
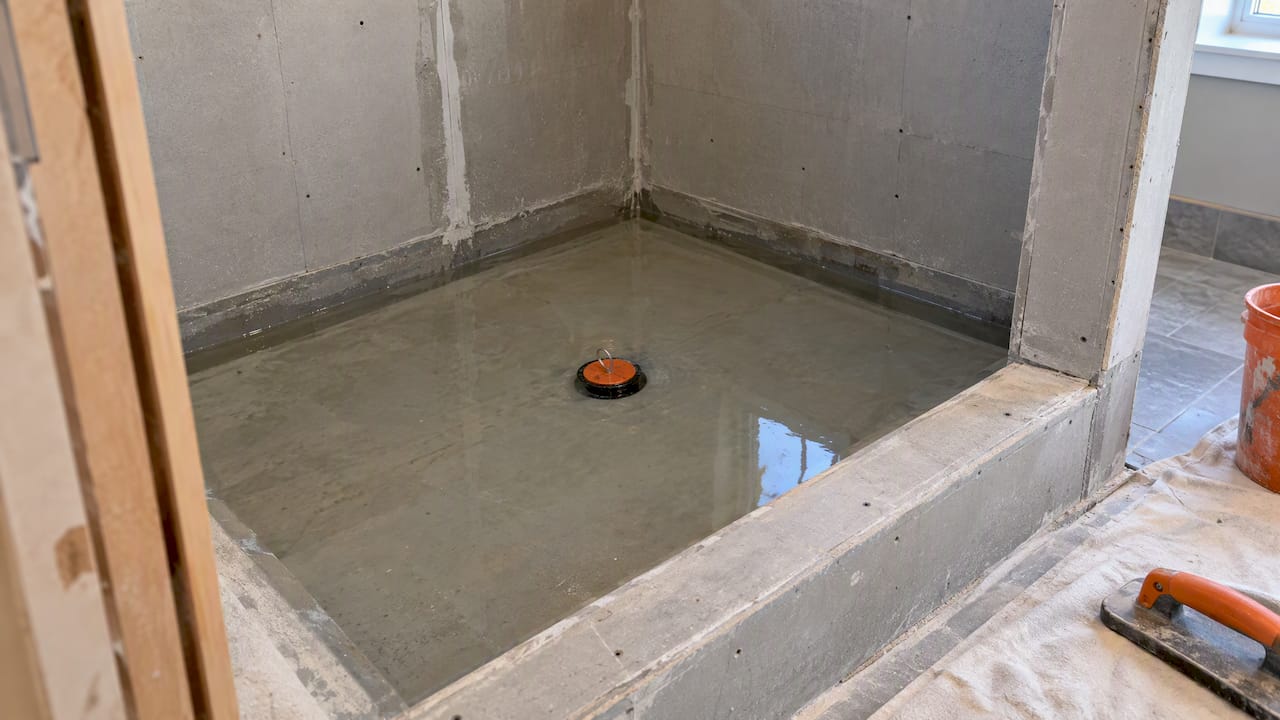
Bonded membranes, either liquid-applied or sheet, are generally the most reliable choice for most DIY tiled showers, assuming your drain and substrate allow a bonding flange or adapter. A traditional pan liner with a mortar bed still works well when built correctly, but it depends on careful pre-slope work. Whichever route you pick, a correct drain match and a full flood test after installation are the checks that decide whether your shower leaks early or lasts for decades.
TL;DR:
- Bonded sheet membranes, liquid-applied membranes, and foam pans are faster and less error-prone options for DIY waterproofing compared to traditional mortar beds, with proper application and product matching being crucial.
- Using the correct drain type—clamping for traditional liners and bonding-flange for bonded membranes—is vital, as mismatched drains cause most leak failures.
- Flood testing the shower base for 24 hours before tiling ensures waterproof integrity and prevents future leaks, especially important for liquid membrane and bonded system installations.
- Skipping steps like pre-slope construction, sealing penetrations properly, or applying insufficient membrane layers significantly increases the risk of leaks or mold.
- Professional help is recommended for complex projects like curbless entries or steam showers, where precise material compatibility and expert installation reduce costly mistakes.
Table of Contents
- Which shower waterproofing method should you choose?
- How do you install each waterproofing system correctly?
- Matching drains and sealing penetrations the right way
- A step-by-step checklist from prep to verification
- Common mistakes that cause shower leaks
- What a professional remodeling crew checks that DIYers often miss
- Our take on the right method for most homeowners
- Get a professional estimate for your shower remodel
- FAQ
- Sources
Which shower waterproofing method should you choose?
Three systems dominate tiled shower construction, and a fourth has become a fast alternative for simple layouts. The traditional pan liner and mortar bed system uses a sheet liner (often PVC or CPE) draped over a sloped sub-base, clamped to a drain, then covered with a mortar bed that gets sloped again before tile goes down. It is durable and time-tested, but labor-heavy and unforgiving of mistakes in the pre-slope.
Bonded sheet membranes, the category Schluter’s waterproofing systems popularized, bond directly to the substrate with thin-set and let you tile right over them, skipping the saturated mortar bed entirely. Liquid-applied membranes like RedGard and HYDRO BAN roll or trowel on in coats and cure into a seamless waterproof skin, offering flexibility for odd geometry and corners.
Prefab foam shower pans speed up installation for standard-sized showers by arriving pre-sloped and ready to bond.
- Pan liner and mortar bed: most labor, longest cure, excellent durability when pre-sloped correctly.
- Sheet membranes: moderate labor, fast turnaround, consistent factory thickness.
- Liquid membranes: fast application, flexible for custom shapes, requires careful coverage control.
- Foam pans: fastest for standard sizes, limited to manufacturer-approved dimensions.
Building codes typically require a continuous waterproof barrier on shower walls up to a specified height, and bonded membrane systems are rated under ANSI A118.10 for load-bearing, bonded waterproofing.
How do you install each waterproofing system correctly?
Each method has its own sequence, and skipping a step is where most failures start.
- Traditional liner and mortar bed: build the pre-slope first, drape the liner over it without puncturing it, clamp it to the drain while keeping weep holes clear of mortar, then pour and slope the top mortar bed before tiling.
- Sheet or bonded membranes: prep the substrate so it is clean, dry, and structurally sound, then bond the sheet with thin-set, overlap seams per the manufacturer’s instructions, and use a bonding-flange drain or an adapter kit where a clamping drain already exists.
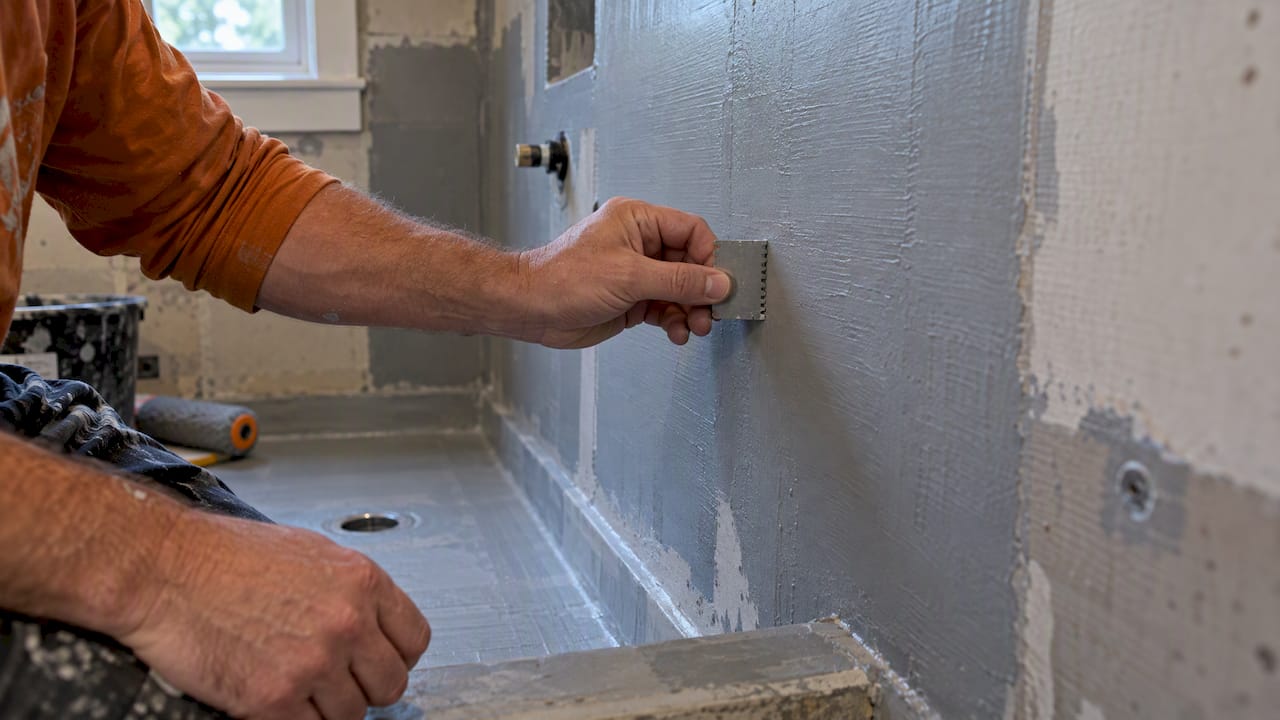
- Liquid membranes (RedGard, HYDRO BAN): prime if the manufacturer calls for it, apply the first coat, let it skin over, then apply a second coat at a right angle to the first. The RedGard technical data sheet specifies coverage near 80 square feet per gallon per coat to meet ANSI A118.10, with two coats required to hit that rating. HYDRO BAN cures to roughly 0.020 to 0.030 inches and does not require fabric reinforcement in the field for standard corners.
- Prefab foam trays: set the tray in a bed of thin-set for full support, bond the drain per the kit instructions, and seal the perimeter with the manufacturer’s recommended tape or sealant before tiling.
Corners and seams deserve extra attention regardless of method. Sheet systems use manufacturer-specific corner pieces and sealing tape, while liquid systems embed a fabric strip into a wet coat at every inside and outside corner to bridge movement without cracking.
Pro Tip: Check wet-film thickness with a mid gauge while the liquid membrane is still wet. It is the only way to confirm you actually met the coverage rate instead of guessing.
Matching drains and sealing penetrations the right way
Drain mismatches cause more failed showers than any single material choice. Traditional liner systems need a two-piece clamping drain with the liner sandwiched between the base and the clamp, leaving weep holes open to the mortar bed above. Bonded membrane systems need a bonding-flange drain, or a clamping drain retrofitted with an adapter kit that creates an integrated flange for the membrane to bond to directly.
- Clamping drains require weep holes to stay open so moisture can drain from the mortar bed into the trap.
- Bonding-flange drains skip weep holes because the membrane bonds directly to the flange, sealing the assembly above the mortar bed.
- Penetrations like pipe stubs and valve bodies get a backer rod and a manufacturer-approved sealant such as LATASIL, never caulk alone.
- Gaps around penetrations should follow the manufacturer’s spacing, then get packed with thin-set only where the instructions call for it.
Inspect weep holes before covering them. A common mistake is letting mortar or thin-set clog them during installation, which traps water in the mortar bed with nowhere to go.
A step-by-step checklist from prep to verification
Work through these stages in order, whether you are doing the labor yourself or supervising a contractor.
- Confirm your drain type (clamping or bonding-flange) and buy any adapter kit before you start demolition.
- Check the substrate for soundness, level, and moisture, repairing any soft spots in the subfloor or backer board.
- Gather the specific products your chosen method requires, then read the manufacturer instructions for coverage rates and cure times before opening a single can.
- Build the pre-slope (liner systems) or prep the substrate (bonded systems), checking that the slope runs evenly toward the drain with no flat spots or reverse pitch.
- Seal corners and penetrations, then apply the membrane in the number of coats or layers the manufacturer specifies.
- Let the membrane cure for the time listed in the technical data sheet before testing.
- Flood test by plugging the drain and filling the shower base with water to roughly 2 inches, then holding it for 24 hours.
- Inspect for drops in water level, check the ceiling or wall below if accessible, and look for pinholes or thin spots in the membrane before you plug and release.
The flood test is the single verification step that separates a shower that fails next winter from one that lasts. A full 24-hour hold under real water pressure reveals leaks that a visual inspection never catches, according to the installation guidance in the RedGard technical data sheet.
Only start tiling once the flood test passes and the membrane has fully cured per its data sheet.
Common mistakes that cause shower leaks
Most shower failures trace back to a short list of repeatable errors, not bad luck or bad materials.
- Skipping or botching the pre-slope, which leaves standing water trapped in the mortar bed.
- Puncturing the liner or membrane with a fastener, tile spacer, or careless tool.
- Mismatching the drain type to the waterproofing system, which prevents a proper seal at the single most vulnerable point in the assembly.
- Applying liquid membrane too thin or in only one coat, leaving gaps in coverage.
- Clogging weep holes with mortar during the pour.
- Tiling before the membrane fully cures or before a flood test confirms it holds water.
Slow drainage, grout staining, or a musty smell near the shower base are early warning signs worth investigating immediately. Pulling an access panel to check for moisture behind the wall, or running a fresh flood test, will tell you quickly whether the issue is cosmetic or structural.
Pro Tip: A damp subfloor felt through vinyl or laminate near the bathroom wall almost always means the membrane failed, not the grout.
Surface staining from hard water is usually DIY-fixable. Active leaks into the subfloor or neighboring rooms call for a professional to open the wall and diagnose the failure point, since retiling over a bad membrane just repeats the problem. Our guide to common bathroom remodeling mistakes covers more of the errors that turn a simple shower refresh into a bigger repair.
What a professional remodeling crew checks that DIYers often miss
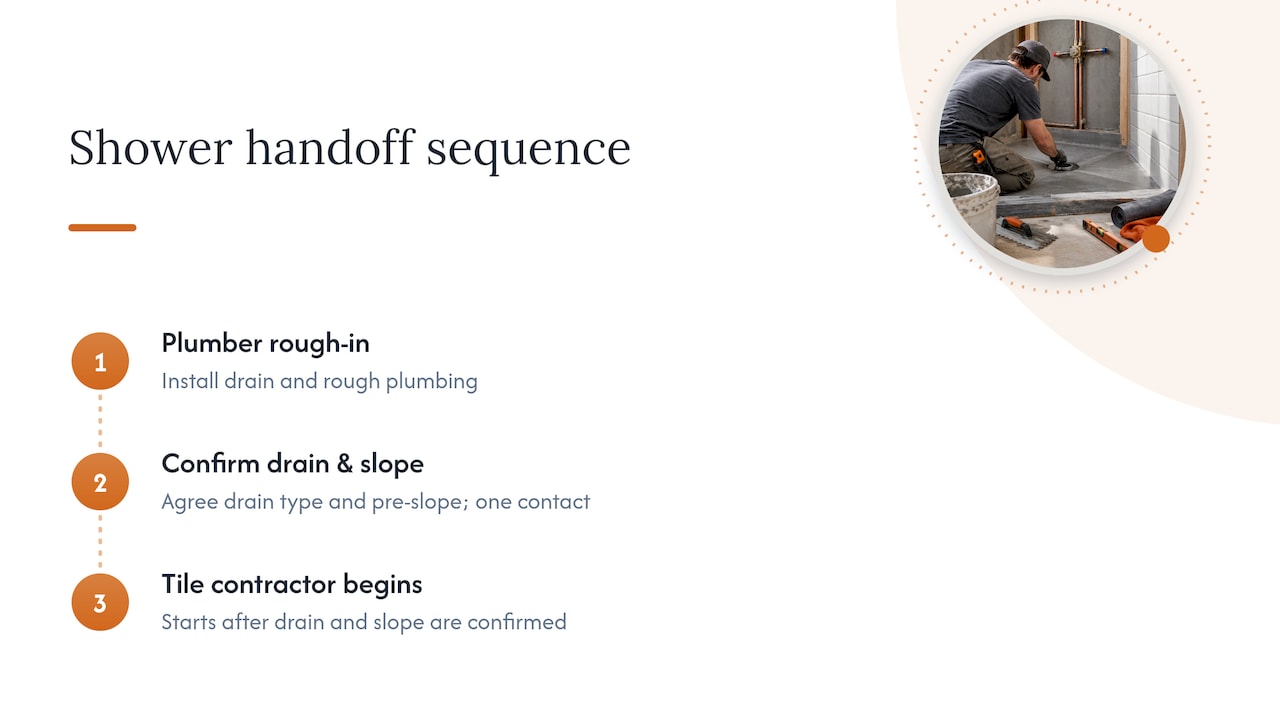
Coordinating a shower waterproofing job means scheduling the plumber for the rough-in drain work before the tile contractor ever shows up, and making sure both trades agree on drain type and pre-slope height ahead of time. A single point of contact keeps that handoff from becoming a communication gap between trades.
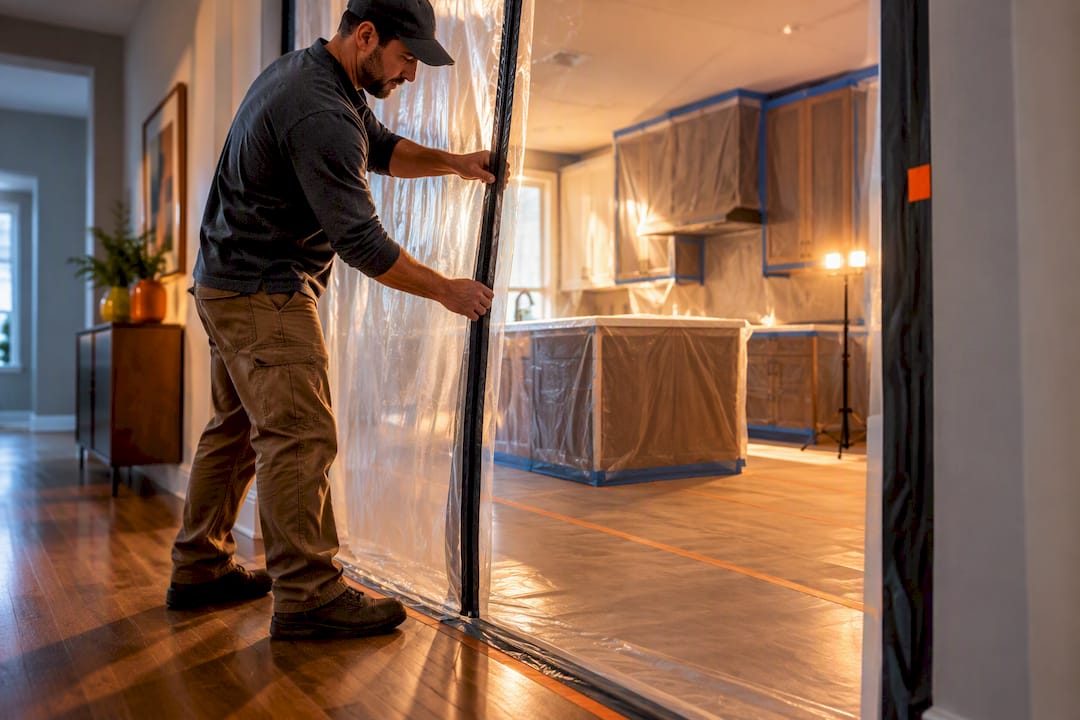
We set up containment barriers and control dust throughout the remodel, which matters most in occupied homes where a bathroom is out of commission for days at a time. Readers planning a shower remodel in a humid coastal climate may find our notes on planning a shower remodel for Tampa’s climate useful before choosing a waterproofing assembly.
Our take on the right method for most homeowners
For a standard tiled shower with a compatible drain, a bonded membrane, liquid or sheet, is the most practical DIY path: faster than a mortar bed, less prone to the pre-slope mistakes that sink traditional liner jobs, and well documented in manufacturer data sheets. The drain match and the flood test are non-negotiable regardless of which product you pick. Curbless transitions, steam showers, or a substrate you can’t confirm are solid reasons to bring in a professional instead of guessing.
— MediaBeast
Get a professional estimate for your shower remodel
If your project involves a curbless entry, a steam shower, or a substrate you can’t verify, that is exactly the point where a DIY waterproofing job gets expensive to redo. Design and construction can be managed under one roof, so the team that specifies your waterproofing assembly also builds it, instead of handing you off between a designer and a separate contractor.
- Up-front pricing with a detailed breakdown before work begins, not a vague estimate.
- A dedicated Lead Carpenter assigned to your project from start to finish.
- Our Work Clean System to minimize dust and disruption while you’re still living in the house.
- Dedicated Tampa shower remodeling services for homeowners who want the waterproofing and tile handled by one crew.
Compare your DIY materials budget against a full professional scope before deciding. Our bathroom remodel cost guide breaks down pricing for shower and bath projects, including a typical 3-fixture bath with shower costing tens of thousands of dollars, so you can weigh the trade-offs with real numbers in front of you.
FAQ
Is HYDRO BAN better than RedGard?
Neither product is universally better. HYDRO BAN cures thinner (around 0.020 to 0.030 inches) and skips in-field fabric reinforcement at standard corners, while RedGard requires two coats at roughly 80 square feet per gallon per coat to meet ANSI A118.10. Choose based on your project’s coverage needs and the manufacturer instructions for your specific tile and substrate.
What are common shower waterproofing mistakes?
The most frequent mistakes are skipping the pre-slope under a liner, mismatching the drain type to the waterproofing system, and clogging weep holes with mortar during installation. Applying liquid membrane too thin, or tiling before a flood test confirms the assembly holds water, also cause early failures.
Can I tile directly over RedGard?
Yes, RedGard is designed to be tiled directly over once it has cured and passed a flood test, with no mortar bed required between the membrane and the tile. Follow the RedGard technical data sheet for cure time and coverage before setting tile.
How do you waterproof a shower that is already tiled?
Waterproofing an already-tiled shower from the surface is far less reliable than waterproofing before tile, since grout and tile are not a waterproof assembly on their own. In most cases, the practical fix is removing the tile down to the substrate and rebuilding with a bonded or liquid membrane system, rather than coating over existing grout lines.
What height does shower wall waterproofing need to reach?
Code guidance commonly references a minimum height around 72 inches for continuous waterproof protection on shower walls, as outlined in resources discussing shower waterproofing height requirements. Check your local building code for the exact requirement in your jurisdiction before finalizing your assembly.
Sources
- RedGard technical data sheet (Custom Building Products)
- Shower waterproofing height guidance (code overview)