
A good remodel payment schedule ties every payment to a piece of finished, visible work, starts with a small deposit, and keeps a final payment back until the punch list is done. Everything else, the percentages, the wording, the paperwork, is detail around that principle. At Bath & Kitchen Gallery we quote bathrooms and kitchens with up-front pricing and detailed item lists, because a payment plan is only as clear as the scope it pays for.
This guide walks through how the schedule works, a worked example, what the Florida rules say, and the wording to look for before you sign.
TL;DR
- Pay for progress, not for dates: each payment should be due when a named piece of work is finished, such as rough plumbing passed or cabinets installed.
- Keep the deposit small. Florida law attaches permit and start-date deadlines to any initial payment above 10% of the contract price, and national remodeler groups advise no more than one-third at the very most.
- Hold back 5% to 10% for the final payment, released after the punch list is signed off.
- Changes to the job belong in a written, signed change order with the price agreed first.
- Pay by check or card, never cash or a personal payment app.
Table of Contents
- Why the schedule matters as much as the price
- The two kinds of schedule
- A typical kitchen or bathroom schedule
- Deposits: how much is too much
- What a payment schedule should say on paper
- Contract type changes who carries risk
- The final payment and the punch list
- Warning signs before you pay
- Why this goes better with one team
- What a remodel costs in Tampa, so you can size the schedule
- FAQ
- Sources
Why the schedule matters as much as the price
A remodel is the one purchase where you pay for something that does not exist yet. The schedule is what keeps the money and the work moving at the same speed. If you have paid far more than the work completed, you have lost your leverage when a problem appears. If the contractor is paid far less than the work completed, they are financing your kitchen, and that rarely ends well either.
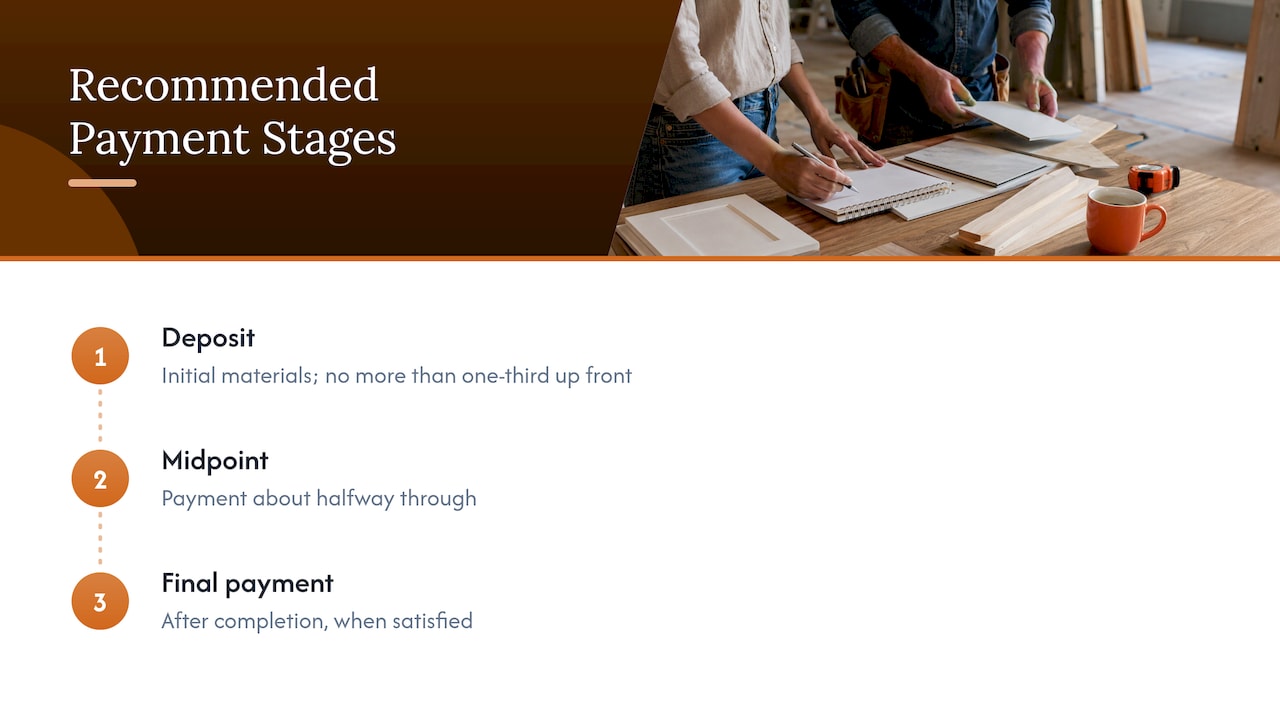
The Connecticut Department of Consumer Protection recommends splitting payment into three parts: a deposit that covers initial materials, a payment about halfway through, and a final payment after completion. It also says a contractor who demands full payment up front is a red flag, and that you should not make the final payment until you are satisfied with the finished work.
The National Association of the Remodeling Industry (NARI) and the National Association of Home Builders (NAHB) say the same in their guidance for working with remodelers: no more than one-third up front, only to start work or order materials, then future payments tied to milestones, with escrow worth considering for large sums.
The two kinds of schedule
Most residential contracts use one of two structures.
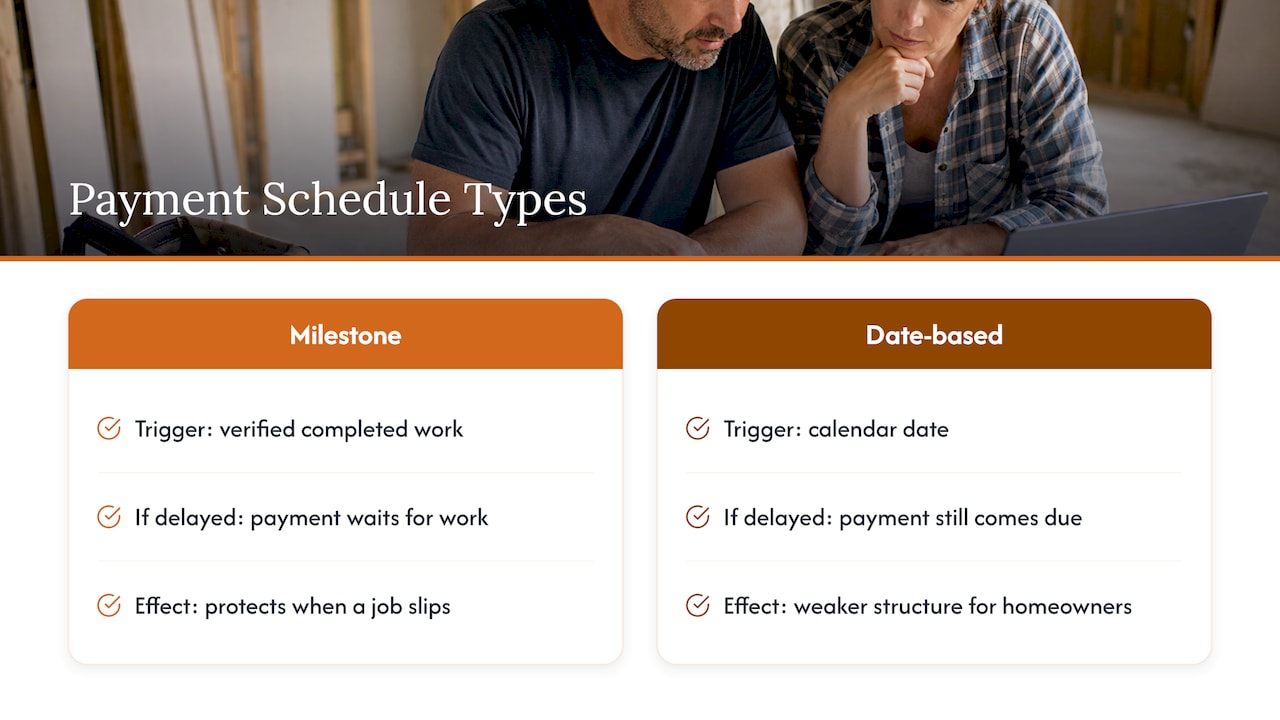
Milestone schedules link each payment to completed work. They protect you when a job slips, because nothing is due until the work is done.
Date-based schedules link payments to the calendar: the first of the month, every two weeks. If the project falls three weeks behind, the next payment still comes due for work that has not happened. For a homeowner, this is the weaker structure, and it is the one to question.
The test for any milestone is whether you could walk through the house and verify it. “Second payment” tells you nothing. “Due when the cabinets are installed” tells you exactly what to look at.
A typical kitchen or bathroom schedule
Percentages vary by contractor, scope and state, but a common shape for a mid-size bathroom or kitchen looks like this.
| Payment | Trigger | Typical share |
|---|---|---|
| Deposit | Contract signed | Small, within your state’s limit |
| Draw 1 | Demolition done, rough plumbing and electrical passed inspection | 25% to 35% |
| Draw 2 | Cabinets (or tile and shower pan) installed | 25% to 30% |
| Draw 3 | Countertops, fixtures and backsplash complete | 15% to 20% |
| Final payment | Punch list complete and signed off | 5% to 10% |
These shares are a pattern to compare against, not a rule. What matters is that the total adds up to the contract price, that each trigger is something you can see, and that the largest payments land right after the contractor’s biggest outlays, such as materials delivered or a major phase finished.
A worked example
Say you sign a $25,000 bathroom contract. Our published range for a small three-fixture bath with a shower is $22,100 to $30,000, so this is a realistic size, though it is an illustration and not a quote.
- Deposit at signing: $2,500 (10%)
- Demo done, rough plumbing and electrical passed: $7,500 (30%)
- Tile and shower installed: $7,500 (30%)
- Vanity, fixtures and glass installed: $5,000 (20%)
- Punch list signed off: $2,500 (10%)
Every line has a dollar amount and a trigger you can check. If the tile crew is delayed two weeks, you owe nothing extra during those two weeks.
Deposits: how much is too much
The deposit pays to reserve the job, order materials and pull permits. It is the payment with the least work behind it, so it is the one to keep modest.
Rules differ by state, and here is how the two states most often cited compare:
- Florida. Under Florida Statute 489.126, a contractor who takes more than 10% of the contract price as an initial payment for residential work must apply for the needed permits within 30 days and start the work within 90 days after the permits are issued, unless you agree in writing to a longer period. If the contractor does not, the statute sets out a written-demand process for getting the permits applied for, the work started or the money refunded.
- California. The state licensing board says a home improvement down payment may not exceed $1,000 or 10% of the contract price, whichever is less, and that progress payments may not exceed the value of the work performed and materials delivered.
If you live in Florida, the 10% line is a useful anchor. A deposit at or under it keeps the statute’s permit and start deadlines from being the only thing standing between you and your money. Larger deposits can be legitimate, for example when custom cabinetry must be ordered, but they should be explained in writing and matched to a specific purchase.
Cash is the one method to rule out. The Connecticut agency advises paying by check or credit card, and NAHB and NARI add that personal payment apps should not be used. A traceable payment is a record if there is ever a dispute.
What a payment schedule should say on paper
The schedule belongs inside the signed contract, not in an email thread. Before you sign, check for these items:
- A fixed contract price in dollars and cents. California’s licensing board requires each progress payment in a home improvement contract to be stated in dollars and cents and tied to specific work, services, materials and equipment for that phase. It is a good model even where the law does not demand it.
- A named trigger for every payment. Look for events such as “rough plumbing and electrical inspection passed” or “cabinets installed and leveled”, not “start of week four”.
- A change order clause. Any change to scope should be a written, signed change order stating the price before the work happens. California applies fixed-price rules to change orders as well, which shows how seriously the better-regulated states take this. Verbal “while you’re at it” additions are where budgets quietly break.
- The final payment amount and its condition. It should be a meaningful share, not a token sum, and it should be released against a written punch list.
- Who pulls permits and who pays for them. Permits and inspections often are the milestones.
Contract type changes who carries risk
The schedule also depends on how the price is built. In a fixed-price contract, the payments divide a known total. In a cost-plus arrangement, payments follow actual costs and the final figure moves. Knowing which you have tells you what a late-stage surprise means for your wallet. We break down four remodeling contract types and who pays for overruns separately, and it is worth reading before you compare bids.
The final payment and the punch list
The punch list is the walk-through list of small items left after the main work: a touch-up of paint, a cabinet door that needs adjusting, a caulk line, a missing outlet cover. Holding back the last 5% to 10% until it is complete gives everyone a reason to finish properly. We explain how this holdback works in our punch list guide for homeowners.
For a smooth sign-off:
- Walk the space in daylight with the contractor, with a printed list and a pen.
- Photograph each item and note the room and the fix needed.
- Check that the space is actually finished and clean. A thorough after-builders cleaning checklist is a good picture of what a site should look like once dust, silica and debris are handled.
- Pay the final amount only when every item is closed out in writing.
One more point for the end of the job: subcontractors and suppliers who go unpaid can, in many states, put a lien on your home even if you paid your contractor in full. Lien waivers from the subcontractors and suppliers, collected before the final payment, protect you from that. Ask your contractor how waivers are handled, and confirm the rules with a real estate or construction attorney in your state if the project is large.
Warning signs before you pay
- A request for most or all of the money before work starts.
- A deposit well above the state limit or above the pattern described earlier, with no purchase to explain it.
- Payment dates that do not match any stage of work.
- Pressure to pay in cash, or by a personal app.
- A price far below every other bid. NAHB and NARI note that a very low bid can signal shortcuts or cash-flow problems, not a bargain.
- No written change order process.
These are the points a careful consumer-protection office would raise, and each can be checked in minutes from the contract itself.
Why this goes better with one team
Payment disputes tend to start where scope is vague. When design and construction sit under one roof, the item list you approve at design is the same list the payments are built on, with no gap between what the designer drew and what the builder priced. That is how we work: Bath & Kitchen Gallery handles both design and construction, gives up-front pricing with detailed item lists, and assigns a dedicated Lead Carpenter to each project, so you have one person who knows the job and can tell you where it stands before each payment comes due.
It also helps the daily experience. Our Work Clean System is built to minimize dust and disruption, which matters on the days a milestone is being inspected and you are living in the house.
Our view: a schedule should read like a progress report
We think of a payment schedule as the homeowner’s progress report. If you can read each line and know what the crew will have finished by then, the schedule is doing its job.
That is why we put so much weight on up-front pricing and a detailed item list. When every cabinet, fixture and tile line is spelled out before the work begins, there is nothing to renegotiate in the middle, and a milestone is simply the moment a group of those lines is complete.
The Lead Carpenter assigned to each of our projects is part of the same idea. The person who is building your kitchen or bath is the person who can say honestly whether a stage is done, which makes milestones meaningful and keeps surprises small. Combined with design and construction under one roof, the result is fewer delays, clear communication and payments you understand.
MediaBeast
What a remodel costs in Tampa, so you can size the schedule
A payment plan starts with a total. Our published ranges for complete projects run from $22,000 to $69,000 for bathrooms, depending on fixtures and finishes, and from $41,200 to $93,600 for kitchens, depending on layout and size. A steam shower bath, for instance, is listed at $54,625 to $69,000, while a small U-shaped kitchen with an island is listed at $41,200 to $52,050. Final cost depends on project scope and the materials you choose.
If you are planning a kitchen, start with our kitchen remodeling page. For a bathroom, see bathroom remodeling in Tampa. Our local showroom is where you choose materials, so that every selection is on the item list before the first payment is made.
FAQ
Is it normal to pay a contractor 50% up front?
No. National remodeler groups advise paying no more than one-third up front, and only to start work or order materials. In Florida, an initial payment above 10% of the contract price triggers statutory deadlines for applying for permits and starting work. A smaller deposit followed by milestone payments is the safer pattern.
What is a typical payment schedule for a contractor?
A common structure is a modest deposit, then three or four progress payments tied to stages such as rough-in inspections passed, cabinets or tile installed, and countertops and fixtures complete, followed by a 5% to 10% final payment after the punch list. State agencies such as Connecticut’s recommend as few as three payments, so the number of draws can vary.
How should change orders affect what I pay?
Every change should be written, signed and priced before the work is done. The change order either adds to the next payment or creates its own, so the contract total and the schedule always match. Avoid agreeing to additions by text or by word of mouth.
Should I hold back money until the end?
Yes. A final payment of roughly 5% to 10%, released after you have walked the finished space with a written punch list, is a standard way to keep every small item on the contractor’s radar. Release it when every item is closed out in writing.
Sources
- Connecticut DCP: How should I pay my contractor
- NAHB and NARI guidance for working with remodelers
- Florida Statute 489.126, moneys received by contractors
- CSLB industry bulletin on progress payment restrictions
- CSLB Contracting for Success guide
- Smith Currie: strict rules for home remodel contracts in California
- After builders cleaning checklist