
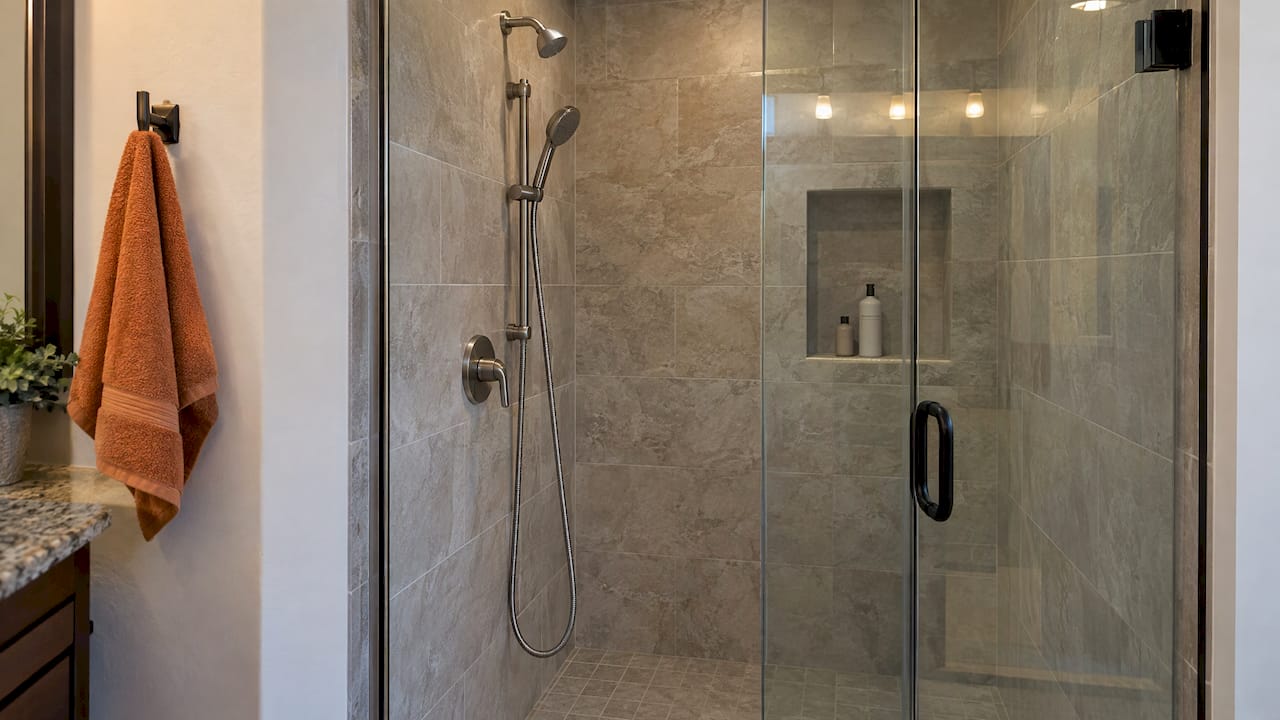
Mount the slide bar so the lower bracket sits near 48 inches from the finished floor, let the holder travel high enough to reach the tallest user’s shoulders, and put the bar on the wall where the hose can swing to every corner of the shower without pulling tight. Then confirm that solid wood blocking is behind both brackets before any tile goes up. Most placement problems come from deciding this after the walls are closed. The easiest time to get it right is during design, when the plumbing, framing and tile layout are planned together.
TL;DR
- Standard supply height for a slide bar is 48 inches from the finished floor. Accessible layouts use a lower range of 38 to 41 inches, per Kohler’s slide bar installation manual.
- Seated or wheelchair use points to a holder at about 60 inches from the shower base, according to the Ability Toolbox guidebook.
- Plan the bar so the hose still has slack at its highest and lowest holder positions, and so the bar does not collide with grab bars.
- The bar needs stud or blocking support at the top and bottom. Plastic anchors will not carry it.
- Decide all of this before the walls are closed, not after the tile is set.
Table of Contents
- Why placement matters more than the product
- The numbers to start from
- Slide bar height: where to put it
- Seated and accessible use
- Where on the wall: location and hose path
- Support behind the wall: the part you cannot fix later
- A step-by-step placement plan
- Common mistakes
- What a shower remodel with a handheld costs
- Planning a shower with the right placement
- FAQ
- Sources
Why placement matters more than the product
A handheld shower is only as good as its location. A beautiful kit mounted too low leaves tall users stooping. Mounted too high, it leaves a child or a seated bather reaching overhead. A bar set in the wrong spot sends spray onto the bathroom floor or strains the hose.
There are three decisions, and they interact:
- Where the water supply elbow goes. This is where the hose connects to the plumbing, and it sets the lowest the hose can hang.
- Where the slide bar goes. Its height and position on the wall decide who can use the holder comfortably.
- Where the docked spray points. The angle of the holder decides whether the water lands on the user or on the wall.
Get all three right on paper and installation is straightforward. Get one wrong and you live with it, because the supply elbow is behind finished tile.
The numbers to start from
No single height fits every household, but published specifications give a solid starting range.
| Measurement | Typical figure | Source |
|---|---|---|
| Supply elbow height, standard | 48 inches from finished floor | Kohler installation manual |
| Supply elbow height, accessible | 38 to 41 inches | Kohler installation manual |
| Distance between bottom and top bracket holes | 27 inches | Kohler installation manual |
| Holder height for seated or wheelchair users | 60 inches from the shower base | Ability Toolbox guidebook |
| Controls in a roll-in shower | 48 inches maximum, 16 to 27 inches from the end wall | NKBA Bathroom Planning Guidelines |
| Minimum hose length for accessible showers | 59 inches | UpCodes summary of ADA 608.6 |
A few notes on how to read these. The ADA figures come from federal accessibility standards written mainly for public and commercial buildings. They are still the most widely used yardstick for a home bathroom that must work for a wheelchair, a shower chair or a future family member who needs one. The kit-specific numbers, such as the 27-inch bracket spacing, depend on the model you buy, so read the installation sheet of the kit that will actually go on your wall.
Slide bar height: where to put it
A slide bar is the vertical rail that holds the handheld spray and lets it move up and down. Its position is a balance between two users: the tallest person who wants the spray at head height and the shortest or seated person who needs to reach the holder.
Start with the tallest and shortest user
A practical rule from installers and echoed in kit guides: the holder should travel high enough to match a fixed showerhead’s height, and low enough that the shortest regular user can grab it without stretching. If a child, a shorter adult or someone seated uses the shower, the lowest holder position matters as much as the highest.
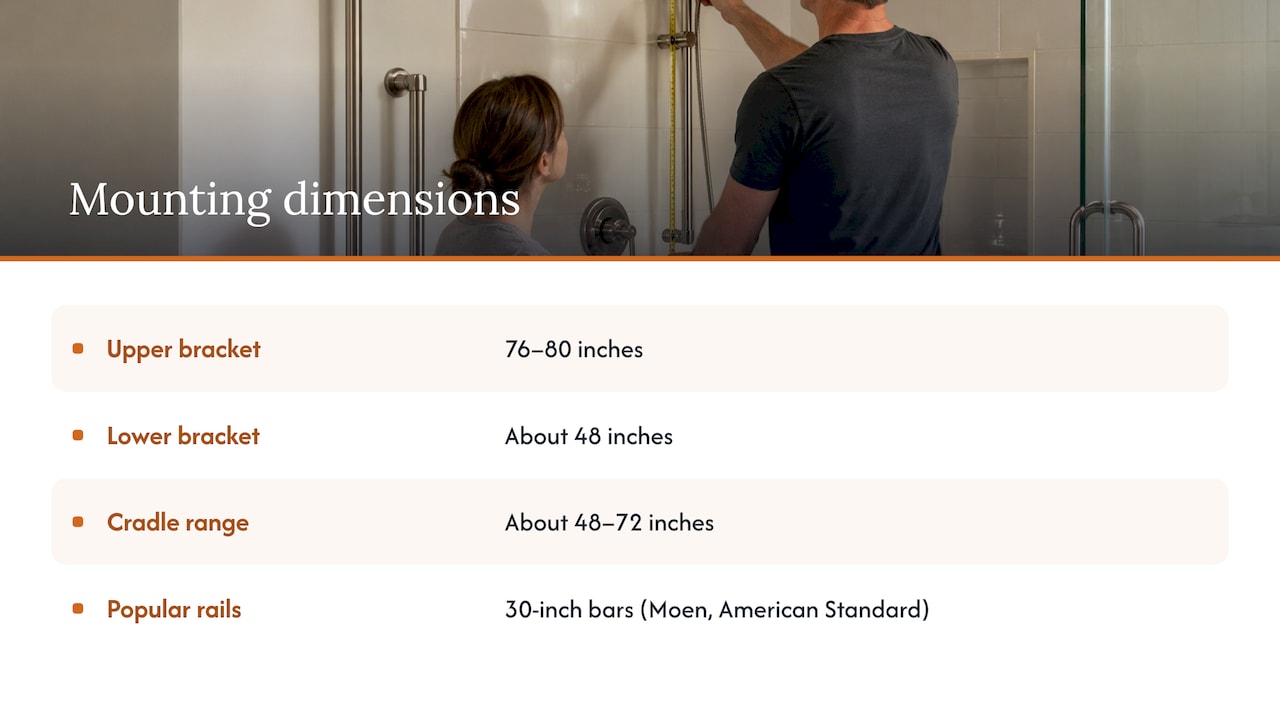
Some installation guides recommend setting the upper bracket at roughly 76 to 80 inches and the lower bracket at about 48 inches, with the cradle adjustable between about 48 and 72 inches, as in Kes Faucets’ 2026 mounting guide. That is one manufacturer’s guidance. Treat it as a typical range for a tall rail, and check it against the rail length of your own kit. Many popular rails are shorter: Moen’s 3869 series uses a 30-inch slide bar, and American Standard’s Spectra+ kit also lists a 30-inch all-metal bar. A 30-inch rail cannot span the whole range above, so you choose where on the wall its travel falls.
Worked example
Say two adults, one 6 feet 2 inches and one 5 feet 3 inches, share a shower, and a teenager is in the mix.
- Set the lower bracket near 48 inches, in line with the standard supply height from the Kohler manual.
- With a 27-inch gap between bracket holes (the Kohler spacing), the upper bracket lands at about 75 inches.
- The holder then slides across a range that reaches above the 5 foot 3 inch adult’s head and keeps the spray accessible to the taller adult.
- Everyone can reach the holder in its lowest position without lifting their arm above the shoulder.
If a family member sits to shower, shift the whole plan toward the accessible range instead, and plan for the lower supply height and a holder reachable from the seat.
Seated and accessible use
For a wheelchair or shower chair, the Ability Toolbox guidebook points to a holder at 60 inches from the base of the shower as the ADA-referenced height. It also notes that a holder reduces the risk of falls or trips over the hose, because the user is not bending down to pick it up.
The layout around the bar matters too:
- In a roll-in shower, the controls, not the showerhead, must sit above the grab bar and no higher than 48 inches, and 16 to 27 inches from the end wall, according to the NKBA planning guidelines.
- The vertical slide bar must not obstruct grab bars. The same NKBA guidance and the UpCodes summary of ADA 608.6 both say so.
- The accessibility standard also calls for a hose at least 59 inches long, an on/off control, and water at 120°F maximum.
The ADA standard allows a fixed head at 48 inches maximum in some facilities, but not in residential dwelling units, so a home that is meant to work for a seated bather should plan for the true handheld.
If you are planning a bathroom for aging in place, our guides on making a small bathroom handicap accessible and installing grab bars cover how these pieces fit together on the same wall.
Where on the wall: location and hose path
Height is half the question. The other half is which wall, and how far from the valve.
Put the bar where the hose can reach everything
The hose has to reach the farthest corner of the shower, including the floor and, in a larger shower, any bench or niche. Two checks prevent trouble:
- Slack at both ends of the bar. Delta’s installation instructions say to locate the wall bar so the hose has slack when the hand shower is at its extreme up or down position. A hose pulled tight at the top of the rail will leak at the fitting or kink over time.
- Spare length to the corner. Kes’s guide suggests checking that the hose reaches the farthest corner with at least 6 inches of slack from the lowest cradle position (Kes Faucets).
Hose length is a design input, not an afterthought. Kits commonly come with a 60-inch hose, as the American Standard specification lists, or a 69-inch metal hose, as in the Moen series. In a standard 60-inch alcove tub-shower, either length reaches. In a large walk-in with a bench, measure from the rail to the farthest point and add slack.
Keep the spray off the floor and the glass door
The docked spray should point at the wall or into the shower, never across the door opening. Holders that rotate allow you to aim the handshower. American Standard’s holder can be set at any height along the bar and angled up to 45°. Moen’s holder also rotates to adjust the angle. Decide the aim with a glass door or curtain in mind, because the wrong angle sends water past the threshold every morning.
Choose the wall by use
- Same wall as the valve. The simplest plumbing, but the user is reaching toward the controls and the spray at once.
- Side wall opposite the entry. Common in walk-in showers. It keeps the holder out of the splash zone when you turn the water on, though it needs a longer run of hose.
- Next to the bench or seat. Place the bar within easy reach of the seated bather, with the grab bar in its own position and the two clearly separated.
Pairing with a fixed head
Many homeowners keep a fixed rain head overhead and add the handheld on a bar below or beside it. A common installer view is that the handheld should reach as high as the primary head so that a tall user can use either one. In practice that means the top bracket sits close to the shower arm height, and you confirm that the diverter and the bar do not crowd each other.
Support behind the wall: the part you cannot fix later
A slide bar carries your hand’s weight whenever someone pulls on it, and some people will use it as a handhold even if they should not. The mounting hardware has to be ready for that.
- Kohler’s manual calls for wood screws rated for 300 lbs per screw. See the Slidebar installation manual.
- Another Kohler document states the slide bar must be mounted to stud framing at both top and bottom, that plastic wall anchors will not support it, and that it should not be installed 24 to 48 inches from the floor, which is the critical support area defined by ASTM F446 (Kohler instruction sheet).
- The same Kohler manual recommends water pressure of 29 to 58 psi for the kit.
The practical consequence is that bracket locations must land on a stud or on blocking, which is a horizontal board fastened between studs. Studs are generally spaced 16 inches apart, and your bracket locations will not always line up with them. When the bar is planned before the wall is opened, blocking is added where the brackets will go. After tile is up, the choices are cutting into finished surfaces or compromising on position.
This is why placement is a remodeling decision and not just a shopping one. If you are already opening the shower wall, add blocking for the bar, for grab bars and for any future accessory. It costs very little at that stage.
A step-by-step placement plan
- List the users. Note the height of the tallest and shortest person, and whether anyone sits, now or in the next 10 to 15 years.
- Pick the kit first. Rail length, hose length and holder angle range all depend on the model. Collect the installation sheet before you fix any measurement.
- Choose the wall. Pick the wall that keeps the holder reachable from where people stand, and does not collide with the valve, niche, bench or glass.
- Set the lower bracket. Start at 48 inches from the finished floor for standard use, or 38 to 41 inches for accessible supply height, and adjust for your tile pattern.
- Mark the upper bracket. Use the kit’s bracket spacing, for example 27 inches on the Kohler slide bar, and confirm the holder’s highest position works for the tallest user.
- Check the hose. Hold the hose from the highest and lowest holder positions and confirm slack to the farthest corner.
- Add blocking. Place it behind both brackets, outside the 24 to 48 inch critical support zone described in the Kohler sheet when mounting hardware instructions require it.
- Align with the tile. Mark bracket holes on grout lines or tile centers so drilling is clean and the bar sits square.
- Test before closing. Run the water at the plumbing rough-in stage to check pressure and the handheld’s reach.
Step 7 is the one most often missed. The Kohler instruction sheet states that a slide bar should not be installed in the 24 to 48 inch band from the floor, so check your specific kit’s sheet when locating the lower bracket.
Common mistakes
- Mounting by eye on finished tile. Bracket holes end up crooked or off-stud, and a drill bit can crack the tile.
- Ignoring the shortest user. Placement that suits an adult can leave a child unable to reach the holder.
- Hose too short. Tight hoses wear at the connection and limit the spray’s reach.
- Blocking the grab bar. The vertical bar and grab bars must coexist. Plan their positions together.
- Placing the bar in the spray path. Every time someone turns on the water, they get a blast at the holder.
- Forgetting future needs. Adding blocking during remodeling is inexpensive. Rebuilding a wall later is not.
Our view: plan the shower wall as one system
We design and build bathrooms under one roof, and we approach a handheld shower as part of the wall, not an accessory. The valve, the slide bar, the grab bars, the niche and the tile layout all sit on the same few square feet, and each one affects the others.
That is why we want the placement decisions made at the design stage. Each project has a dedicated Lead Carpenter, so the person who oversees the framing is the same person who knows where the bar, the blocking and the tile lines are meant to land. Our approach pairs design and construction, so a bracket height is not a surprise on the day the tile goes up.
Our up-front pricing includes detailed item lists, so you see the scope of the shower in writing before work starts. And our Work Clean System is built to minimize dust and disruption while the walls are open, which is when these details are decided.
MediaBeast
What a shower remodel with a handheld costs
A handheld is rarely the cost driver in a bathroom remodel. The size of the room, the shower type and the finishes are. For reference, our published ranges for completed bathroom projects in the Tampa area are:
- Small 3-fixture bath with shower: $22,100 to $30,000
- Large 3-fixture bath with shower: $26,700 to $34,000
- 4-fixture bath with shower: $35,000 to $46,000
- 4-fixture bath with steam shower: $54,625 to $69,000
These are listed on our bathroom remodel cost page, where each range is tied to a specific layout. Final cost depends on scope and materials.
Planning a shower with the right placement
If you are remodeling a bathroom in the Tampa area, the cleanest way to get the handheld exactly where your household needs it is to settle the heights, the wall and the blocking during design. Our bathroom remodeling service covers design and construction together, with a local showroom for choosing materials. If the shower is the main project, see our shower remodeling services.
Bring the names and heights of everyone who will use the shower, and any mobility needs now or ahead. That is enough to start laying out the bar, the valve and the grab bars on the same plan.
FAQ
How high should a handheld shower slide bar be?
For standard use, the water supply elbow sits at 48 inches from the finished floor, and the bar runs upward from there. Accessible layouts use a lower supply height of 38 to 41 inches, per Kohler’s installation manual. Match the upper end of the bar’s travel to the tallest user’s head height.
Where should the handheld holder go for a seated bather?
The Ability Toolbox guidebook cites 60 inches from the base of the shower as the ADA-referenced holder height for wheelchair and shower-chair users. Place it on the wall next to the seat, within easy reach, and keep it clear of the grab bars. If this is part of an accessibility project, our page on ways to make your bathroom more accessible shows how the pieces fit together.
How long should the hose be?
The ADA standard calls for at least 59 inches (UpCodes summary). Common kits come with 60 or 69 inches. Whatever the length, the hose should still have slack when the holder is at the very top or bottom of the bar, as Delta’s instructions say.
Can I put the slide bar anywhere on the wall?
Only where it can be fastened to studs or blocking at both brackets. Kohler’s instruction sheet says plastic wall anchors will not support a slide bar. Plan bracket positions before the wall is closed so solid wood sits behind each one.
Should the handheld sit above or below the fixed showerhead?
Most layouts put the handheld on a bar that travels up to about the fixed head’s height so that tall users can use either. The bar must not obstruct the diverter or any grab bar, so lay out the valve, head and bar together.
Sources
- Shower Spray Unit and Water, UpCodes (ADA 608.6)
- Bathroom Planning Guidelines, NKBA
- Slidebar installation manual, Kohler
- Slide bar instruction sheet, Kohler
- Handheld Shower Head Mounting Height, Kes Faucets
- Hand Held Shower Wand, Ability Toolbox Guidebook
- Installation instructions, Delta Faucet
- Moen 3869 series specifications
- American Standard Spectra+ specification sheet