
The upgrades that deliver the most usable storage for the least effort are pull-out shelves and rollouts, deep drawers for pots and pans, and drawer organizers for utensils, spices, and lids. Under-sink rollouts and trash pull-outs round out the top five. Most of these are DIY-friendly on a weekend, but anything touching plumbing, electrical, or a cabinet’s face frame is worth handing to a remodeler. Below, each idea gets a benefit, an install note, and a rough cost and time range.
TL;DR:
- Installing pull-out shelves or rollouts can transform a cabinet into a quick-access space, especially when rated for at least 25% more weight than expected.
- DIY-friendly upgrades such as hardware organizers and back-of-door racks cost under $150 and typically take a weekend, while structural modifications warrant professional help.
- Larger projects like custom toe-kick drawers or pantry pull-outs require a contractor due to precise measurements, plumbing interference, or finishing concerns.
- Proper lighting inside cabinets, like motion-sensor puck lights or wired LED strips, significantly improves visibility for frequently used storage areas.
- Regular maintenance of slides, trays, and hardware is essential to preserve smooth operation and prevent water damage or loose mounting screws.
Table of Contents
- 1. Practical Cabinet Storage Upgrades You Can Start This Weekend
- 2. How to Prioritize Upgrades and Decide DIY vs. Hiring a Pro
- 3. When a Remodeler Beats a DIY Weekend
- 4. Lighting Options Inside Cabinets for Better Visibility
- 5. Keeping Upgraded Cabinet Storage Working Over Time
- 6. Will These Upgrades Fit Your Cabinets?
- 7. What Tools You Need for a DIY Install
- 8. What to Budget in Time and Money
- 9. Getting More Out of the Vertical Space You Already Have
- What Homeowners Get Wrong About Cabinet Storage
- How Bath & Kitchen Gallery Turns These Ideas Into a Finished Kitchen
- Sources
- FAQ
1. Practical Cabinet Storage Upgrades You Can Start This Weekend
These upgrades come from the projects homeowners request most, and several mirror the exact builds Family Handyman walks through step by step. Start with the ones that touch the cabinets you open every day.
- Pull-out shelves and rollouts. Sliding a fixed shelf out on drawer slides turns a crouch-and-reach cabinet into a glance-and-grab one. DIY with a kit or pro install for a tight fit. Hardware-only, a weekend project.
- Pantry pull-outs. Tall, narrow pull-out units fit beside a fridge or in an awkward gap and hold cans, boxes, and bottles on both sides. Usually a pro job because it needs custom-width framing. Pro install, one to two days.
- Full-extension deep drawers for pots and pans. Replacing lower cabinet doors with deep drawers means no more stacking pots inside pots. This is a bigger retrofit best left to a carpenter unless you are comfortable with cabinet carcasses. DIY build for experienced woodworkers, pro install otherwise, one to three days.
- Tray and divider organizers for baking sheets. Vertical slots keep sheet pans, cutting boards, and muffin tins from sliding into a jumbled stack. Hardware-only DIY, a couple of hours.
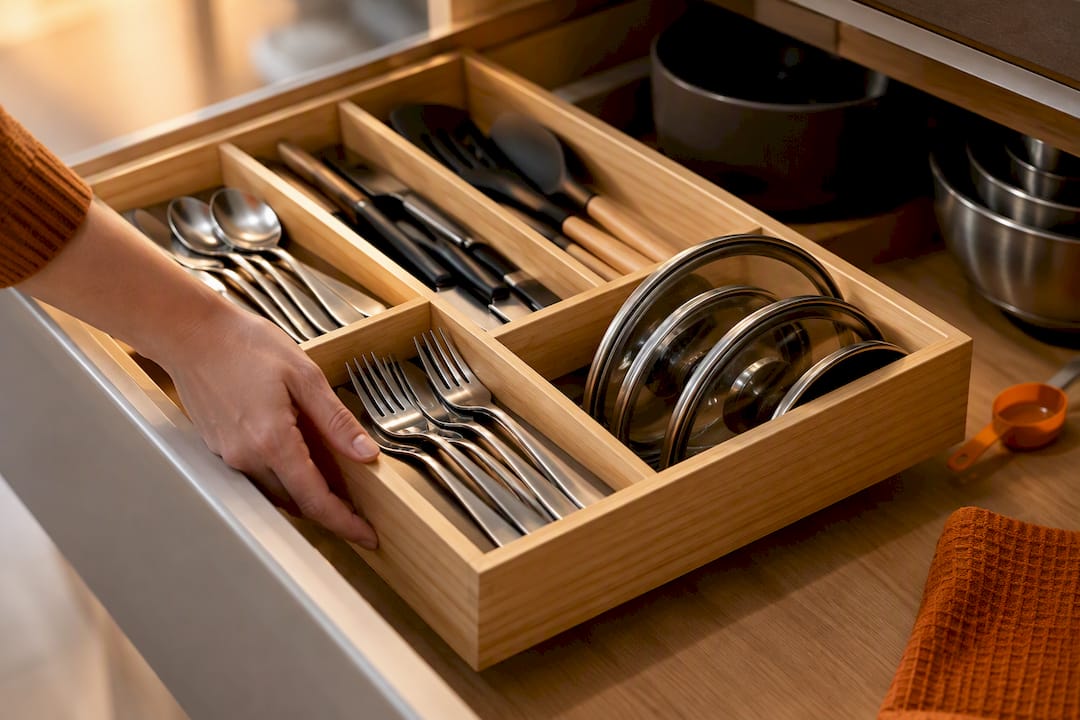
- Spice drawers. A shallow drawer insert with angled or flat spice slots near the stove saves real search time. DIY with a drawer insert kit. Hardware-only, under an hour per drawer.
- Lid organizers. A simple rack or divider set keeps pot lids upright instead of loose in a pile. DIY, hardware-only, minutes to install.
- Drawer dividers for utensils. Adjustable dividers stop the junk-drawer effect in the utensil drawer specifically. DIY, hardware-only, quick weekend fix.
- Back-of-door racks. Wire or plastic racks mounted to a cabinet door add storage for foil, wraps, cutting boards, or cleaning supplies without touching the cabinet body. DIY, hardware-only, 15 minutes per door.
- Under-sink custom rollouts. A rollout tray built to clear the plumbing trap makes cleaning supplies accessible without kneeling. This is where measurement matters most: build a low-profile tray for the front and a taller one behind the pipe run, and offset the mounting cleats so slides clear the trap. DIY for confident builders, pro install if plumbing is tight. DIY build, half a day.
- Toe-kick drawers. The empty space under lower cabinets can become a shallow drawer for baking sheets or platters. Usually needs a carpenter to cut and finish the kick panel. Pro install, one day.
- Adjustable shelves. Swapping fixed shelves for adjustable pegs and shelf pins lets you resize cabinet zones as your cookware changes. DIY, hardware-only, an afternoon.
- Hidden cutting board and knife storage. A slim vertical slot near the counter edge stores boards and knives out of sight and out of reach of kids. DIY with a kit, pro install for a custom slot. Hardware-only to DIY build.
- Tiered organizers for cans and pods. Stepped risers make it easy to see everything in a single glance instead of digging to the back row. DIY, hardware-only, minutes.
- Trash and recycling pull-outs. A dedicated pull-out for bins keeps odors and mess contained and frees up floor space. DIY with a standard-width kit, pro install for a custom bin size. DIY build to pro install, half a day.
Two build tips from Family Handyman’s cabinet add-on plans are worth following on any of the above: mark the cabinet opening at its narrowest point, often near the hinges, before you build a drawer front, and make sure both drawer slide members stay parallel during installation or the drawer will bind.
- Measure twice at the hinge side, since that is usually the tightest point in the opening.
- Dry-fit slides before final screws go in to catch alignment problems early.
Pro Tip: For heavy pullouts like pot drawers or trash bins, choose slides rated at least 25% above the load you expect them to carry, since underrated slides tend to fail early under daily use.
2. How to Prioritize Upgrades and Decide DIY vs. Hiring a Pro
Think in terms of impact versus disruption. High impact, low disruption jobs, like adding drawer organizers or back-of-door racks, go first because they are cheap and fast. High impact, high disruption jobs, like full base cabinet deep drawers or toe-kick drawers, take planning and often a contractor.
- Measure the cabinet opening at the hinges, the narrowest point, before ordering any hardware.
- Check whether the cabinet has a face frame, since frameless cabinets need different slide hardware.
- Locate plumbing and electrical lines under the sink before cutting or drilling anything back there.
- Note your existing drawer slide type so replacements match the mounting holes.
Cost brackets follow the same logic. Hardware-only fixes like dividers, racks, and risers run roughly $20 to $150 per unit and fit into a DIY weekend. Retrofit rollouts and drawer conversions run about $150 to $600 per cabinet and take one to three days, DIY or pro. Custom cabinet modifications, like toe-kick drawers or pantry pull-outs sized to a specific gap, need a pro quote and typically run one to three weeks depending on cabinet lead time.
A repeatable pattern across DIY guides: upgrades that need no structural change, like drawer organizers and under-sink rollouts, tend to top the “easiest wins” lists from outlets like BHG, while anything requiring a cut into the cabinet box moves toward pro territory.
Get at least two quotes for anything beyond hardware-only fixes. Call a pro when the job involves structural cabinet work, plumbing or electrical interference, custom face-frame cuts, or finish matching against existing cabinetry.
3. When a Remodeler Beats a DIY Weekend
Bigger cabinet retrofits reward professional handling for reasons that go beyond convenience. A rollout built to the exact width of your opening fits and slides properly the first time. Under-sink work that involves rerouting around a trap or shutoff valve is safer with a plumber-aware carpenter on the job. Matching stain or paint finish on a toe-kick drawer or a new drawer front takes color-matching experience most homeowners do not have on hand.
These projects benefit from an approach that combines design and construction under one roof, ensuring coordination between planning and building. Professional remodeling services often offer up-front pricing, assign a dedicated Lead Carpenter to oversee the job, and use systems intended to minimize dust and disruption during cabinet work.
- Design and construction handled by the same team to improve communication.
- Up-front pricing with itemized details available before work starts.
- A project overseer assigned to manage work from start to finish.
- Systems designed to minimize dust and mess during remodeling.
4. Lighting Options Inside Cabinets for Better Visibility
A pull-out shelf only helps if you can see what is on it. Battery-powered LED puck lights are the simplest fix: stick them to the cabinet ceiling and they turn on with a tap or a built-in motion sensor, no wiring required. Slim LED strip lights along the underside of upper cabinets or inside deep base cabinets cost more but give even, continuous light across a shelf instead of one bright spot.
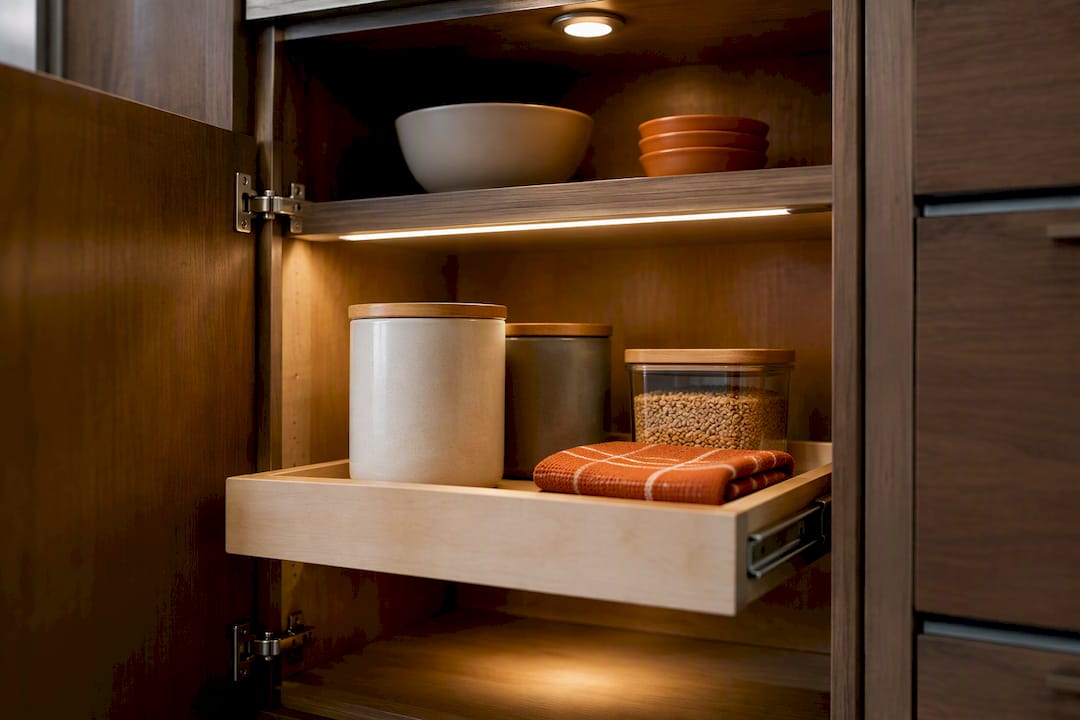
For under-sink cabinets and toe-kick drawers, a motion-sensor puck light is usually enough since those spaces get quick, frequent visits rather than sustained use. Pantry pull-outs benefit from a wired light on a door switch, since they get opened and closed constantly and battery packs would need frequent swaps.
Hardwired options need an electrician if you are tapping into existing circuits, but plug-in and battery versions are entirely DIY and install in minutes with adhesive strips or screw-in mounts. Either way, place the light source toward the front of the cabinet rather than the back, since a light mounted too deep casts a shadow over the exact area a pull-out shelf slides into.
5. Keeping Upgraded Cabinet Storage Working Over Time
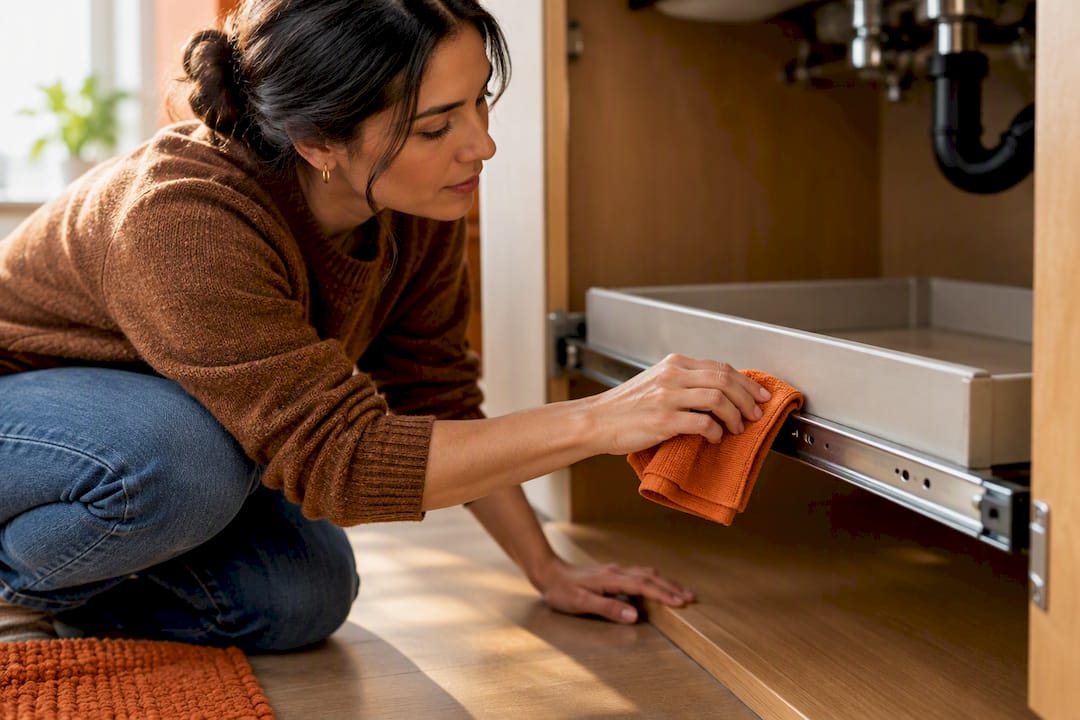
Rollouts and drawer organizers only stay useful if the hardware keeps moving smoothly. Wipe drawer slides every few months with a dry cloth to clear crumbs and grease, and avoid spraying lubricant directly on plastic glide components, since it can attract more dust than it prevents.
Wood dividers and trays should be wiped with a damp cloth rather than soaked, especially in spice drawers and lid organizers where moisture can warp thin inserts. Wire back-of-door racks and pull-out bins benefit from an occasional check of their mounting screws, since the repeated swing of a door loosens hardware faster than a stationary shelf.
For under-sink rollouts, check for water damage or swelling every few months, since that area is the most likely to see a slow leak before anyone notices. A quick monthly glance under the sink catches problems before they reach the cabinet floor.
6. Will These Upgrades Fit Your Cabinets?
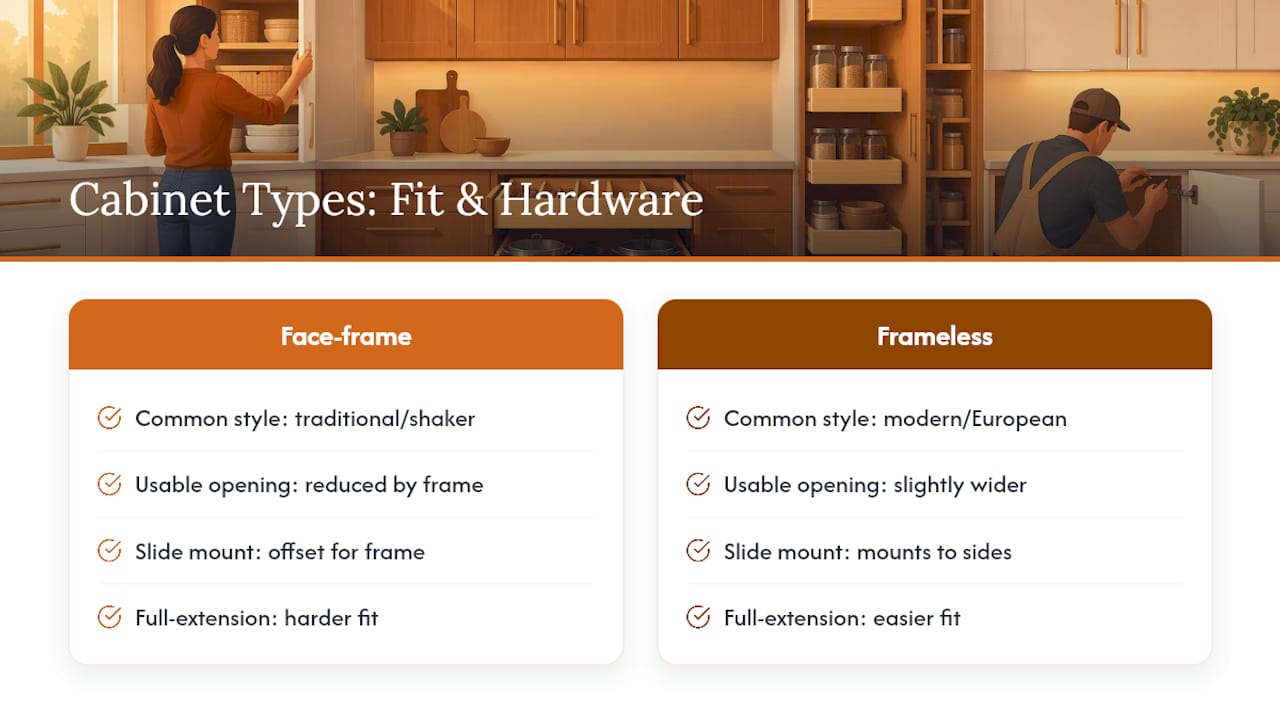
Most of the upgrades above work across face-frame and frameless cabinet styles, but the hardware differs. Face-frame cabinets, common in traditional and shaker-style kitchens, need slides mounted to account for the frame reducing the usable opening width. Frameless cabinets, common in modern European-style kitchens, offer a slightly wider opening and often accept full-extension slides more easily.
Cabinet depth matters for deep drawers and pot storage: a standard 24-inch base cabinet fits most pot drawer kits, but shallower cabinets may need a custom-built drawer box instead of an off-the-shelf kit. Narrow cabinets under 9 inches wide are usually too tight for standard pull-out shelves but work well for pull-out spice racks designed for that exact width.
Older cabinets with hand-built face frames or non-standard openings are the cases most likely to need a custom fit rather than a store-bought kit, which is where a carpenter’s measurements save you from ordering hardware that will not slide.
7. What Tools You Need for a DIY Install
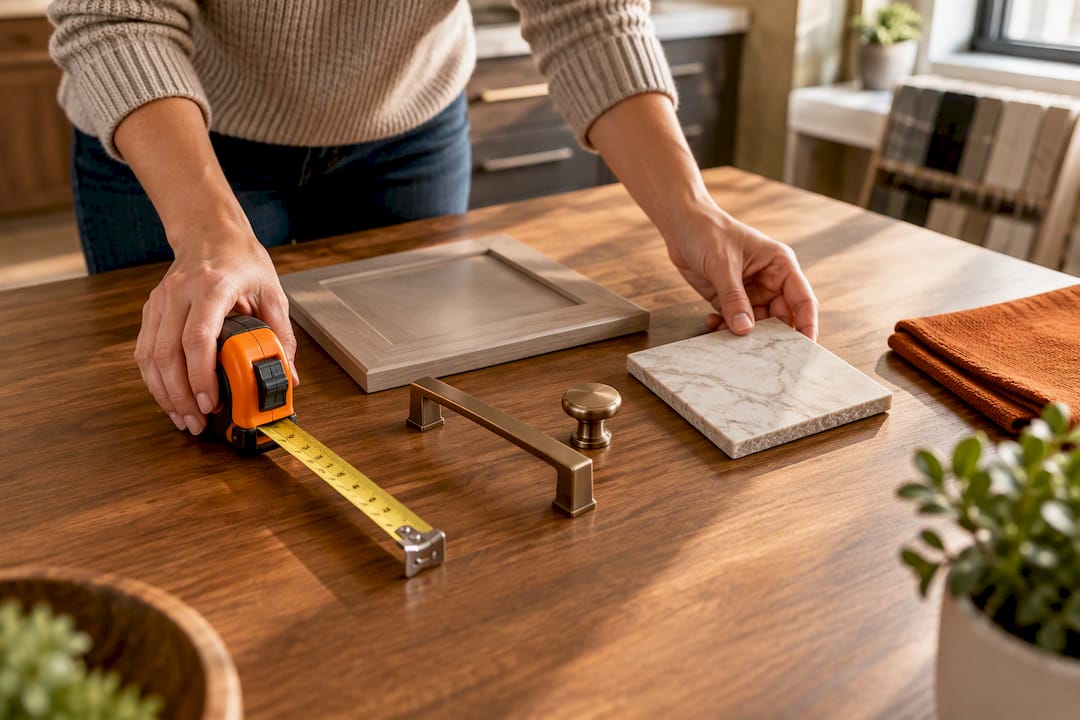
Most of the hardware-only and DIY-build upgrades need a small, common toolkit rather than anything specialized. A drill and driver bits handle almost every mounting job. A tape measure and a square are essential for marking the narrowest point of the opening before cutting or ordering slides.
A level keeps rollout trays and shelves from tilting once installed, which matters most for pull-out pantry units carrying tall bottles. Wood screws in a couple of lengths, plus a clamp to hold slides steady while you drive screws, round out the basics.
For toe-kick drawers or any job that requires cutting into a cabinet panel, add a jigsaw and sandpaper to clean up the cut edge. Under-sink rollout builds benefit from a small hand saw for trimming trays around pipes. None of this requires a full workshop, but a project touching the cabinet box itself is the point where many homeowners decide a carpenter’s tools and experience are worth the cost.
8. What to Budget in Time and Money
Hardware-only fixes, like drawer dividers, lid racks, and back-of-door organizers, generally cost around a few dozen to a few hundred dollars per unit and take an afternoon. Retrofit rollouts and drawer conversions usually cost from the low hundreds to several hundred dollars per cabinet and take one to three days whether you do it yourself or hire it out. Custom modifications, like a toe-kick drawer cut into an existing kick panel or a pantry pull-out built to a nonstandard width, need a contractor quote and typically require several weeks once you account for ordering materials and scheduling the work.
The jump in price and time from retrofit to custom modification usually comes down to one thing: whether the cabinet box itself gets altered. A drawer insert changes nothing structural. A toe-kick drawer or pantry pull-out does, and that is where labor and finish-matching add real cost.
9. Getting More Out of the Vertical Space You Already Have
Most kitchen cabinets waste vertical inches between shelves that were set at one fixed height decades ago. Adjustable shelf pins let you split a tall cabinet into two usable zones instead of one, which is often enough to end the need for a pull-out at all in smaller kitchens.
Stacking risers turn a single shelf into two tiers for cans, jars, or small appliances, and they cost close to nothing compared to a full rollout. In deep upper cabinets, a second, shorter shelf mounted a few inches below the existing one captures dead air space that usually holds nothing but dust.
Tall, narrow gaps beside a fridge or oven are prime real estate for a pull-out pantry unit precisely because they are vertical space that a standard cabinet layout ignores. If your kitchen has one of these gaps unused, it is often the single highest-return spot to add storage before touching anything else.
What Homeowners Get Wrong About Cabinet Storage
The biggest mistake is treating cabinet storage as one project instead of a series of small decisions. Homeowners often jump straight to a full drawer conversion when a $30 divider set would have solved the actual daily frustration, which is usually a jumbled utensil drawer or a lid pile, not a lack of cabinet volume.
The opposite mistake shows up just as often: forcing a DIY rollout into a cabinet with a nonstandard opening, then living with a drawer that binds or won’t close flush. Measuring the narrowest point before buying hardware is not optional advice, it is the difference between a fix and a new problem.
Prioritize the upgrade that touches the thing you reach for every day, not the one that photographs best. A spice drawer used three times a day beats a pantry pull-out used once a week, even though the pull-out looks more impressive.
— MediaBeast
How Bath & Kitchen Gallery Turns These Ideas Into a Finished Kitchen
Once an upgrade moves past a weekend project, having one team handle design and construction can save measurement errors and ensure better coordination. Custom cabinetry and rollout solutions can be built to the exact dimensions of your kitchen, often with pricing provided up front before work begins. Full kitchen projects, including cabinet storage overhauls, are outlined on the kitchen remodel costs page.
- Custom cabinetry and cabinet modifications built to exact opening dimensions.
- Rollout, drawer, and hardware installation for various cabinet storage solutions.
- Project management includes practices to minimize dust and disruption, often overseen by dedicated staff.
If your kitchen needs more than a drawer insert, schedule a consultation or visit the showroom to see cabinet options in person before committing to a plan.
Sources
FAQ
How do you maximize storage in kitchen cabinets?
Start with adjustable shelves and stacking risers to use vertical space, then add pull-out shelves or rollouts to the cabinets you open most often. Drawer organizers for utensils, spices, and lids solve daily clutter faster than any structural change.
Can you update kitchen cabinets without replacing them?
Yes, most storage gains come from adding rollouts, drawer inserts, and back-of-door racks to existing cabinet boxes rather than replacing the cabinets themselves. Refinishing the doors and fronts, handled by specialists in cabinet refinishing like Tru Painting, can also refresh the look without a full remodel.
What are some good ideas for cabinet storage?
Pull-out shelves, deep drawers for pots and pans, spice and lid organizers, under-sink rollouts, and trash pull-outs cover most kitchens’ daily frustrations. Back-of-door racks and toe-kick drawers add storage without changing a cabinet’s footprint.
What can I put on top of kitchen cabinets for storage?
Baskets or decorative bins are a common choice for the space above cabinets, since they hide clutter while adding a finished look. Storage product ideas from retailers like Keter offer practical basket and bin options sized for that kind of display storage.