
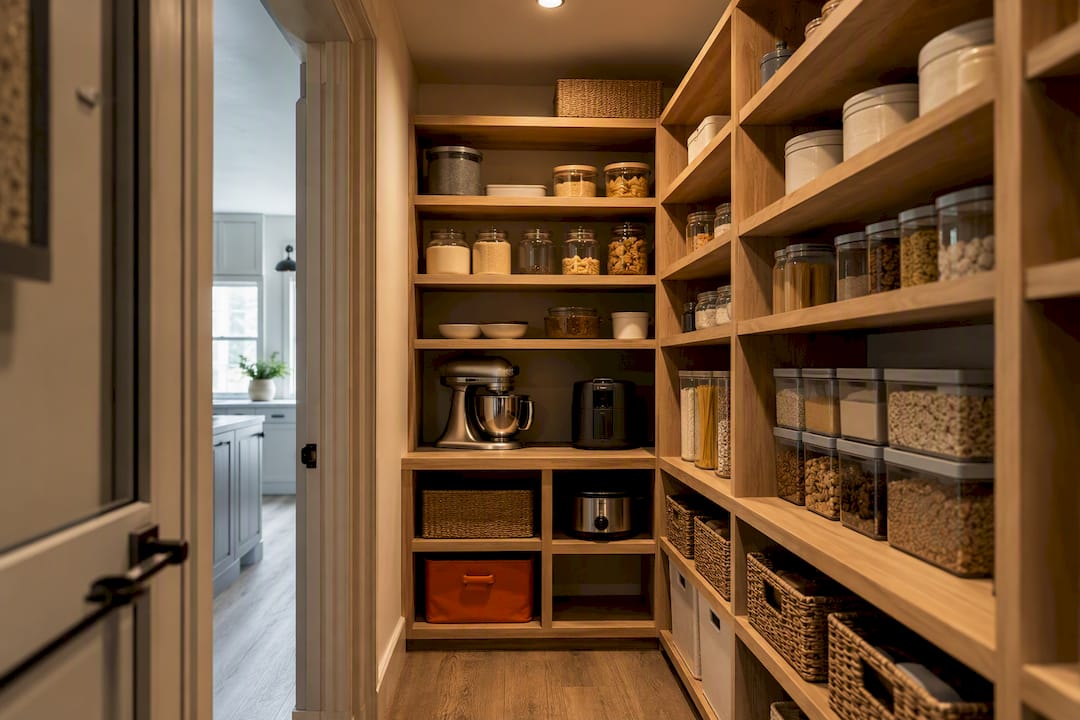
For most kitchens, the best pantry design starts with choosing a layout based on your actual footprint, then building in shallow shelving, clear sightlines, and labeled zones before you touch a single door style or light fixture. This article walks through 12 practical design ideas, standard measurements, and a contractor-ready checklist so you can plan with real numbers instead of guesswork.
TL;DR:
- Shelves deeper than 16 inches should have full-extension slides rated for at least 75 pounds to prevent sagging under weight.
- In small pantries under 4 feet wide, sliding or pocket doors are essential to maximize space and eliminate door-swing conflicts.
- Proper aisle clearance of 24 to 30 inches is crucial for comfortable movement, with 36 inches recommended for two-person access.
- Shallow shelves of 10 to 12 inches at eye level improve visibility and reduce lost items, especially in medium and small pantry layouts.
- Fixed shallow shelving costs less and is more reliable than pull-out drawers unless used for deep or heavy storage.
Table of Contents
- Top 12 Pantry Design Ideas Homeowners Can Use Now
- Layouts and Sizing: Pick Walk-In, Reach-In, or Cabinet Pantry
- Shelving, Materials, and Load Planning
- Accessibility and Hardware: When to Use Pull-Outs
- Lighting, Finishes, and Door Choices
- Small-Space Solutions for Narrow or Shallow Pantries
- Practical Planning Checklist Before You Buy Shelving
- Perspective From Bath & Kitchen Gallery: Remodeling Lessons
- What Homeowners Get Wrong About Pantry Design
- Ready to Build Your Pantry the Right Way?
- Sources
Top 12 Pantry Design Ideas Homeowners Can Use Now
Good pantry design ideas balance what looks good with what you’ll actually maintain six months from now. Here are the 12 that consistently earn their keep, sorted roughly from big structural moves to small finishing touches.
- Walk-in layout with a landing zone. A small island or countertop landing spot near the entry gives you a place to set down groceries before you put them away. Works best in large pantries (6×8 ft or bigger).
- Concealed pantry cabinets. Full-height cabinet doors that blend into surrounding millwork hide clutter behind a finished face. Ideal for open-concept kitchens where a visible pantry door breaks the sightline.
- Sliding or pocket doors. These reclaim floor space an inward-swinging door would eat up, which matters most in reach-in pantries under 4 feet wide.
- Fixed shallow shelving for visibility. Shelves set at 10 to 12 inches deep keep everything visible at a glance instead of buried two rows deep. Best for medium and small pantries where “out of sight” really does mean “out of the shopping list.”
- Pull-out drawers for deep runs. Reserve these for shelves deeper than 16 inches or for heavy bulk goods like water cases. Overkill in a shallow reach-in.
- Labeled clear containers. Swap cardboard boxes for stackable clear bins with labels; this alone can cut duplicate purchases. Works in any size pantry.
- Zone-based organization. Group items by use (baking, snacks, breakfast) rather than by category alone, so the whole household can find things without asking.
- Countertop coffee or prep station. A 24-inch counter run with an outlet turns a walk-in pantry into a working appliance zone. Needs at least 5×8 ft of floor space.
- Vertical door racks. Mount slim racks on the back of the pantry door for spices or foil boxes. A near-zero-cost win in cabinet or reach-in pantries.
- Lazy Susans for corners. Rotating shelves solve the “reach into the abyss” problem in L-shaped layouts. Best suited to corner pantries and larger walk-ins.
- Toe-kick drawers. The dead space under the bottom shelf becomes shallow storage for trays or table linens. A smart add for cabinet pantries with limited depth.
- Integrated wine or utility storage. A slim vertical bay for bottles or cleaning supplies keeps odd-shaped items from cluttering shelves. Fits well in medium to large walk-ins with extra wall length.
Layouts and Sizing: Pick Walk-In, Reach-In, or Cabinet Pantry
Your footprint decides more of the design than any Pinterest board will. A walk-in pantry is a dedicated room you step into, typically running 4 to 8 feet wide and 4 to 6 feet deep for comfortable shelving on two or three walls. A reach-in pantry is a shallow closet you access from the kitchen without stepping inside, usually 12 to 16 inches deep. A cabinet pantry is a tall, freestanding or built-in unit that mimics a walk-in’s zoning in a fraction of the space, which is often the right call in kitchens without a spare closet to convert.
If you’re planning a walk-in from scratch, 5 by 5 feet (about 25 square feet) is the practical minimum for shelving on two walls plus a usable walkway. Comfortable walk-ins run 5×8 to 6×8 feet. Aisle width matters just as much as square footage: plan for 24 to 30 inches of clearance between opposing shelves, and bump that to 36 inches if you expect two people in there at once or you’re storing a rolling cart.
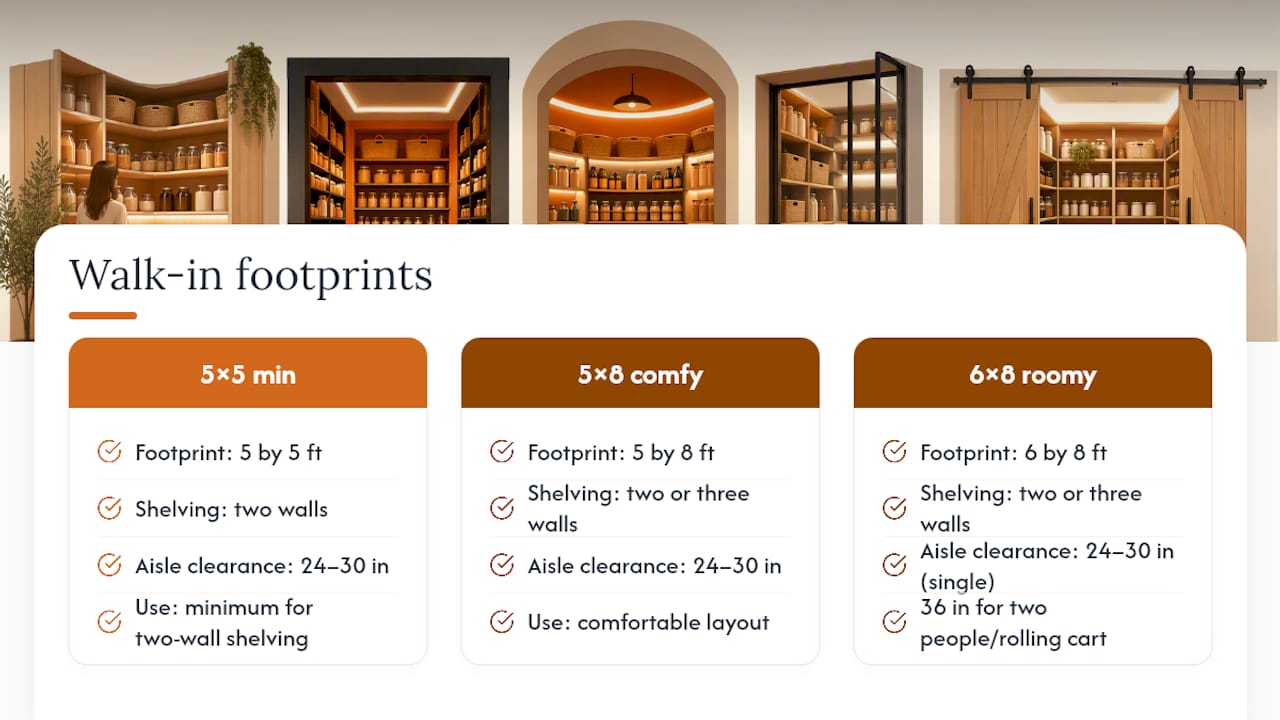
U-shaped and L-shaped walk-ins maximize wall length for shelving but need that 24 to 30 inch clearance to avoid feeling cramped in the corners. Galley layouts (shelves on two parallel walls) work well in narrow converted closets but can feel tight if you go under 4 feet wide.
Shelving, Materials, and Load Planning
Shelf depth should change depending on what zone you’re looking at, not stay uniform top to bottom. Shallower shelving around 10 to 12 inches at eye level improves visibility and cuts down on the “black hole” effect where cans vanish behind boxes. Mid-height shelves can run 12 to 16 inches for cereal boxes and small appliances, and the bottom zone can go deeper, 20 to 24 inches, for bulk items and bins you’re not digging through daily.
Material choice affects both cost and how much weight a shelf can carry over a span:
- 3/4-inch plywood or melamine: the workhorse choice. Balances cost and strength for most home pantries and takes edge-banding well.
- Wire shelving: cheap and ventilated, but sags over long spans without added support brackets.
- Steel: carries the most load and resists warping, though it costs more and can transmit vibration or noise.
- Bamboo: a durable, moisture-resistant option that looks warmer than wire without steel’s price tag.
- Tempered glass: attractive for display shelves near the entry, but a poor choice for heavy or deep storage.
Add a vertical support or bay divider any time a plywood shelf spans more than 32 to 36 inches unsupported, especially if you’re storing canned goods. Seal or edge-band raw plywood edges to resist moisture, particularly near a kitchen with steam exposure.
Pro Tip: If you’re mounting pull-out shelves anywhere in the pantry, look for full-extension slides rated between 75 and 100 pounds — that range covers canned goods and small appliances without the drawer sagging on its rails over time.
Accessibility and Hardware: When to Use Pull-Outs
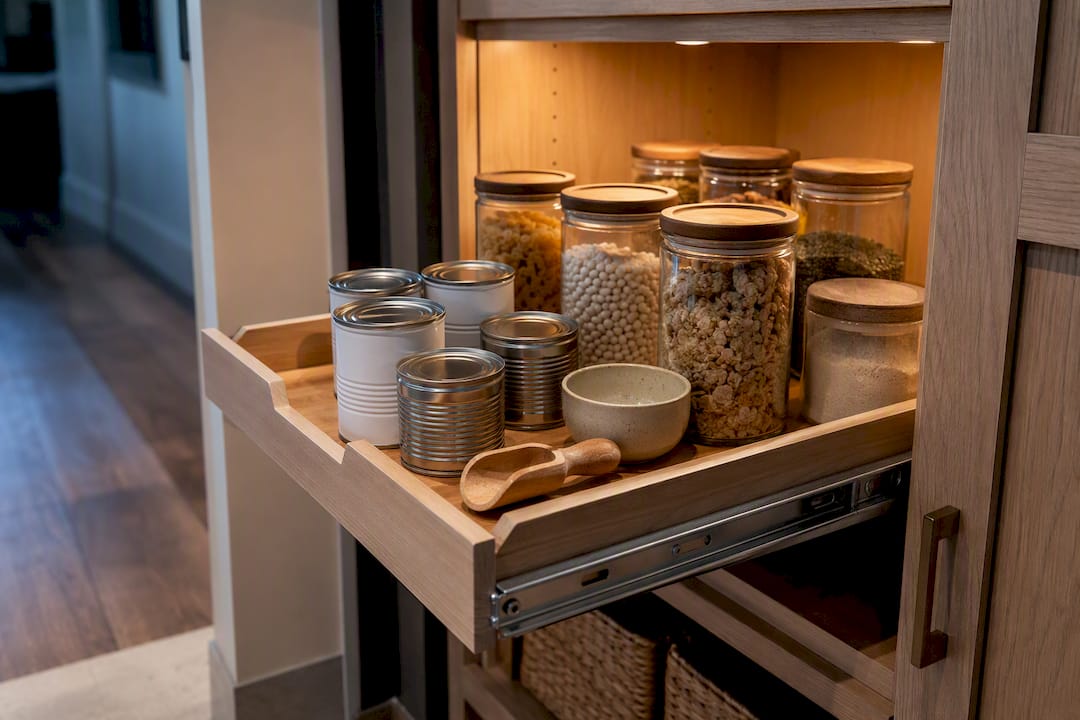
Pull-outs cost more per linear foot than fixed shelving, so they only earn their price when depth or weight genuinely demands them. Fixed shallow shelving retains more usable width and costs far less in a 12 to 16 inch pantry, which covers most homes. Save pull-outs for shelves deeper than 16 inches, bottom bins holding heavy bulk goods, or corner cabinets where a lazy Susan solves the reach problem better than a drawer would.
When you do specify hardware, match the slide rating to the load: 75 to 100 pounds for heavy canned or bottled storage, lighter-duty slides for snack bins or linens. A quick selection workflow:
- Measure shelf depth. Under 16 inches, default to fixed shelving.
- Estimate the heaviest likely load on that shelf (a full case of canned goods can hit 25 to 30 pounds).
- Choose a slide rated at or above that load, with margin for growth.
- Reserve tilt-out bins and toe-kick drawers for lightweight, low-frequency items.
Lighting, Finishes, and Door Choices
A pantry with no light source is just a dark box you’re guessing inside. LED tape strips mounted under the front lip of each shelf, spaced every shelf level, throw even light without hot spots; add a motion sensor so nobody’s fumbling for a switch with an armload of groceries. If you’re building in a countertop landing zone, plan an outlet nearby before drywall goes up, not after.
Finish choices matter more in a pantry than people expect:
- Use a satin or semi-gloss paint sheen on shelves for easy wipe-downs.
- Seal raw wood shelving to resist spills and humidity swings.
- Add a washable liner on lower shelves where spills are most likely.
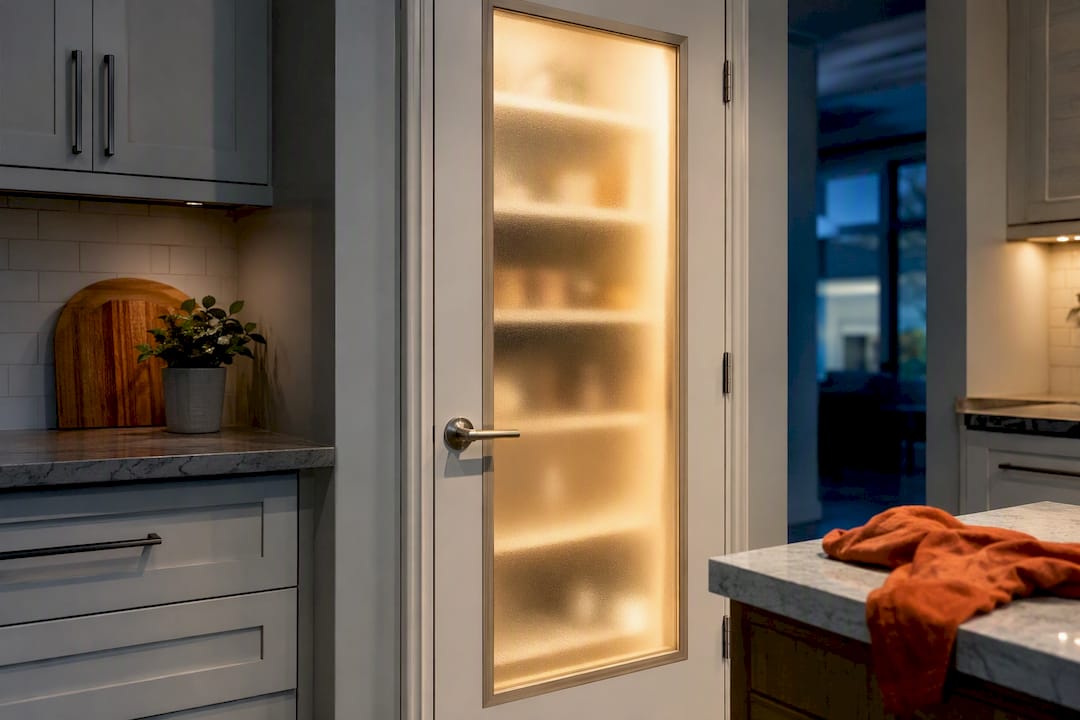
For doors, sliding and pocket styles reclaim space that an inward swing would cost you, tambour doors add a furniture-grade look, and frosted glass lets light in without demanding constant tidiness behind it. A partner guide on selecting the right pantry door breaks down the trade-offs by kitchen layout.
Pro Tip: Pair frosted glass door panels with interior strip lighting. You get a soft glow through the glass at night and a pantry that reads as intentional design, not just storage.
Small-Space Solutions for Narrow or Shallow Pantries
A narrow pantry doesn’t have to feel like a missed opportunity. Keep fixed shelves at 12 inches or shallower where visibility matters most, and reserve any pull-out for a single bottom drawer holding heavy items. Tall, narrow pull-out pantries (the kind that slide out from a 6 to 8 inch gap between cabinets) can add real capacity without eating floor space.
- Door-mounted organizers turn wasted door depth into spice or can storage.
- Converting a base cabinet into stacked pantry drawers works well next to a range.
- Pocket or sliding doors disguise a small pantry behind a flush cabinet face.
- Simple shelf retrofits and door organizers are reasonable DIY projects; anything involving new framing, electrical outlets, or structural cabinet conversion is worth handing to a carpenter.
Related reading on maximizing small kitchen spaces covers several of these tactics in more depth for tight floor plans.
Practical Planning Checklist Before You Buy Shelving
A short sequence of planning steps saves you from ordering the wrong shelf depth twice.
- Measure everything. Walls, door swing, outlets, vents, and any obstacles like ductwork.
- Audit what you store. Count heavy items (cases, appliances) separately from light ones.
- Set shelf depths by zone. Shallow at eye level, deeper down low.
- Choose hardware and load limits. Match slide ratings to your heaviest shelf.
- Set a budget and schedule. Wire shelving runs cheapest; custom wood costs concentrate in labor and finish work, not materials.
Add a vertical support any time a bay runs past 32 to 36 inches unsupported. If you’d rather build it yourself, Ana White’s free plywood shelving plans include cut lists for shallow pantry builds.
Perspective From Bath & Kitchen Gallery: Remodeling Lessons
Pantry projects look simple until you hit a wall with wiring behind it or a door swing that fights the layout you sketched. Handling design and construction under one roof avoids the miscommunication that happens when a designer’s plan gets handed off to a separate crew mid-project.
- Up-front pricing means you know shelving, hardware, and finish costs before demo starts, not after.
- A dedicated Lead Carpenter on every project keeps one person accountable for the whole pantry build, not three different subs.
- The Work Clean System keeps dust contained during construction, which matters more in a pantry than most rooms since it sits next to food storage.
Simple shelf retrofits and organizer swaps are fair DIY territory. Once a project involves moving walls, adding outlets, or custom cabinetry that has to align with existing kitchen millwork, bringing in a contractor prevents costly rework later.
What Homeowners Get Wrong About Pantry Design
Most pantry advice obsesses over Pinterest-worthy shelving and skips the boring part that actually determines whether the space works: measuring first. Homeowners routinely order shelving before confirming aisle clearance or door swing, then wonder why the finished pantry feels tight even though it “looked bigger in the sketch.”
The conventional wisdom oversells pull-out drawers. They photograph well, but in a standard 12 to 16 inch reach-in, fixed shallow shelving does the same job for less money and less mechanical failure down the road. Save the pull-outs for genuinely deep runs or heavy bottom storage, not every shelf in the room.
If you take one thing from this article, prioritize sightlines over square footage. A small, well-lit pantry with shallow shelves and labeled zones will outperform a larger one with deep, dim shelving every time you’re standing there trying to find the cumin.
— MediaBeast
Ready to Build Your Pantry the Right Way?
Reading about ideal shelf depths and door clearances is one thing. Getting them built correctly around your existing kitchen’s wiring, framing, and layout is another. Tampakitchenandbath designs and builds custom pantry shelving, lighting, doors, and finish work as part of a full kitchen remodel, with one Lead Carpenter overseeing the entire job from first measurement to final install.
That means no guessing between a designer’s plan and what the construction crew actually builds, and no surprise costs once demo starts, since pricing is set up front. If a pantry upgrade is part of a bigger kitchen project, explore kitchen remodeling services in Tampa or schedule a discovery call with a designer to talk through your layout, measurements, and budget before you order a single shelf.
Sources
- How much weight can a pull-out pantry shelf hold? – WoodWorker Express
- Pantry shelving ideas: smart layouts and storage systems — Build-Construct
- Walk-In Pantry Design: Dimensions, Layouts & Cost — Dreamspaces
- How to design a walk-in pantry — Tasting Table
- Built pantry shelving — Ana White