
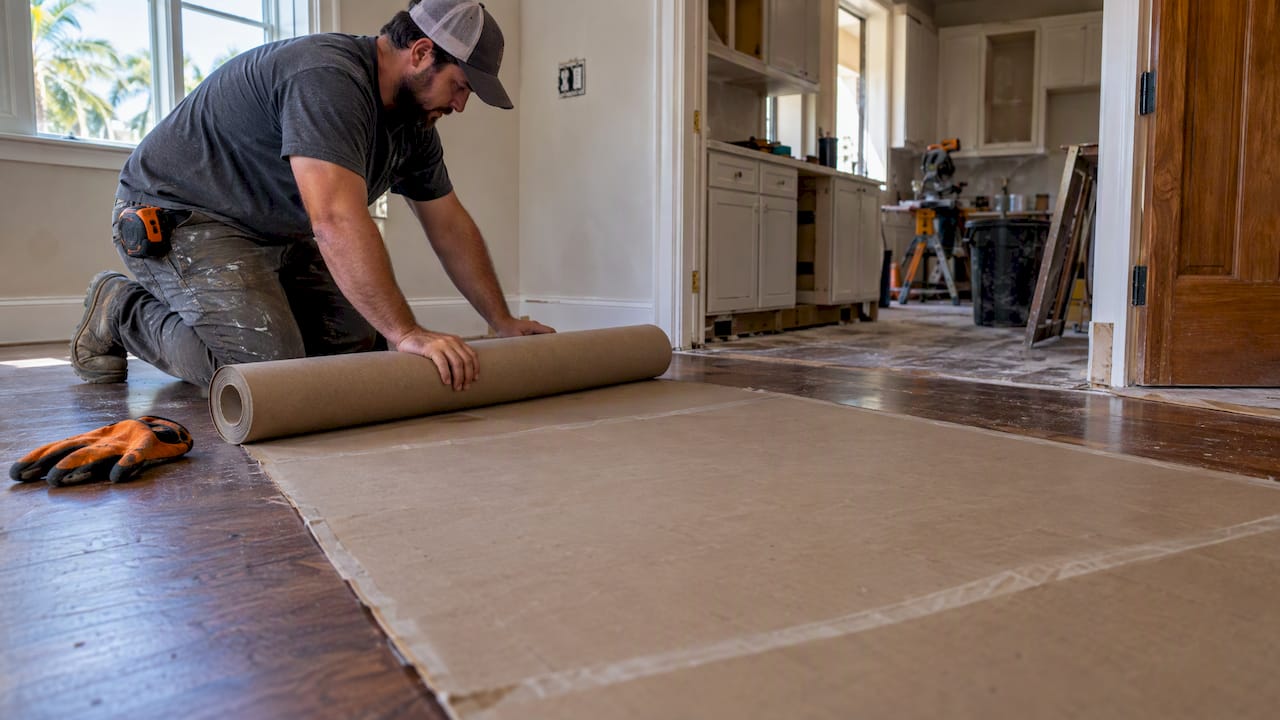
The best way to protect floors during a remodel is to match a breathable, job-grade covering to the floor type, clean thoroughly before laying anything down, and respect cure times on fresh finishes. Beyond the covering itself, dust and fumes need containment with EPA-recommended poly barriers and ventilation. Skip these steps and you risk trapped moisture, scratched finishes, or dust working its way into the rest of the house.
TL;DR:
- Using breathable, impact-resistant materials like Ram Board is ideal for hardwood and sensitive floors to allow moisture escape and prevent warping.
- Proper installation includes ensuring the floor is fully cured, thoroughly cleaned, and seams are overlapped and taped securely to prevent debris and moisture intrusion.
- Wait at least 48 to 72 hours after finishing work like sealing or polishing before covering floors to avoid trapping residual moisture.
- Dust containment requires sealing the work area with thick poly sheeting and creating negative pressure with exhaust fans to prevent dust migration.
- Regular inspection and prompt replacement of damaged protection sections are essential for managing long-term projects and avoiding hidden moisture or grit damage.
Table of Contents
- Which materials protect each floor type best
- How do you install floor protection correctly?
- Moisture and timing: what not to cover too soon
- Dust containment and ventilation during the job
- How often should you inspect floor protection mid-project?
- A quick checklist for prep, daily checks, and removal
- Protecting edges, transitions, and thresholds
- How Bath & Kitchen Gallery keeps floors protected on managed remodels
- Why hire us to manage floor protection on your remodel
- FAQ
- Sources
Which materials protect each floor type best
Not every floor needs the same shield, and using the wrong one can cause the exact damage you’re trying to prevent. Heavy-duty breathable board works well on hardwood and other sensitive surfaces because it resists impact while letting moisture escape during the job. Ram Board and similar products use breathable technology specifically so curing finishes aren’t sealed under plastic, which can trap humidity and cause clouding or warping.
For painting work, builder’s paper or rosin paper is usually enough since the main threat is drips rather than foot traffic or tools. Adhesive film suits short-term protection on luxury vinyl plank and laminate, where you need a tight seal against spills but the floor isn’t as prone to dents. Padded runners make sense in hallways and stairwells where crews walk constantly.
A few guidelines matter across every material choice:
- Avoid laying plastic sheeting directly on finished hardwood since it can trap moisture against the wood and cause the finish to haze or soften.
- Use heavy board alone for high-traffic zones with tool drops or scaffolding.
- Layer rosin paper under adhesive film when you need both breathability and a sealed edge.
- Choose carpet-specific film with a grip backing so it doesn’t shift underfoot on carpeted stairs or hallways.
Concrete that’s still curing or freshly polished needs breathable coverage too, since trapped moisture can interfere with sealers and polish topcoats.
How do you install floor protection correctly?
Getting the material right only matters if the installation holds up for weeks of foot traffic and wet trades. Follow these steps the day protection goes down:
- Confirm the floor has met its cure time and check for residual moisture before covering anything.
- Sweep and vacuum thoroughly so grit doesn’t get trapped underneath and scratch the finish.
- Stage boards, paper, and film away from walkways so they’re not stepped on before installation.
- Lay film with the adhesive side down per the manufacturer’s orientation, then roll board sections flat rather than folding them.
- Overlap seams sufficiently to prevent debris and liquid seepage and tape them with seam tape made for the material, according to installation guidance from XFasten.
- Secure edges to baseboards with low-tack tape, never to the floor finish itself.
- Cut clean, tight edges around thresholds, vents, and floor registers so debris can’t slip underneath.
- Press down lifting edges and clear grit from the surface regularly, and jot down the date each time you check it.
Pro Tip: Keep a roll of seam tape and a small broom at the job site entrance so crews have no excuse to skip the daily edge check.
Moisture and timing: what not to cover too soon
Covering a floor before it’s ready can undo weeks of finishing work. As a conservative rule, wait at least 72 hours after hardwood finishing, 48 hours after grout or tile setting, and up to 7 days after polishing concrete, depending on the sealer used. Non-breathable coverings make this worse because they trap moisture against the surface instead of letting it escape, which is why breathable board products exist in the first place.
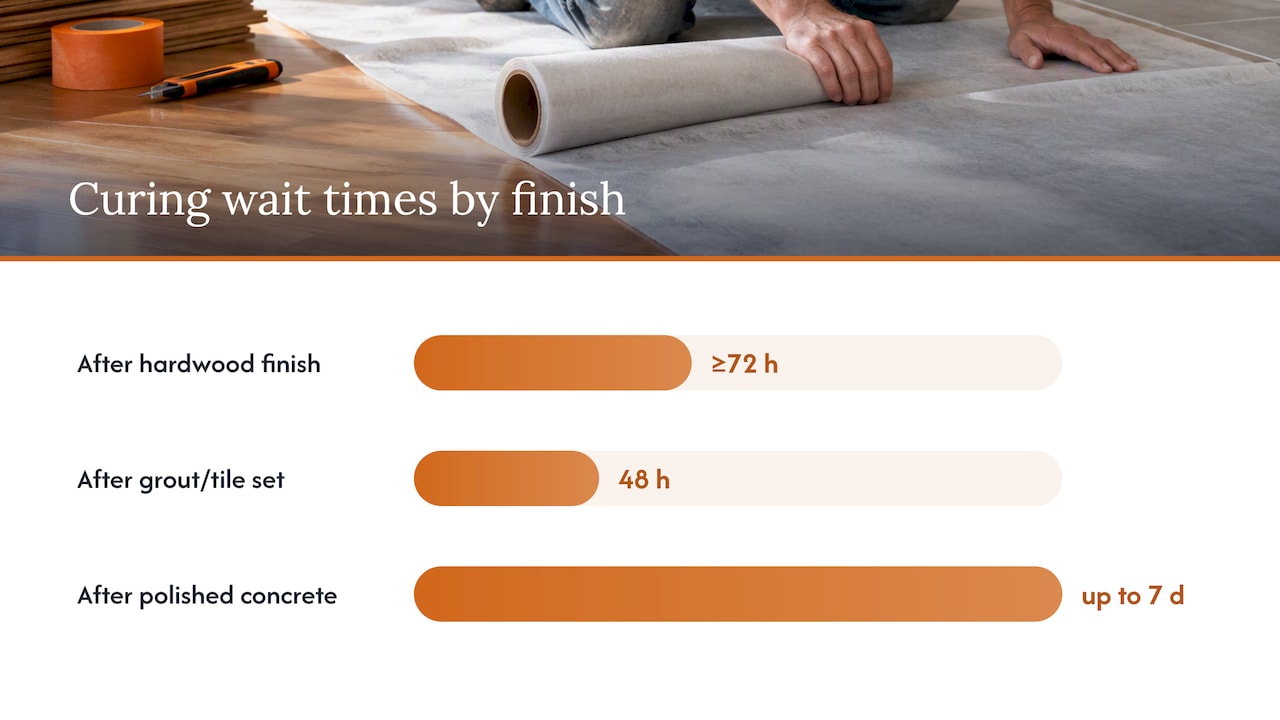
Before covering, check manufacturer guidance for the specific finish or use a moisture meter if you have one. When in doubt, add a buffer day rather than risk clouding, bubbling, or a soft finish that has to be redone.
Dust containment and ventilation during the job
Dust control protects more than the floor. Per EPA best practices, seal the work area with poly sheeting that is sufficiently thick for containment taped at doorways, block HVAC supply and return registers in the room, and set up an exhaust fan to create negative pressure that pulls dust out rather than letting it drift through the house.
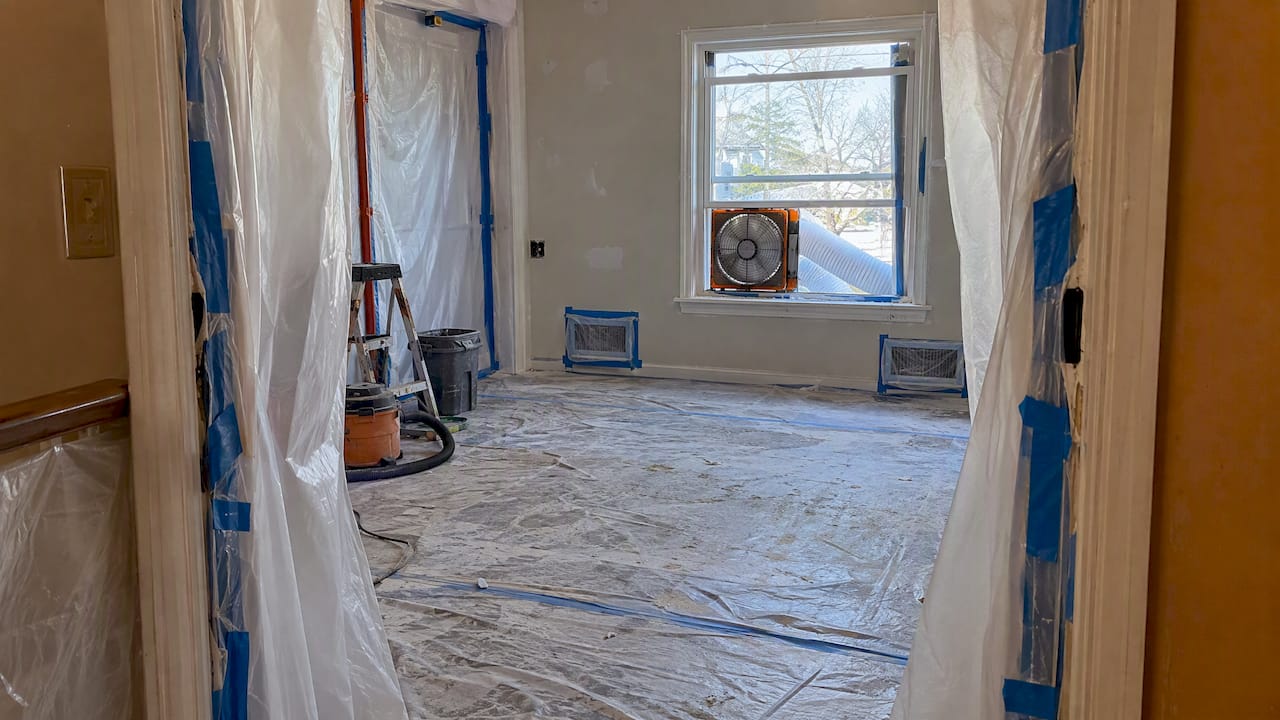
For bigger demolition jobs, a simple plastic flap at the doorway isn’t enough. The EPA’s work area guidance for projects disturbing lead-based paint calls for full isolation, with containment extending at least 6 feet indoors from the disturbance, since dust from these tasks travels farther than a flap can stop. Small residential jobs can usually get by with a sealed doorway and one exhaust fan, but major demo calls for a true isolation setup with no casual access in or out.
How often should you inspect floor protection mid-project?
Lift and check sections periodically, such as every few weeks, or right after any wet trade like tile setting or painting finishes its work. Look for moisture underneath, staining, grit buildup, or torn seams, since any of these can mean the protection is doing more harm than good.
Replace compromised sections right away rather than patching over them, and keep a simple log if you’re managing a longer project with multiple subcontractors. For adhesive residue left behind, a low-angle peel followed by isopropyl alcohol on a microfiber cloth usually lifts it without touching the finish underneath, a tip echoed in professional floor protection installation guides.
A quick checklist for prep, daily checks, and removal
A short checklist keeps floor protection consistent across a multi-week project, whether you’re doing the work yourself or coordinating several trades.
- Pre-job: confirm floor type and cure time, buy the right protection grade, and vacuum floors dry before laying anything down.
- Daily: press down seams, clear grit, label wet or fragile zones, and verify dust containment is still sealed.
- Removal: take up protection in sections once overhead trades are finished, then do a final clean and inspection.
| Phase | Key action | Why it matters |
|---|---|---|
| Pre-job | Confirm cure times and vacuum floors | Prevents trapping moisture or grit under protection |
| Daily | Press seams and clear debris | Stops tears and scratches from accumulating |
| Removal | Remove in sections after overhead work ends | Avoids re-soiling a floor that’s already clean |
Protecting edges, transitions, and thresholds
Edges and thresholds take more abuse than open floor space because every cart, ladder, and foot crosses them repeatedly. Cut protection material to fit tightly around door thresholds rather than leaving a gap where debris can collect, and use a dedicated transition strip or a folded double layer of board at doorways where traffic concentrates.
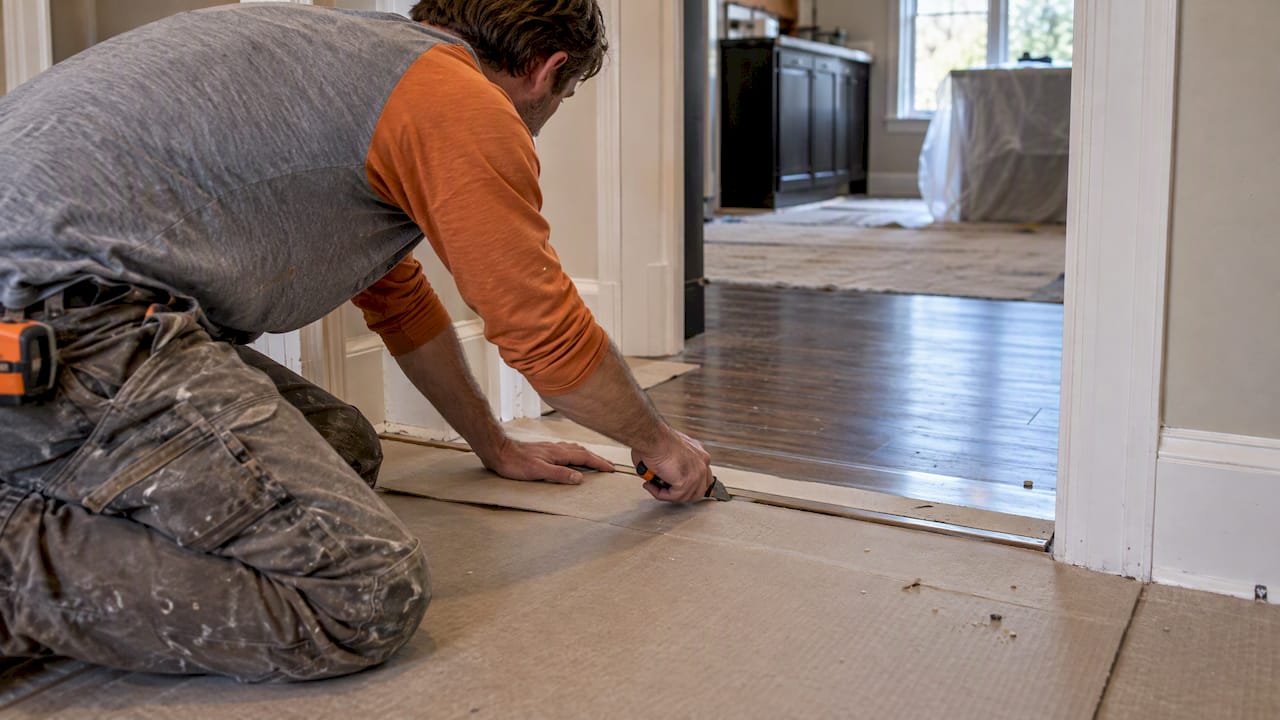
When trades are replacing doors or trim, dust and dropped tools concentrate right at the threshold, so it’s worth reinforcing that spot specifically rather than relying on the same single layer used elsewhere. For readers tackling a door swap as part of a larger remodel, a low-dust door replacement process can limit how much debris reaches the floor in the first place.
Avoid taping protection directly across a threshold transition strip, since adhesive can pull up finish or leave residue on metal or wood trim. Instead, anchor the material just past the transition on stable subfloor or baseboard, and use a utility knife for clean, tight cuts rather than tearing material by hand, which leaves ragged edges that catch on foot traffic.
How Bath & Kitchen Gallery keeps floors protected on managed remodels
On projects we manage, inspection and maintenance of floor protection and dust containment are handled regularly to maintain standards and reduce surprises during the remodel.
— MediaBeast
Why hire us to manage floor protection on your remodel
Floor protection, inspection, and dust containment aren’t an add-on for us. They’re built into how we run every project, with a Lead Carpenter checking seams, moisture, and containment throughout the job rather than leaving it to chance.

- Up-front pricing means you know the full scope before work begins, no surprise charges for protection or cleanup.
- A single Lead Carpenter oversees design and construction together, so protection decisions don’t fall through the cracks between trades.
- Our Work Clean System covers dust containment as a daily practice, not a one-time setup.
If you’re planning a kitchen project, you can see current kitchen remodel costs and what’s included. For a bathroom, check bathroom remodel pricing to get a sense of scope before reaching out for a quote.
FAQ
What are the best ways to protect my floors during building work?
Match breathable board or film to your floor type, clean the surface first, and secure edges to baseboards rather than the floor itself. Combine this with EPA-recommended dust containment using 6 mil poly sheeting and ventilation so dust doesn’t spread beyond the work area.
What is the best material to protect floors during construction?
Breathable heavy-duty board, such as the kind made by Ram Board, is a strong option for hardwood and other sensitive floors because it resists impact while letting moisture escape. Rosin paper works well for lighter tasks like painting, and adhesive film suits short-term coverage on vinyl or laminate.
What is the best floor protection for decorating?
For painting and light decorating, rosin or builder’s paper is usually sufficient since the main risk is drips rather than heavy foot traffic. Secure it with low-tack tape at the edges and avoid taping directly to the finished floor.
How can I protect my concrete floor during construction?
Wait for the concrete to finish curing, which can take up to 7 days after polishing depending on the sealer, before covering it. Use a breathable covering rather than plain plastic sheeting, since trapped moisture can interfere with sealers and polish topcoats.
What’s a common mistake people make when protecting floors?
Taping plastic sheeting or film directly onto a finished floor is one of the most frequent errors, since it can pull up the finish when removed. Another is skipping the daily seam check, which lets grit and moisture work underneath the protection and cause the exact damage the covering was meant to prevent.
Sources
- Best practices for indoor air quality when remodeling your home | US EPA
- Ram Board product page
- How to protect floors during renovation — XFasten