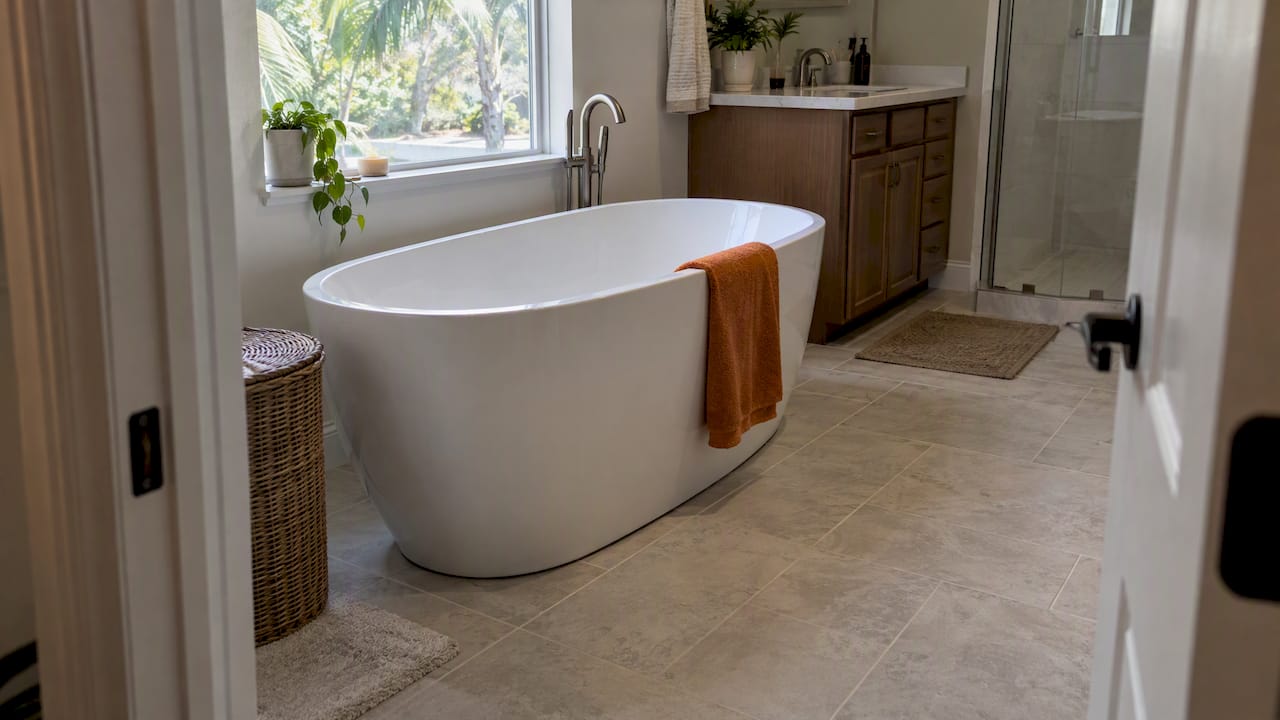

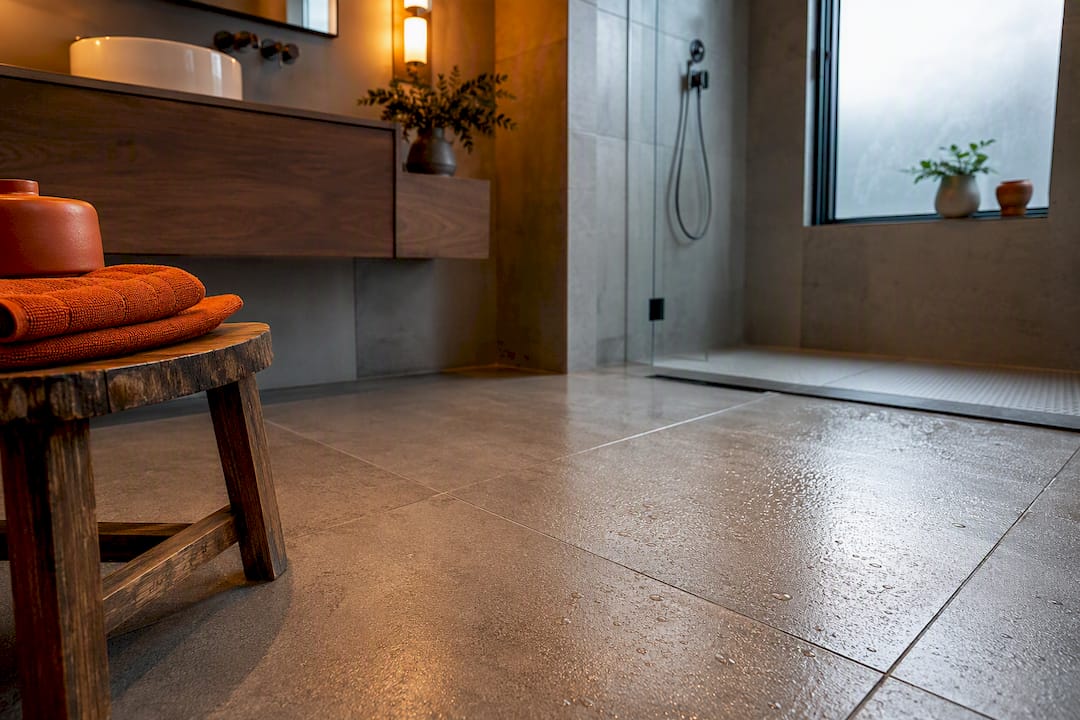
Porcelain tile is the best long-term waterproof bathroom floor, full stop, thanks to a water absorption rate at or below 0.5 percent. Luxury vinyl plank or SPC is the smartest budget or DIY alternative, since it’s 100% waterproof through the plank itself. Skip solid hardwood, laminate, cork, and carpet entirely, as they are not suitable for wet bathroom environments. Whatever you choose, a membrane like Schluter DITRA or KERDI underneath it matters more than the material label on the box, and a contractor like Tampakitchenandbath will know exactly how to detail it.
TL;DR:
- Porcelain tile remains the top long-term waterproof option due to its low water absorption rate of at or below 0.5 percent, especially in primary bathrooms and wet rooms.
- Proper waterproofing depends heavily on the installation quality, including moisture testing, membrane use, slope work, and sealing seams, not just the material chosen.
- Vinyl planks and SPC are cost-effective, waterproof, and easier for DIY projects, but their seams and edges require careful sealing with silicone caulk to prevent water ingress.
- Seams, grout porosity, and inadequate membrane installation are common failure points that can lead to subfloor water damage, regardless of material quality.
- Prioritizing a skilled installer who explicitly details waterproofing steps surpasses material selection in ensuring bathroom floor longevity.
Table of Contents
- Which Waterproof Bathroom Flooring Fits Your Situation?
- Why Porcelain Tile Is the Top Long-Term Choice
- Luxury Vinyl: Waterproof Planks, But Watch the Seams
- What About Sheet Vinyl, Stone, and Wood?
- What a Waterproof Floor Installation Should Actually Include
- What to Budget for Cost and Maintenance
- How Tampakitchenandbath Waterproofs Every Bathroom Floor
- The Real Lesson Homeowners Miss About Waterproof Flooring
- Ready to See What a Properly Waterproofed Bathroom Looks Like?
- Sources
Which Waterproof Bathroom Flooring Fits Your Situation?
Not every bathroom needs the same floor. A primary bath that sees two showers a day and eventually has to help sell your house has different needs than a half-bath your guests use twice a month.
Here’s how priorities typically map to material choices:
- Durability and resale value: porcelain tile, installed over a proper membrane, holds up best and reads as a premium finish to future buyers.
- Budget or DIY project: luxury vinyl plank (LVP) or SPC gives you a waterproof floor without hiring a tile setter.
- Warmth underfoot: LVP wins here, since it doesn’t conduct cold the way porcelain does, unless you’re pairing tile with radiant heat.
- Slip safety in a wet-heavy household: look for tile rated for wet areas, or textured LVP with an embossed surface.
- Small guest bath: either material works fine; go with whatever matches your budget since traffic and moisture exposure are lower.
- Primary bath with a walk-in shower: porcelain over a membrane is worth the extra cost, especially around the walk-in tub or shower transitions where water pools.
- Rental property: SPC rigid-core vinyl tends to be the smartest compromise between looks, waterproofing, and cost, since tenants are hard on floors and you’re not chasing resale value.
- Wet-room style bath with a floor drain: this is porcelain or sheet vinyl territory only, since it requires precise slope work that click-lock vinyl can’t accommodate.
One caution applies across every option here: no waterproof flooring is bulletproof at its seams. A floor with no membrane, or a seam that wasn’t sealed correctly, will let water into your subfloor no matter what the box promised.
Why Porcelain Tile Is the Top Long-Term Choice
Porcelain’s density is what separates it from cheaper ceramic. At or below 0.5 percent water absorption, porcelain tile is effectively waterproof through the body of the material, not just on a glazed surface layer. That’s a meaningful difference if a tile ever chips or a grout line wears thin.
Slip safety is where a lot of buyers get tripped up, literally. Look for a DCOF (Dynamic Coefficient of Friction) rating of 0.42 or higher for wet-area tile. If a manufacturer or showroom can’t tell you the DCOF rating on a tile you’re considering for a shower floor, treat that as a red flag.
Statistic Callout: Porcelain’s sub 0.5% absorption rate is why it’s routinely recommended over standard ceramic for primary bathrooms and wet rooms, where the tile faces standing water and constant humidity.
Here’s the part most homeowners miss: tile and grout are not a waterproof system on their own. Grout is porous. Water finds its way through hairline cracks eventually. A waterproofing membrane like Schluter DITRA or KERDI installed beneath the tile is what actually keeps moisture out of your subfloor and the joists below it.
A few buying notes worth keeping in mind:
- Choose matte or textured finishes over polished tile for any wet-area floor.
- Wood-look porcelain gives you the look of hardwood without the water risk, a popular pick for homeowners who love the aesthetic but not the maintenance.
- Expect to pay roughly $12 to $35 per square foot installed, depending on tile grade, layout complexity, and labor rates in your area.
- Hire a professional for anything beyond a simple square layout, especially where slope-to-drain or a curbless shower is involved.
Luxury Vinyl: Waterproof Planks, But Watch the Seams
Modern LVP and SPC (rigid-core vinyl) are engineered to be waterproof all the way through the plank. The vulnerability isn’t the material, it’s where two pieces meet. Seams and edges are where water finds a way in if they aren’t detailed properly.
Click-lock floating vinyl is the DIY-friendly route. It snaps together without adhesive, which makes it forgiving for a weekend project, but it also means the floor needs a flat, stable subfloor to lock tightly and stay watertight. Glued-down vinyl costs more in labor but resists movement better in high-traffic bathrooms. SPC, with its rigid limestone-composite core, generally holds up better than standard LVP under heavy use or in a household with kids and pets.
Pro Tip: Run a bead of 100% silicone caulk, not standard latex caulk, along every wall edge and around the toilet flange after installing click-lock vinyl. That’s the detail most DIY installers skip, and it’s the first place a leak shows up.
A few practical notes before you buy:
- Choose SPC over standard LVP for bathrooms with heavy foot traffic or kids.
- Glue down vinyl near tubs and showers where water exposure is constant.
- Expect roughly $3.50 to $10 per square foot installed, a fraction of porcelain’s cost.
- For rentals or quick flips, SPC often strikes the best balance of cost, durability, and installation speed.
What About Sheet Vinyl, Stone, and Wood?
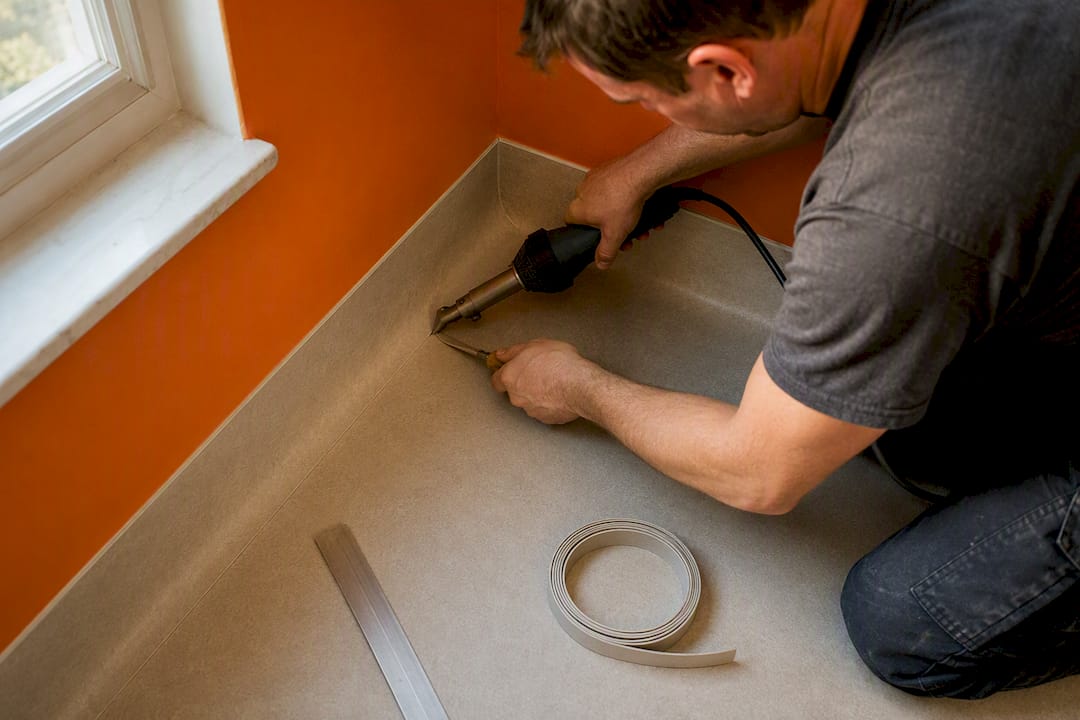
Sheet vinyl deserves more credit than it usually gets. Installed as one continuous piece and heat-welded with the edges coved up the wall, it has no seams at floor level at all. That makes it a strong pick for laundry rooms, utility baths, or budget-conscious full remodels where a completely sealed floor matters more than a premium look.
Natural stone tile looks beautiful but comes with real upkeep. It needs sealing on a regular schedule, roughly once a year for most stone types, and it can be slicker than porcelain unless you choose a honed or textured finish. Cost tends to run higher than standard porcelain too.
Solid hardwood and laminate belong on the avoid list for full bathrooms. Both absorb water and swell or delaminate in wet environments. Engineered wood with a waterproof core can work in a powder room with no shower, but it still needs extra sealing at every joint and isn’t something we’d recommend for a primary bath.
What a Waterproof Floor Installation Should Actually Include
This is where most bathroom floors succeed or fail, and it has almost nothing to do with the material you picked. Installation quality is usually the deciding factor in whether a floor holds up, not the brand name on the box.
Here’s what a proper installation includes, in order:
- Moisture testing of the subfloor before any flooring goes down, to confirm the substrate is dry enough to work with.
- Flatness correction, since tile and rigid vinyl both require a subfloor within a tight tolerance, typically no more than 1/8 inch variation over 10 feet.
- Membrane installation like Schluter DITRA or KERDI under tile, bonded and sealed at every seam and penetration.
- Slope-to-drain work in showers and wet rooms, so water moves toward the drain instead of pooling.
- Seam welding for sheet vinyl, done with heat rather than adhesive alone, to eliminate gaps.
- Silicone sealing at penetrations, meaning toilet flanges, drain edges, and wall transitions, not just the tub surround.
Pro Tip: When you’re comparing bids, ask each contractor directly whether a waterproofing membrane is included in the line-item price or listed as an upgrade. If it’s not mentioned at all, that’s your answer about how carefully the job will be done.
Watch for these red flags in any bid:
- No mention of a membrane product by name under tile.
- No moisture testing step listed before installation begins.
- Vague language like “waterproofed as needed” instead of a specific method.
- No slope specification for shower floors or wet rooms.
If you’re early in the process, planning your remodel around these waterproofing steps before you fall in love with a tile pattern saves a lot of frustration later.
What to Budget for Cost and Maintenance
Installed costs vary more by labor and prep than most people expect. Porcelain runs roughly $12 to $35 per square foot installed, while quality LVP or SPC lands closer to $3.50 to $10 per square foot. Sheet vinyl tends to sit at the lower end of that range, and natural stone often exceeds porcelain once sealing and specialized labor are factored in.
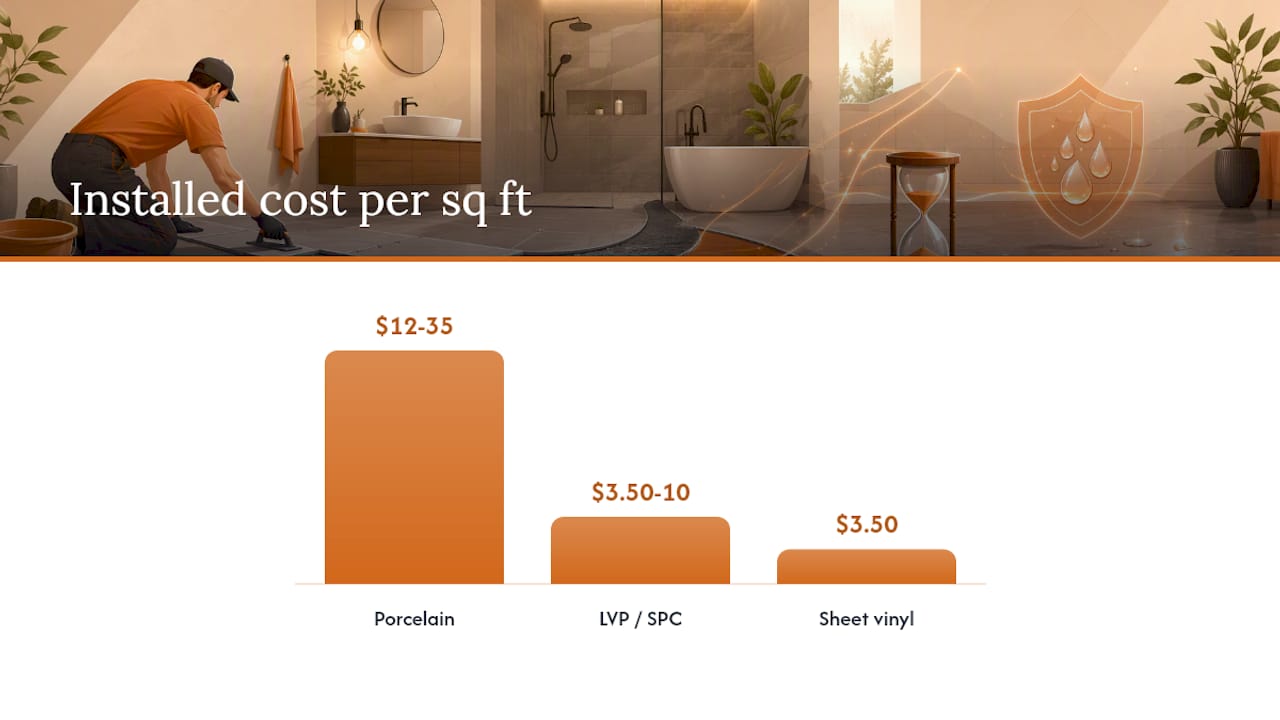
Statistic Callout: That roughly threefold cost gap between porcelain and vinyl is the single biggest factor homeowners weigh when deciding between the two, alongside how long they plan to stay in the home.
Maintenance is where the material differences show up over time.
- Reseal grout lines every 1 to 2 years to keep water from wicking into the joints.
- Reseal natural stone annually, or more often in a high-humidity climate.
- Check silicone caulk at seams and penetrations yearly, and replace it the moment it cracks or peels.
- Expect vinyl planks to need spot replacement occasionally, while porcelain rarely needs anything beyond grout upkeep.
Most flooring warranties cover manufacturing defects but exclude water damage traced back to a poor installation, which is exactly why the installer matters as much as the product.
How Tampakitchenandbath Waterproofs Every Bathroom Floor
Every project runs under a dedicated Lead Carpenter who confirms waterproofing steps, membrane installation, and transition details aren’t skipped for the sake of schedule. Up-front pricing means those steps are priced into your quote from day one, not added later as a surprise.
The Work Clean System also keeps job sites organized enough to actually inspect membrane seams and transitions before flooring goes down. When you’re vetting any contractor, ask three things: is a membrane named specifically, is subfloor moisture tested, and is the transition detail at tubs and drains spelled out in writing.
The Real Lesson Homeowners Miss About Waterproof Flooring
Most flooring guides treat this decision like a shopping problem: pick porcelain or pick vinyl, compare swatches, done. That framing undersells what actually determines whether your bathroom floor lasts 20 years or fails in three.
The material matters less than the person installing it. A gorgeous porcelain floor with no membrane underneath is a slower, more expensive way to rot a subfloor than cheap vinyl with a caulk gun run around the edges. Conventional advice spends too much time on aesthetics and cost per square foot, and not nearly enough on asking installers to name their waterproofing method out loud.
If you take one thing from this guide, make it this: prioritize the installer’s process before the product catalog. Ask about DCOF ratings for slip safety, ask about membrane brand and coverage, ask how seams get sealed. A floor is only as waterproof as its weakest transition, and that’s a build-quality question, not a shopping question.
— MediaBeast
Ready to See What a Properly Waterproofed Bathroom Looks Like?
Tampakitchenandbath handles design and construction under one roof, with membrane installation and a dedicated Lead Carpenter overseeing every waterproofing step from subfloor to grout line. That’s the difference between hoping your contractor got the details right and having someone accountable for them in writing.
Browse the Tampa Bathroom Remodeling Gallery to see finished porcelain and vinyl installations up close, then check the bathroom remodel cost guide to get a realistic sense of your budget. When you’re ready, request an estimate and get a Lead Carpenter assigned to your project from day one.
Sources
- Bathroom Flooring Guide: Best Materials, Costs & What to Avoid (2026)
- Best Waterproof Bathroom Flooring 2026 (Australia): What Actually Works | The Flooring Centre
- Bathroom Flooring Choices: Tile, Vinyl, Wood, and Stone Compared