
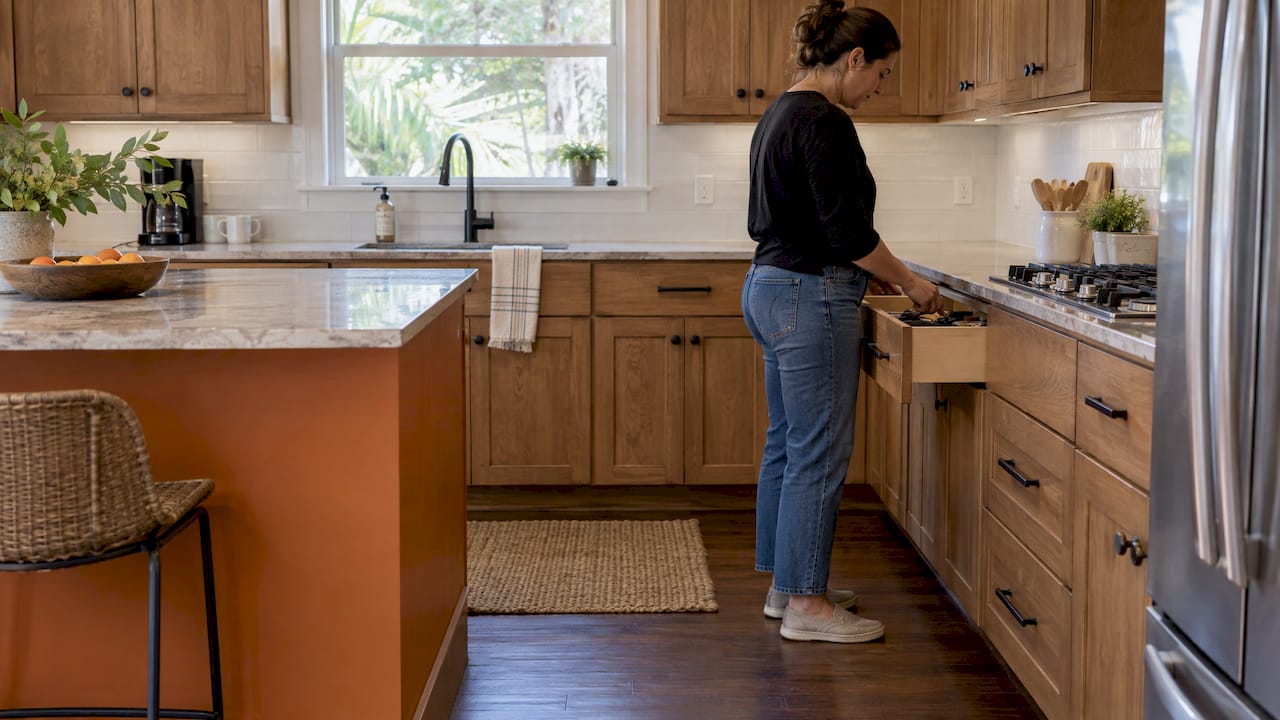
Put hardware on the stile opposite the hinges, about 2.5 to 3 inches from the cabinet’s edge on a flat door, and centered on drawer fronts. Wall cabinet hardware goes near the bottom corner of the door. Base cabinet hardware goes near the top corner. Those few rules cover most kitchens and bathrooms. The details below cover framed doors, slab doors, wide drawers, tall pantry doors and the drilling method that keeps every hole in the same place.
TL;DR
- Doors: hardware goes on the side opposite the hinges. On wall cabinets it sits near the bottom corner, and on base cabinets near the top corner.
- Drawers: center one knob or pull on narrow fronts. On wide fronts, use two knobs or one long pull.
- Sizing: a pull about one-third the width of the drawer is a common starting ratio.
- Drilling: use a jig or template, mark from one reference point, and test the position with putty or tape before you drill.
- Doors usually get knobs and drawers usually get pulls, but style and function can override that.
Table of Contents
- The standard placement rule
- Placement by door style
- Drawer fronts
- Knobs vs. pulls: which goes where
- Sizing: how big should hardware be?
- How to mark and drill without mistakes
- Common mistakes
- Planning hardware in a kitchen or bath remodel
- Perspective: why we settle hardware early
- Remodeling in Tampa? We handle the whole kitchen or bath
- FAQ
- Sources
The standard placement rule
Cabinet hardware follows one logic. It sits where your hand naturally lands, and it stays far enough from the edge that the cabinet doesn’t look crowded.
For doors, the usual approach is to install hardware on the stile opposite the hinges and center drawer hardware. Forbes Home gives a useful buffer. Wall cabinet hardware goes as low as possible while keeping a 1 to 2 inch gap from the bottom edge, and base cabinet hardware goes as high as possible with a 1 to 2 inch gap from the top edge. Both sit opposite the hinge.
The reasoning is practical. You open an upper door by reaching up, so a low handle is easier to grab. You open a lower door standing over it, so a high handle saves you from bending.
Quick reference by cabinet type
| Cabinet or front | Where the hardware goes | Typical measurement |
|---|---|---|
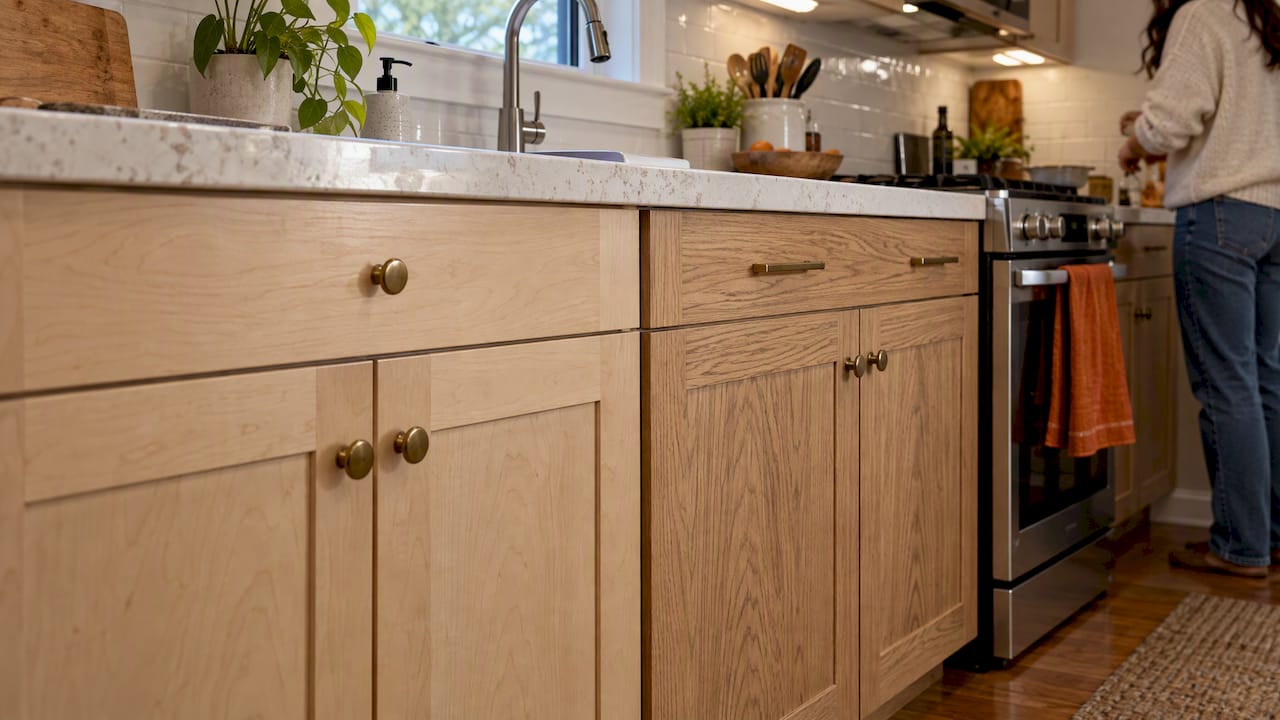
| Wall cabinet door | Bottom corner, opposite the hinges | About 2.5 to 3 inches from the bottom and 1 inch from the side edge |
| Base cabinet door | Top corner, opposite the hinges | About 2.5 to 3 inches from the top and 1 inch from the side edge |
| Narrow drawer (up to 12 to 16 inches) | Dead center, one piece | Horizontal and vertical center |
| Wide drawer (over 18 to 24 inches) | One long pull or two knobs | Two knobs sit in the first and third columns of a nine-part grid |
| Tall pantry or broom closet | Around adult elbow height | More vertical flexibility |
The door measurements come from The Spruce. The drawer and pantry ranges come from Forbes Home. Treat these as starting points. Your door size, hardware size and personal reach all shift the final spot a little.
Placement by door style
Door construction changes the answer more than anything else. Look at your door before you measure.
Framed and Shaker doors
These doors have a visible frame made of vertical stiles and horizontal rails. The hardware usually follows that frame. Two layouts are common:
- Centered on the stile. The knob sits in the middle of the stile’s width. This reads as clean and current, and it works well on Shaker doors.
- Traditional corner placement. The end of the pull lands at the point where the stile and rail meet. For an updated look, center it on the stile and align it with the rail edge.
If your rails and stiles are 2 inches wide, a knob centered in the frame lands 1 inch from the corner in both directions. If you are still choosing between door styles, our guide to Shaker vs. slab cabinets explains how each one changes the look and the practical details, and our overview of cabinet door styles shows the full range.
Slab (flat) doors
Slab doors have no frame to guide you, so you set the position by measurement. On modern flat-front cabinets, hardware is typically placed 2 to 3 inches from the corner edges. The Spruce’s figures are 2.5 to 3 inches from the top or bottom edge and about 1 inch from the side. Pick one set of numbers and use them on every door in the room.
A tidy variation for slab doors is to run a long pull vertically along the door edge. This gives a minimalist look, and it suits tall doors well.
Inset and beaded-frame doors
These doors sit flush inside the frame. Keep the hardware on the door itself, centered on the door’s own stile or at the standard distance from the corner. Make sure the pull’s length doesn’t run so close to the frame that your fingers hit it when you grip.
Drawer fronts
Drawers are simpler. The rule is to center the hardware.
- Narrow drawers. Forbes Home says drawers up to 12 to 16 inches wide generally take one knob or pull at the horizontal and vertical center.
- Wide drawers. Over 18 to 24 inches, you can use one wide pull or two knobs. The Spruce suggests that for drawers wider than about 24 inches, two knobs go in the first and third columns of a nine-part grid. Divide the face into three columns by three rows and mark the center of the left and right columns on the middle row.
- Painter’s tape grid. The Spruce also describes using painter’s tape to lay out that nine-part grid on the drawer front. It takes two minutes and removes the guesswork.
Stacked drawers
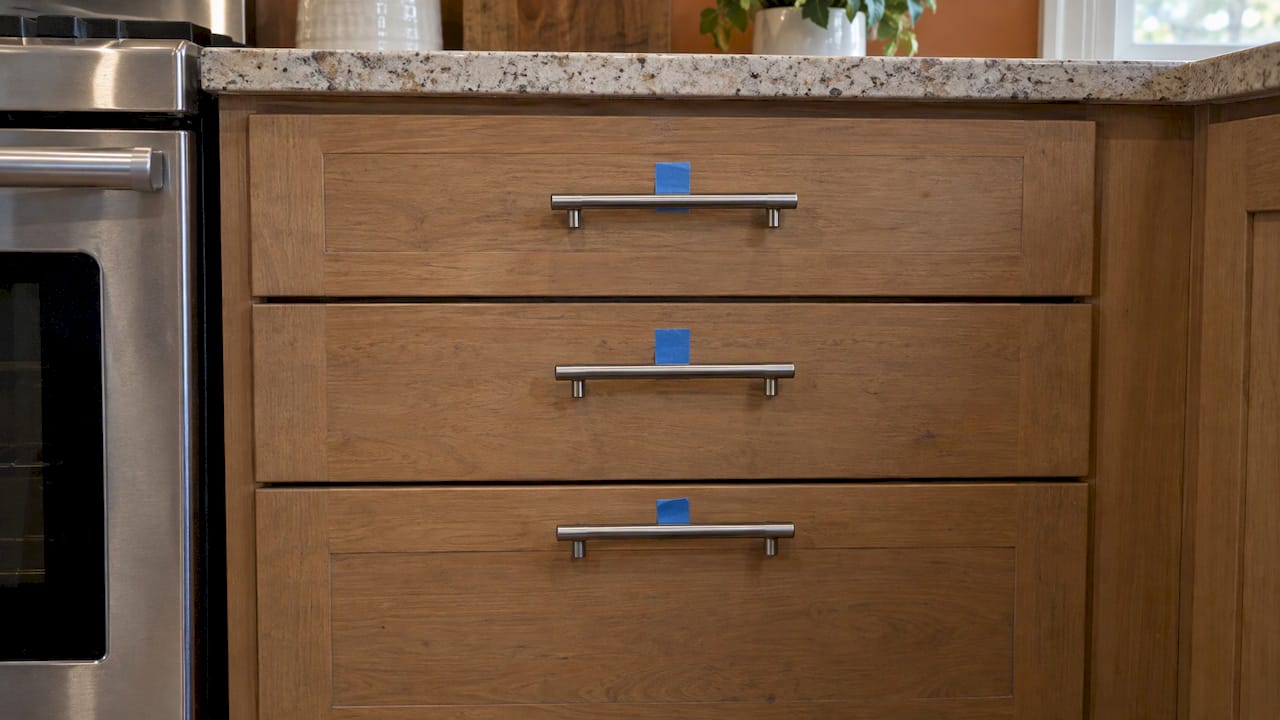
A bank of three or four drawers can look off even when every pull is mathematically centered. This Old House has a fix: move the bottom drawer’s pull up about 1/2 inch and the next one up about 1/4 inch, then center the top drawer’s pull. The lower pulls then appear centered to the eye. Try it with tape before you commit.
Tall pantry and appliance doors
Tall doors, such as pantry or broom-closet doors at 84 to 96 inches, give you more leeway. Forbes Home says hardware there should generally be installed at adult elbow height. Long pulls also suit the scale of these doors, as Livingetc notes in its guide to knobs vs. pulls.
Knobs vs. pulls: which goes where
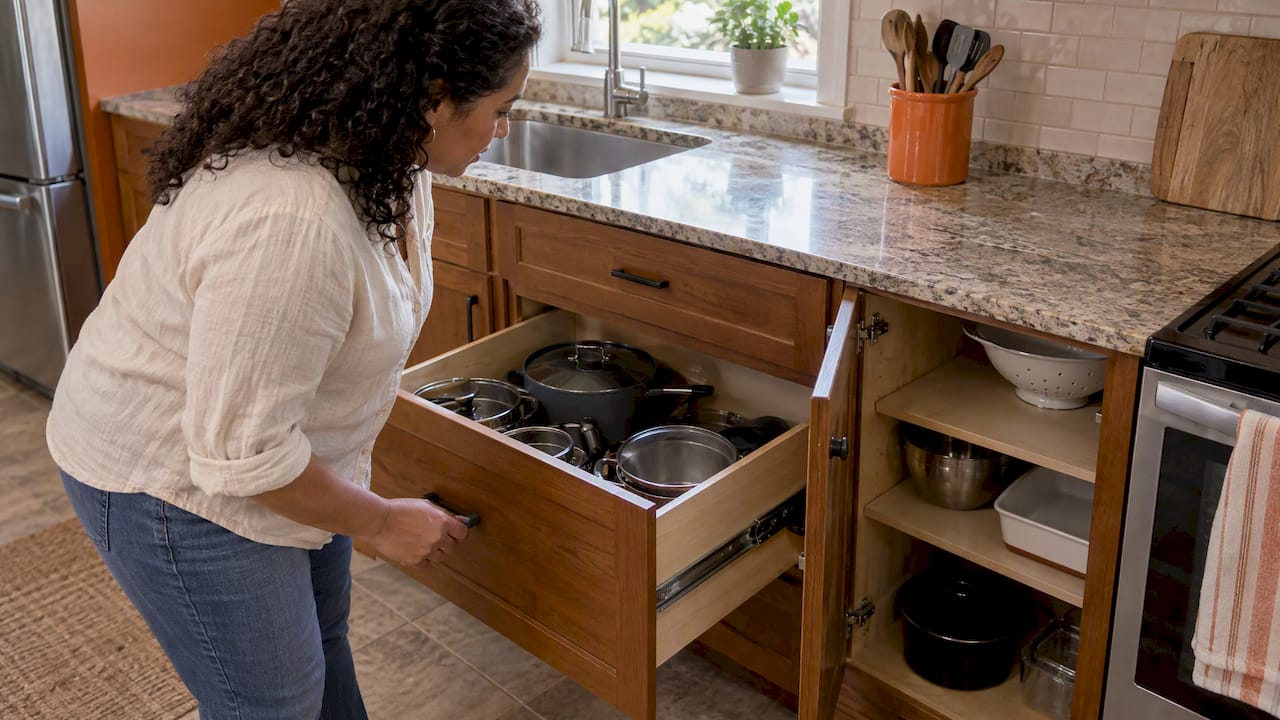
The most common pairing is knobs on doors and pulls on drawers. There is a reason for it. Livingetc, quoting designers, explains that drawers often carry more weight and need more leverage, so pulls suit them better, while knobs are typical for doors.
Here is how to decide in practice:
- Start with function. Heavy drawers, such as pots and pans or deep file drawers, are easier to open with a pull you can wrap your fingers around.
- Match the style. A sleek modern kitchen looks different from a traditional one with ornate details. Hardware style should drive the choice of shape, finish and detail, not just position.
- Consider budget. Knobs are generally simpler and less expensive than pulls, and they use a single hole.
- Check the frame. Make sure a knob is not wider than the door’s frame, or it will overhang the stile.
Mixing is fine. Knobs on doors with pulls on drawers is the classic combination, and using pulls everywhere gives a more streamlined, contemporary look. What matters is that you repeat the same logic through the room.
Sizing: how big should hardware be?
Size and placement work together. A pull that’s too small looks lost, and one that’s too large can crowd the door.
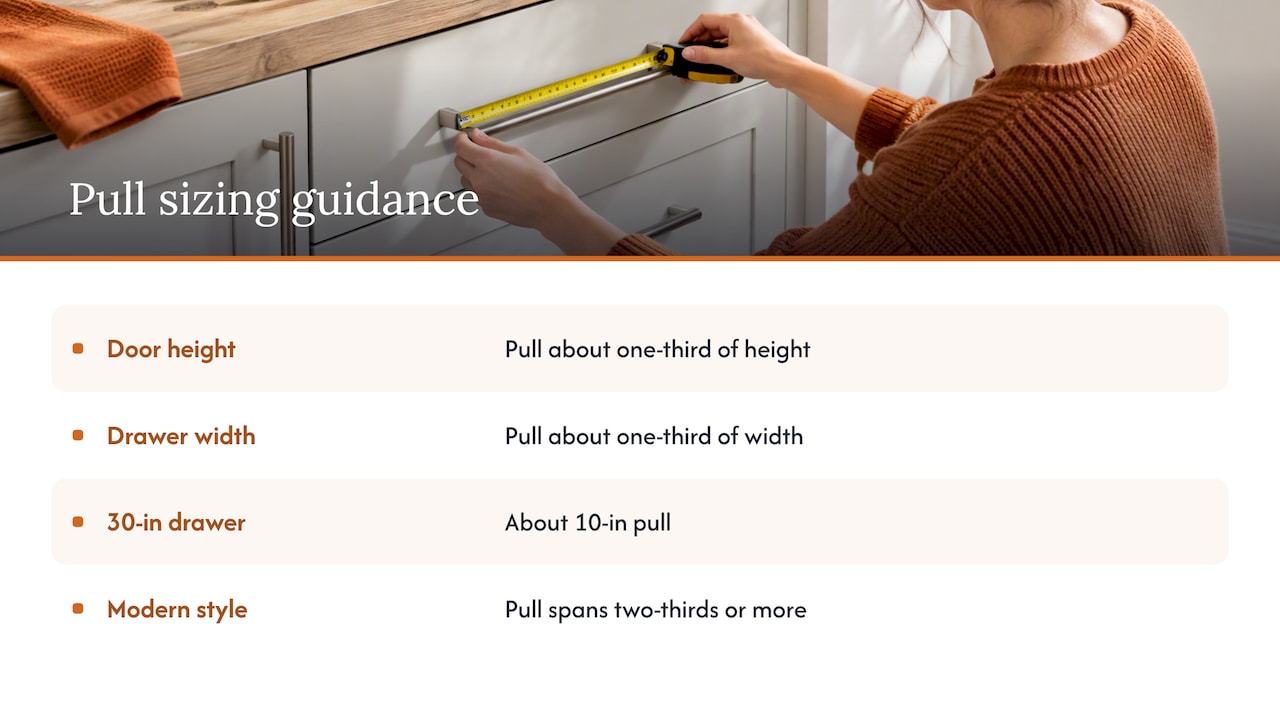
The one-third rule is the common guide. It suggests choosing pulls about one-third the height of a cabinet door or one-third the width of a drawer, which usually looks best. On a 30-inch drawer, that means a pull around 10 inches long. Modern designs sometimes go longer: pulls that span two-thirds or more of the drawer can suit sleek styles.
For pulls, you also need the center-to-center measurement, which is the distance between the two screw holes. If you are replacing existing hardware, measure it before you shop, because a new pull with a different spacing means filling and redrilling holes. Knobs have a single screw hole, so they are far easier to swap.
Replacing hardware on existing cabinets
If you are refreshing an older kitchen, the cheapest approach is to buy pulls with the same center-to-center spacing as the old ones. That way, your holes are already drilled. If you plan to repaint or refresh the finish first, doing it before you install new hardware keeps the new pieces clean. Professional cabinet painting and refinishing is worth considering at that stage, since the hardware you pick should suit the finish and door style you end up with.
How to mark and drill without mistakes
Most placement errors happen at the drilling stage. A hole drilled 1/8 inch off is visible once the hardware is on. Follow this order.
- Hang the doors first. Van Dyke’s Restorers advises installing doors before attaching hardware, which avoids drilling on the wrong side or corner.
- Choose your measurements. Write down the distance from the edge and from the top or bottom, and use it for every door of that type.
- Test the look. Use wall putty to hold a knob or pull in the position you want, then step back and look. The same Van Dyke’s guide suggests this before drilling.
- Use a jig. This Old House recommends a jig or template for consistent placement, and says a DIY jig from scrap wood keeps holes level and centered. Adjustable jigs are sold at hardware stores, but a block of plywood with guide holes works.
- Mark from one reference point. Always measure from the same edge. Double-check before you drill, and start with pilot holes.
- Choose the right bit. Amerock’s installation sheet says a 3/16-inch hole is recommended for most hardware, but a 1/4-inch hole is required for pulls with studs.
- Back the hole with tape or scrap wood. Drilling through the door face can splinter the back. A piece of scrap behind the drill point prevents that.
Check your hardware screws
Screws that come with hardware are often sized for a standard door thickness. If your doors are thicker or thinner than average, or you have an overlay drawer front on top of a box front, buy screws with the right length. A screw that is too long will poke through the face, and one that is too short won’t hold.
Common mistakes
- Mixing measurements. Using 2.5 inches on one door and 3 inches on the next is hard to spot until the last piece is on.
- Forgetting the hinge side. Hardware belongs on the opposite side from the hinges. On a pair of doors, mirror the placement.
- Ignoring the drawer line. A knob on a drawer sitting just above a door’s knob should align with it where possible.
- Oversized knobs on narrow stiles. If the knob hangs over the edge of the stile, go down a size.
- Skipping the dry run. Tape and putty cost nothing and save you from filling holes.
- Choosing hardware after cabinets are built. Tell your cabinet maker or installer which hardware you want. Our note on choosing appliances before cabinets applies here too: decisions made early prevent rework later. Appliance handles and cabinet pulls should also be planned together so they don’t collide at a corner.
Planning hardware in a kitchen or bath remodel
In a full remodel, hardware placement is a design decision made before the cabinets are ordered. A few things to settle with your contractor:
- Door style first. Framed, slab or inset determines the placement options, so lock in the style before the hardware.
- Drawer layout. Plan the number and sizes of drawers so you know whether you need single pulls or paired knobs.
- Counters and backsplash. Hardware on a base door near a corner or a tall backsplash needs enough clearance.
- Small spaces. In a compact kitchen, smaller hardware and consistent spacing keep things calm. See our tips for remodeling a small kitchen.
- Bathroom vanities. The same rules apply: centered on drawers, and upper corner placement on vanity doors. Wide vanity drawers often take a single long pull.
For a wider look at what makes a cabinet layout work, see our guide to kitchen cabinets and cabinet design.
Perspective: why we settle hardware early
We handle design and construction under one roof, so hardware is never an afterthought on our jobs. It is a design decision that gets made while the cabinets are still on paper.
Here is what we have seen. Hardware problems rarely come from a bad measurement. They come from a decision that nobody owned. The designer picked pulls, the cabinet maker built the doors, and the installer drilled on site with no template. Every hand-off is a chance for a hole to land in the wrong place.
That is why each of our projects has a dedicated Lead Carpenter. One person sees the plan from start to finish, so the placement you approved is the placement that gets drilled. We also give up-front pricing with detailed item lists, so hardware is a line you can see, not a surprise.
Our advice: pick a door style, choose hardware that suits it, decide the placement once, and write it down for every door and drawer. Then use a jig. It is a small habit that makes a kitchen look finished.
MediaBeast
Remodeling in Tampa? We handle the whole kitchen or bath
If you are placing hardware as part of a larger project, we can take care of it from design to installation. Bath & Kitchen Gallery designs and builds kitchens and bathrooms in the Tampa area, with up-front pricing, a dedicated Lead Carpenter on each job and a Work Clean System to keep dust and disruption down.
Our published ranges give you a sense of scale. Our kitchen remodel pricing runs from $41,200 to $52,050 for a small U-shaped kitchen with an island, up to $74,100 to $93,600 for a large kitchen with an island. On the bathroom side, a small 3-fixture bath with a shower is listed at $22,100 to $30,000. See the full list on our bathroom remodel cost page, or start with our kitchen remodeling page to talk through your project. Final cost depends on scope and materials.
FAQ
What is the 1/3 rule for cabinet hardware?
It is a sizing guide: choose a pull about one-third the height of a cabinet door or one-third the width of a drawer. Hardware Resources says these lengths usually look best. Longer pulls, up to two-thirds of the drawer width, can suit a sleek modern design.
What is the standard placement for cabinet hardware?
On doors, hardware goes opposite the hinges. On wall cabinets it sits near the bottom corner, and on base cabinets near the top corner, usually 2.5 to 3 inches from the edge. Drawer hardware is centered. Use the same measurements throughout the room.
Should I use knobs or pulls?
Use knobs on doors and pulls on drawers as a default, since drawers often carry more weight and need more leverage. Long pulls also suit tall pantry and appliance doors. Beyond that, it comes down to your style and budget.
How do I place hardware on a wide drawer?
For drawers over about 24 inches, use two knobs or one long pull. For two knobs, divide the drawer front into a nine-part grid and center the knobs in the first and third columns. Use painter’s tape to mark it before you drill.
Sources
- How To Install Cabinet Hardware, This Old House
- How to Locate Cabinet Knobs and Pulls, This Old House
- How To Choose And Install Cabinet Hardware, Forbes Home
- Where to Put Knobs and Handles on Kitchen Cabinets, The Spruce
- When should you use knobs vs pulls in a kitchen?, Livingetc
- One-third rule pull length installation sheet, Hardware Resources
- Installing New Cabinet Hardware, Amerock