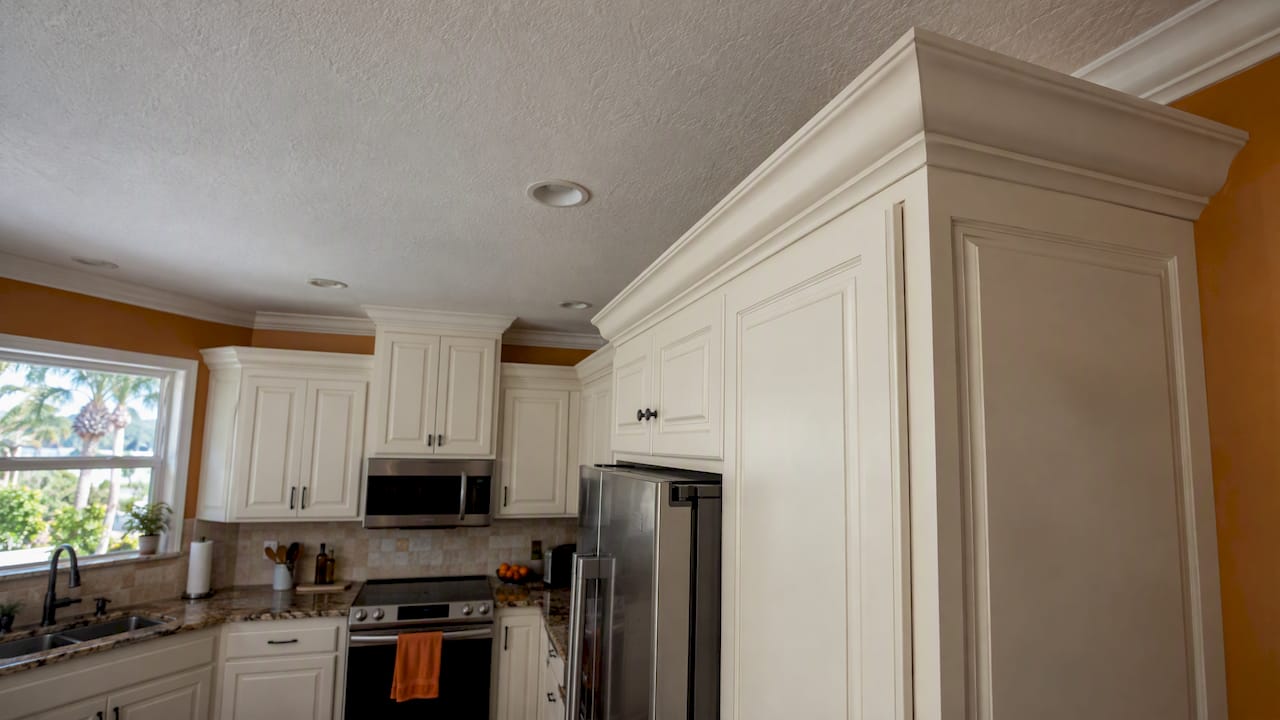

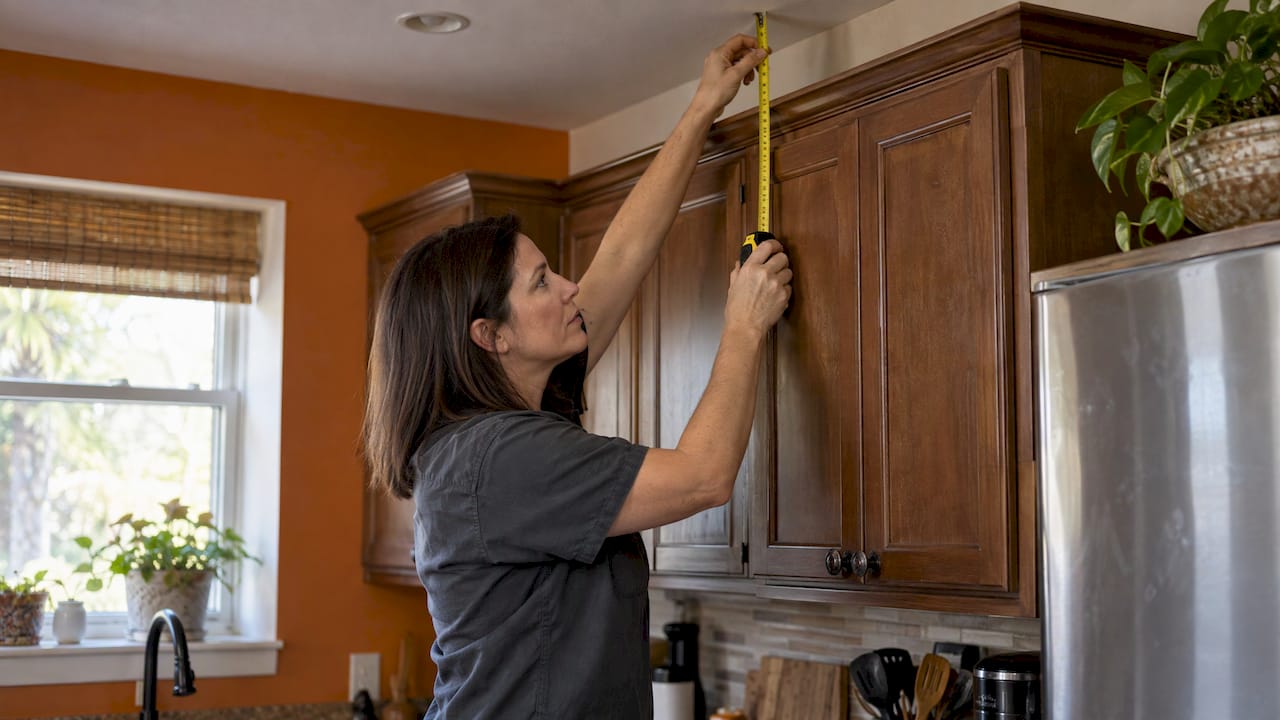
Cabinets that run to the ceiling remove the dead gap above standard uppers, add storage and give a kitchen a built-in, finished look. They work best on 8- to 9-foot ceilings. The right method depends on your ceiling height, your existing cabinet height and how much of the budget you want in the upper wall. Below you’ll find the terms to use, the height math, the ways to build it and the costs to plan for.
TL;DR
- Cabinets that reach the ceiling are called ceiling-height or full-height cabinets. Two rows of uppers are called stacked cabinets.
- On an 8-foot ceiling, a single 42-inch upper usually reaches the top. On a 9-foot ceiling, you generally stack cabinets or add a riser and crown molding.
- Going to the ceiling costs more than standard uppers, because it means extra cabinet boxes or custom trim plus more installation labor.
- Ceilings above 10 feet and very low ceilings are the two cases where the look can feel off.
- Measure the real ceiling height in several spots before you order anything. Ceilings and soffits are rarely level.
Table of Contents
- What are cabinets that go to the ceiling called?
- Should your cabinets go to the ceiling?
- How ceiling height changes the decision
- Three ways to get cabinets to the ceiling
- Finishing the top: crown, reveal or flush
- What cabinets to the ceiling cost
- How to make existing cabinets go to the ceiling
- A quick decision guide
- Our perspective: plan the wall as part of the whole kitchen
- Plan your cabinets-to-the-ceiling kitchen with us
- FAQ
- Sources
What are cabinets that go to the ceiling called?
You will see several names for the same idea. Designers and manufacturers say “full-height cabinets,” “ceiling-height cabinets” or “floor-to-ceiling cabinetry.” When the wall cabinets are built as two separate boxes, one above the other, the result is called stacked upper cabinets. A “tall” or “tower” unit is a different thing: it runs from the floor upward, often as a pantry or appliance column, and is a separate cabinet type from a wall cabinet that has been extended.
The space above a standard run has its own vocabulary too. A drywall box above the cabinets is a soffit, also called a bulkhead or furdown. Removing it is often the first step when a homeowner decides to take cabinets all the way up. A flat board that sits on top of a short cabinet to lift it toward the ceiling is a riser, sometimes called a frieze board, and crown molding is then fastened to it.
Knowing these terms helps when you talk to a designer or contractor. “I’d like upper cabinets to the ceiling” is clear. “I’d like stacked uppers with a 15-inch top row” is a quote-ready request.
Should your cabinets go to the ceiling?
There is no single right answer. Homebuilding says there is no right or wrong choice for floor-to-ceiling cabinetry and that it can be tailored to different styles. The same piece warns that it may feel overbearing in a low-ceiling kitchen, and suggests a ceiling height of at least 2.1 m (about 7 feet) so the room has space to breathe.
The reasons people go to the ceiling are practical as much as visual:
- More storage. The 12 to 24 inches above a standard upper hold seasonal platters, small appliances and rarely used cookware.
- A cleaner line. Nothing sits on top of the cabinets, so there is no awkward gap and no collection of decorative baskets.
- Less to clean. Dust and kitchen grease settle on the tops of cabinets that stop short of the ceiling. With the space enclosed, there is no exposed surface to wipe.
- A built-in look. Continuous vertical lines make a ceiling feel taller and the kitchen more custom.
The trade-offs are about use. The top shelves are high, so you need a step stool for items you reach for rarely. A very small kitchen with dark cabinet finishes can feel heavy with a full wall of doors. A good design answers both: lighter finishes, glass or open sections in the middle, and a clear plan for what lives where.
If you are weighing doors against open shelves on the upper wall, our guide to upper cabinets versus open shelving walks through that choice. For storage problems that more boxes will not fix, see why full cabinets still fail.
How ceiling height changes the decision
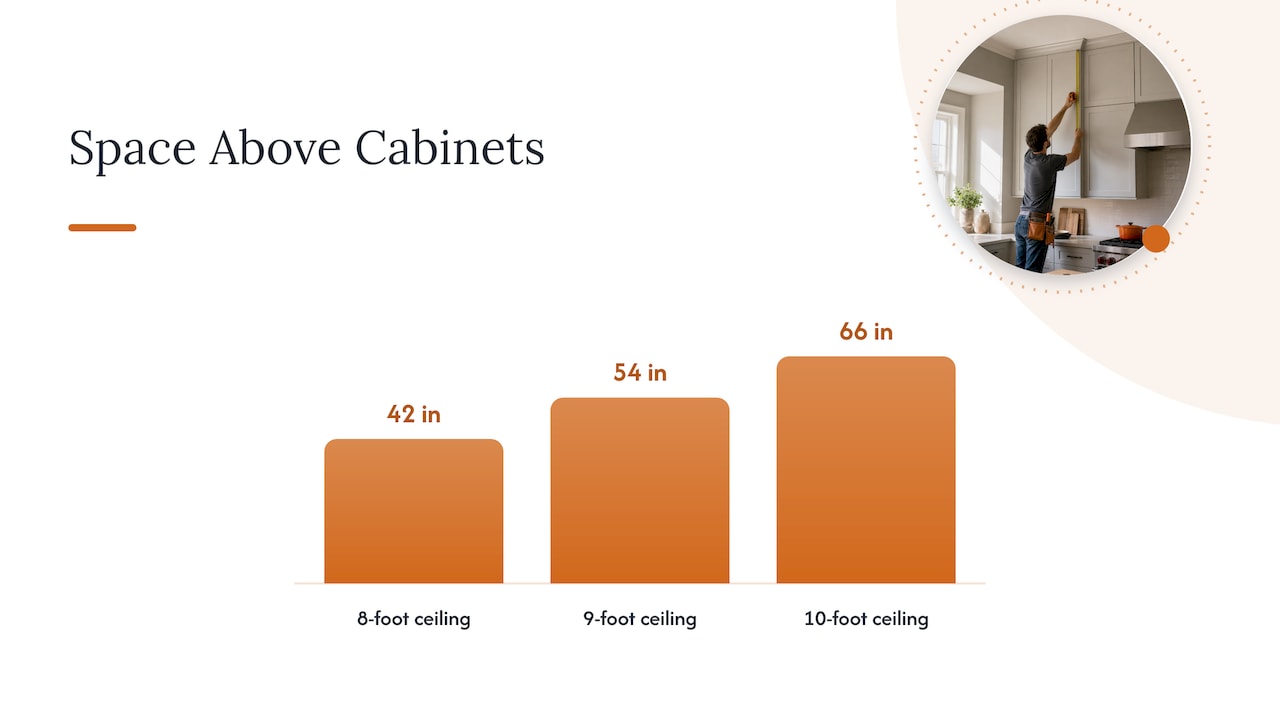
The height math is simple once you know the starting point. The Spruce explains that wall cabinets are typically mounted about 54 inches above the floor. That leaves 42 inches of vertical space under an 8-foot ceiling and 54 inches under a 9-foot ceiling.
| Ceiling height | Space above the 54-inch mounting line | Typical way to fill it |
|---|---|---|
| 8 feet | 42 inches | One 42-inch cabinet |
| 9 feet | 54 inches | A 36-inch cabinet plus an 18-inch cabinet stacked above |
| 10 feet | 66 inches | A tall stacked run or a tall run with a shorter top row, planned carefully |
| Over 10 feet | More than 66 inches | Usually not worth running cabinets all the way up |
The 8- and 9-foot rows come straight from The Spruce’s examples. The 10-foot row is simple subtraction from the same 54-inch mounting height. The same source advises against running cabinets all the way up on ceilings higher than 10 feet, calling it neither practical nor attractive to install such a mass of cabinets. On very high ceilings, a common compromise is to stop at a sensible height and use the upper wall for architectural detail, lighting or a feature.
Many homes built in the last 50 years already have a gap between the top of the wall cabinets and the ceiling. The Spruce says that gap is often 1 to 2 feet, with wall cabinets typically 32 or 36 inches tall. That is the space you are deciding whether to fill.
Why exact measurements matter
Ceilings are not perfectly level, and floors slope too. Measure from the floor to the ceiling at both ends of each wall and in the middle. Use the tightest number to plan the cabinets, and let trim absorb the difference. If you are removing a soffit, check what is inside it first. Ducts, wiring or plumbing may need to be rerouted, and that changes the schedule and the budget.
Three ways to get cabinets to the ceiling
There are really three routes. Each gives a different look, cost and level of storage.
1. Single tall cabinets
On an 8-foot ceiling, a 42-inch upper often reaches the top cleanly, and crown molding finishes the last inch or two. It is the simplest option: one door per opening, one box to hang, fewer seams. The limit is height. Past a certain point, one very tall door looks top-heavy and is awkward to open.
2. Stacked upper cabinets
Stacking puts a second, shorter row above the first. The Spruce’s example for a 9-foot ceiling is a 36-inch cabinet with an 18-inch cabinet above it. The top boxes can have doors that match the lower ones, or they can be glass-front for display. Lining up the door joints and keeping a consistent reveal between the rows is what makes this look custom rather than added on.
Stacking adds the most storage. It also adds the most boxes and doors, so it costs the most of the three routes.
3. A riser with crown molding
Where you want the look without more storage, a trim solution works. A riser board sits on top of the existing cabinets and carries crown molding that meets the ceiling. Done well, it reads as a tall cabinet. The space behind it is usually closed off rather than usable, so you gain appearance and cleanability but not shelf space. The Spruce notes that false cabinet panels or soffits can give the look at lower cost than extra-tall cabinets or a second row.
A trim-only approach is best on ceilings of modest height. Once the gap grows past about a foot or so, the trim becomes a large flat band and looks out of proportion, and stacked boxes are the better call.
Finishing the top: crown, reveal or flush
How the cabinet meets the ceiling decides whether the job looks built-in or improvised. You have three typical finishes:
- Crown molding. The classic choice. It hides small gaps and gives a forgiving line when the ceiling is slightly uneven. It suits traditional and transitional kitchens.
- Shadow reveal. A narrow, deliberate gap between cabinet and ceiling. It reads modern and clean, but it exposes any unevenness in the ceiling, so it needs careful scribing and a flat ceiling.
- Flush to the ceiling. The cabinet panel meets the ceiling with no trim. It is the cleanest look and the least forgiving. It generally calls for custom-fit work on site.
If your ceiling is out of level or has texture, crown or a scribed filler gives you room for error. Choose a reveal or flush finish only after the ceiling has been checked.
What cabinets to the ceiling cost
Expect a higher number than for standard uppers, and know where the difference comes from. The Spruce says installing wall cabinets that go to the ceiling can substantially increase the cost of a remodel, with extra-tall cabinets or a second row adding to it. The added expense comes from four places:
- More cabinet boxes, doors and hardware on the same wall.
- Custom fillers, risers and trim cut to the room.
- Longer installation, since tall or stacked boxes need to be leveled, joined and scribed to the ceiling.
- Soffit removal, patching and repainting, plus any rerouting of what is inside the soffit.
Published per-foot figures vary widely with material, finish and region, so treat any internet number as a rough orientation and get a written, itemized quote for your own kitchen.
Here is the reference point we can give you. For full kitchen projects, we publish up-front price ranges by layout on our kitchen remodel costs page. A Small U-Shaped Kitchen with Island is listed at $41,200 to $52,050, and a Large Kitchen with Island at $74,100 to $93,600. Those ranges are for the layouts as described on that page, and your exact scope, including cabinet height, determines your final price.
How to make existing cabinets go to the ceiling
You do not always have to replace everything. Starting from a kitchen with 32- or 36-inch uppers and a gap above, The Spruce lists three paths: fill the space with cabinets that fit it precisely, add a second row of wall cabinets, or close small gaps with crown molding or other decorative trim.
If the existing cabinets are sound and you can match the door style and finish, adding a top row can work. The practical steps look like this:
- Measure and plan. Confirm the true ceiling height and check for a soffit, ducts or lighting in the way.
- Remove the soffit if there is one. Patch the ceiling and wall before cabinets go in.
- Choose the method. Stacked boxes for a gap of a foot or more, a riser and crown for a smaller one.
- Build or order the top row. This Old House shows how upper boxes can be built from plywood with pocket-hole screws and face frames, then finished with crown molding to cover the gap to the ceiling. In a remodel, a professional shop usually builds them so the finish and door style match the existing run.
- Install and trim. The boxes are secured to the studs, leveled, joined to the lower row and finished with crown or a scribed filler.
- Paint or finish. A match matters. If the existing cabinets are older, the new doors may look different next to them, which is a common reason homeowners replace the whole run.
For most homeowners, the matching question decides it. New boxes beside aged finishes show. Replacing the full upper wall costs more but delivers one consistent surface.
A quick decision guide
Use these checks before you commit.
- Ceiling is 8 to 9 feet: Cabinets to the ceiling usually work well and look proportional.
- Ceiling is 10 feet or higher: Stop short and use the upper wall for lighting or architectural detail.
- Ceiling is low or the room is small: Go lighter in color or use glass-front doors on the top row so the wall does not close in.
- You rarely use top shelves: Choose the riser and crown method for the look, and keep storage in the lower, reachable zones.
- You want maximum storage: Stack, and plan the top row for items you use a few times a year.
- You have a soffit: Inspect it early. What is inside drives both the schedule and the price.
- The ceiling is uneven: Choose crown or a scribed filler rather than a reveal or flush finish.
If you are working with a small footprint, our tips for maximizing small spaces in a kitchen remodel cover other ways to gain storage without crowding the room. For a closer look at cabinet styles, our kitchen cabinets guide is the next stop.
Our perspective: plan the wall as part of the whole kitchen
We see cabinets to the ceiling as a design decision first and a construction decision second. The height of the upper wall changes how light moves through the room, where the hood and lighting go, and how the kitchen feels from the next room. That is why we handle design and construction together, in-house.
The costly mistakes are rarely in the cabinet itself. They come from a soffit nobody opened, a ceiling that was never measured at both ends, or a top row ordered before the layout was settled. Our process puts a detailed, itemized price in front of you before work starts, so a taller upper wall is a line you can see and decide on, not a surprise.
On the job, each project has a dedicated Lead Carpenter. The person who scribes the crown and checks the level is the person who answers your questions. Our Work Clean System is built to limit dust and disruption, which matters when a soffit comes down and ceiling work starts in a kitchen you still live in.
Our advice: choose the height that suits your ceiling and the way you cook, then let the details carry the finish. A clean crown line and well-aligned doors are what make cabinets to the ceiling look built-in.
MediaBeast
Plan your cabinets-to-the-ceiling kitchen with us
If you are considering a taller upper wall in a Tampa-area kitchen, we can design and build it as part of a complete remodel. You get design, custom cabinetry, countertops, tile and installation from one team, a local showroom to see materials in person, and up-front pricing with detailed item lists.

Start on our kitchen remodeling page to see how we work, or browse our custom kitchen cabinets to compare options. If you want to see ceiling treatments, our kitchen ceiling designs page is worth a look. When you are ready to talk numbers, our price ranges by kitchen layout give you a starting point.
FAQ
What are cabinets that go to the ceiling called?
They are most often called full-height or ceiling-height cabinets. When two rows of wall cabinets are built as separate boxes, one above the other, they are called stacked cabinets. A tall or tower unit is a floor-standing column such as a pantry, which is a separate cabinet type.
How far should cabinets be from the ceiling if they do not reach it?
There is no fixed rule, and many homes built in the last 50 years have a gap of 1 to 2 feet above 32- or 36-inch wall cabinets, according to The Spruce. If you leave a gap, a small one closed with crown molding looks intentional. A larger gap is where stacking or a riser starts to make sense.
How do I make my existing cabinets go to the ceiling?
You can add a second row of cabinets, fill the space with cabinets built to fit it, or close a small gap with crown molding or trim. The best method depends on the size of the gap, whether there is a soffit and how well new doors will match your current ones. A site visit and measurements settle the choice.
Are cabinets to the ceiling worth the extra cost?
For most 8- and 9-foot kitchens, yes, if you want the added storage and a finished, built-in look. They cost more than standard uppers because of the extra boxes, trim and labor. A riser and crown approach gives you much of the look for less money, without the extra storage.
Do cabinets to the ceiling work with low ceilings?
They can, but the wall can feel heavy. Homebuilding suggests a ceiling of at least 2.1 m (about 7 feet) to keep a sense of space. Lighter finishes, glass-front top doors and good lighting help a lower room stay open.
Sources
- When Should Cabinetry Go to the Ceiling? (The Spruce)
- Should kitchen cabinets go to the ceiling? (Homebuilding)
- Building Upper Cabinet Boxes: Extending Your Kitchen Cabinets (This Old House)