
Recessed shower niches have replaced shower caddies as the default storage solution, and the best ones are built to either disappear into the wall or become the room’s focal point. Which approach fits depends on your shower: a single horizontal niche makes a statement in an open layout, while stacked or vertical niches better solve tight or shared bathrooms. What’s actually buildable comes down to stud spacing and waterproofing choices, both covered below along with sizing, height, and a planning checklist.
TL;DR:
- Most custom niches require precise framing adjustments and waterproofing to ensure durability and proper drainage, especially for wide or statement designs.
- Height placement should typically be between chest and shoulder level on a side wall, with a secondary lower niche for shaving or children to improve accessibility.
- Matching interior tile for a seamless look or contrasting mosaics for accents significantly influences the overall aesthetic and budget considerations.
- LED lighting, especially backlit niches, enhances visual appeal and should be ordered early to integrate with tile and trim choices effectively.
- Proper waterproofing involves continuous membrane layers, sealed joints, and careful plumbing routing, with exterior wall niches demanding specialized insulation and vapor barriers.
Table of Contents
- Shower Niche Design Ideas Worth Stealing in 2026
- How Big Should a Shower Niche Be, and Where Should It Go?
- Choosing Tile, Trim and Lighting That Make the Niche Look Intentional
- Waterproofing and Installation Choices That Determine Whether the Niche Lasts
- Your Pre-Contractor Planning Checklist
- How a Design-Build Team Avoids the Usual Niche Problems
- Blend It In or Make It the Feature?
- Get Your Shower Niche Designed and Built Right the First Time
- Where to Look Next for Sizing and Inspiration
- Sources
- FAQ
Shower Niche Design Ideas Worth Stealing in 2026
The niche has quietly become one of the most personalized details in a bathroom remodel. Some homeowners want it invisible; others want it to be the first thing a guest notices. Here are twelve approaches worth considering, sorted loosely from subtle to statement.
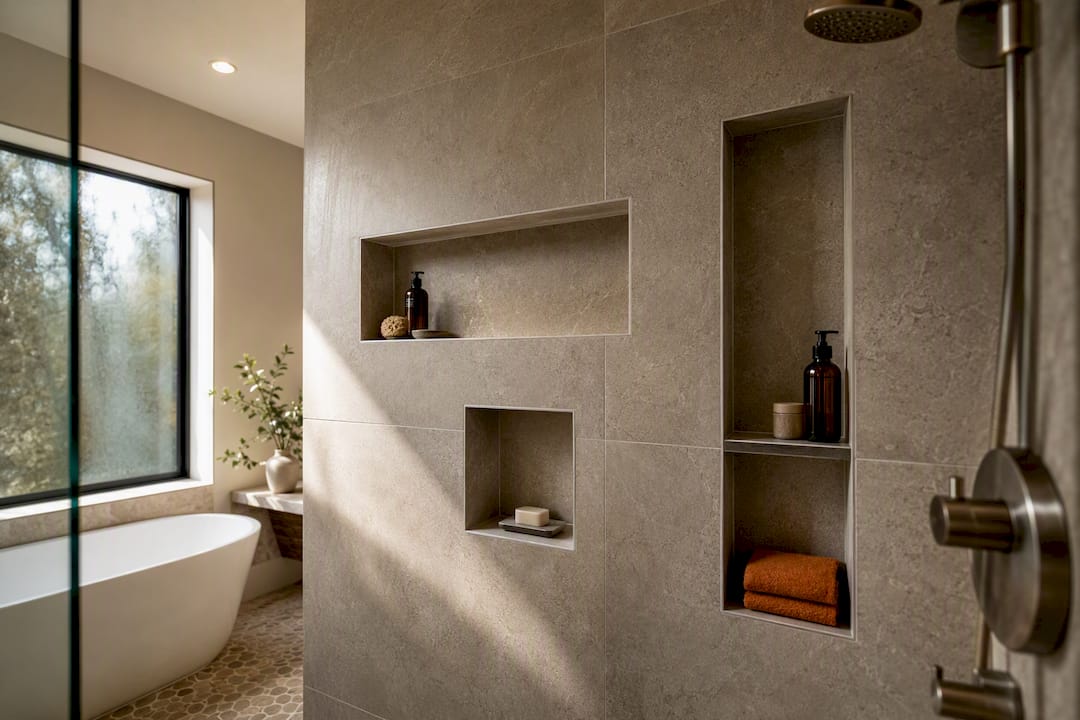
- Horizontal full-width niche. Runs the length of a wall segment, usually 24 to 36 inches wide. Works best in walk-in showers with enough linear wall space, and it reads as a deliberate architectural line rather than an afterthought. Typically requires custom framing.
- Vertical column niche. A tall, narrow strip that fits neatly between two studs. Ideal for compact showers where floor and wall space are tight. Often prefab-friendly since it matches standard stud bays.
- Dual or stacked niches. Two openings, one above the other, giving separate zones for shampoo and razors. Great for shared bathrooms with different height needs. Can be prefab or custom depending on spacing.
- Corner wrap niche. Wraps around an inside corner for a seamless, almost floating look. Best suited to custom stone showers. Requires custom framing and precise mitered edges.
- Bench-integrated shelf. A recessed opening built directly above or beside a shower bench. Works well in showers already planned with a seat. Custom framing only.
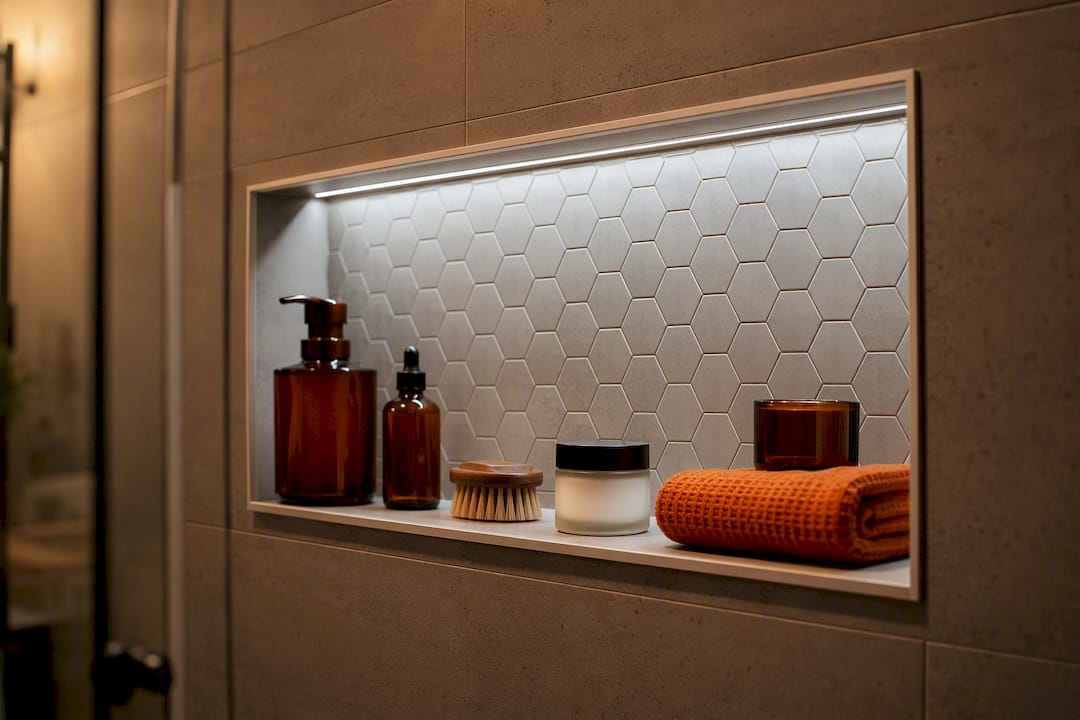
- Backlit recessed column. A vertical or horizontal niche with a hidden LED strip along the top edge. This is one of the defining looks of 2026 shower niche trends, and it works especially well with matte stone. Custom electrical routing needed.
- Framed stone niche. A contrasting stone or metal frame outlines the opening like a picture frame. Suits transitional or traditional bathrooms. Usually custom.
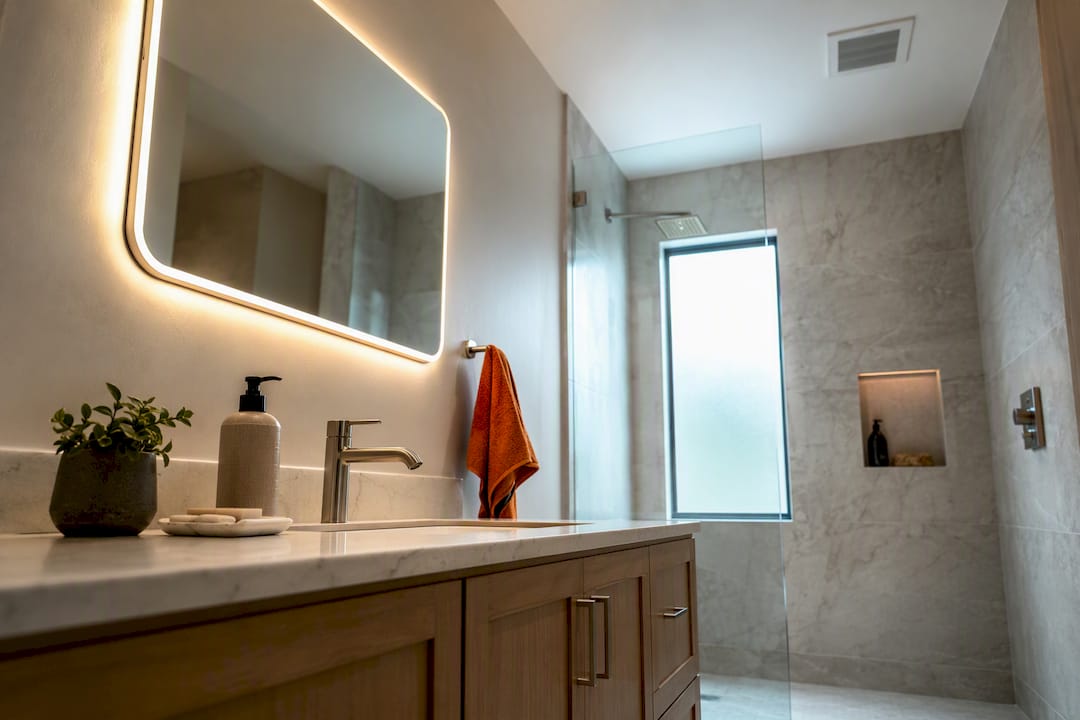
- Minimal hidden niche. Tiled in the exact same large-format slab as the surrounding wall so the seams nearly vanish. A quieter cousin of the backlit look, and increasingly popular for a carved-from-stone effect. Custom framing recommended for clean grout alignment.
- Mosaic-accent niche. The back wall gets a small mosaic or penny tile while the surround stays plain. Good for adding color without committing to an accent wall. Prefab inserts can be tiled this way too.
- Continuous marble shelf niche. A single slab of marble runs the full depth and width, doubling as a shelf and a backsplash. Common in the wraparound corner style. Custom only.
- Prefab tile-ready insert. A pre-formed, waterproof box that drops into a standard stud bay. Fastest and most budget-friendly option, but limited to stock sizes.
- Long horizontal niche above a bench. Combines two of the ideas above: a wide shelf positioned above seating height, giving reach without bending. Works in larger custom showers.
How Big Should a Shower Niche Be, and Where Should It Go?
Size is rarely arbitrary. It’s dictated by how your walls are framed and how far you can reach without stepping out of the spray.
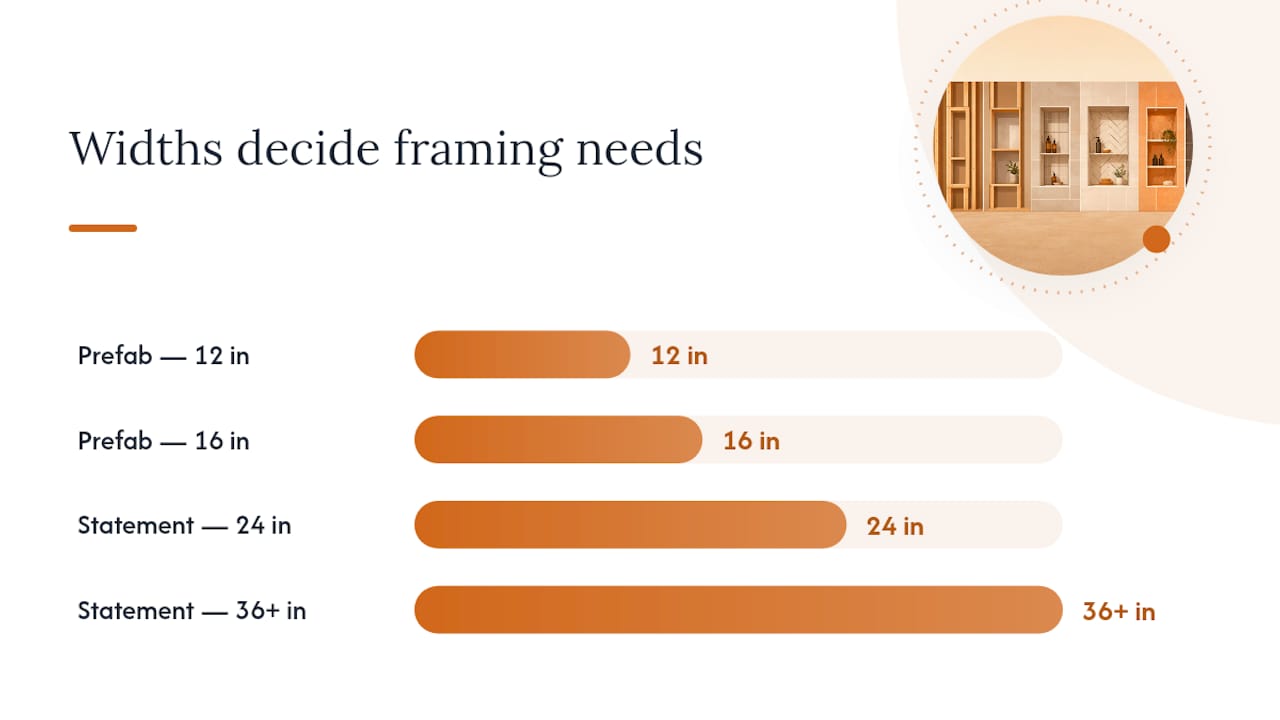
Most prefab niches come in a handful of dimensions because they’re built to slide into a standard 16 inch on-center stud bay. The most common sizes include compact and vertical niches sized to fit typical stud spacing, with typical depths sufficient to accommodate standard plumbing and framing, according to Apollo Tile’s sizing guide. Horizontal statement niches often stretch wider, in the 24 to 36 inch-plus range, but those almost always require cutting into more than one stud bay, which means custom framing.
Pro Tip: Depth matters more than people expect. A 3.5 inch niche looks identical to a 4 inch one from across the room, but the shallower option leaves noticeably less room for taller shampoo bottles.
Height is where most DIY plans go wrong. A practical placement often suggests the niche’s midpoint in the chest-to-shoulder height range from the finished shower floor, positioned on a side wall rather than directly in the spray path, according to Apollo Tile’s placement guide. For households with kids or anyone who prefers to sit while shaving, a second, lower niche approximately at foot level solves the reach problem without lowering the main one.
- Common planning sizes: 12×12, 12×20, 12×24, 16×20, and horizontal widths from 24 to 36+ inches.
- Depth: 3.5 to 4 inches, matched to standard 2×4 or 2×6 stud framing.
- Height: 48 to 60 inches for the main niche; 48 to 54 inches as a good mixed-household starting point.
- Secondary niche: 30 to 36 inches for shaving or kids.
Before framing begins, measure the actual bottles you use. House Made Clear’s dimension guide notes that mismatched niche depth against real bottle height is one of the most common usability complaints homeowners report after the fact.
Choosing Tile, Trim and Lighting That Make the Niche Look Intentional
A niche either blends into the wall or contrasts with it, and that decision shapes the entire tile order. Matching the niche’s interior to the surrounding tile creates a carved, monolithic look that reads as expensive restraint. Contrasting it with a mosaic or a different stone creates a framed, deliberate accent instead.
- Large-format porcelain or marble slabs for the seamless, blend-in approach.
- Penny rounds or hex mosaic for a textured contrast accent inside the opening.
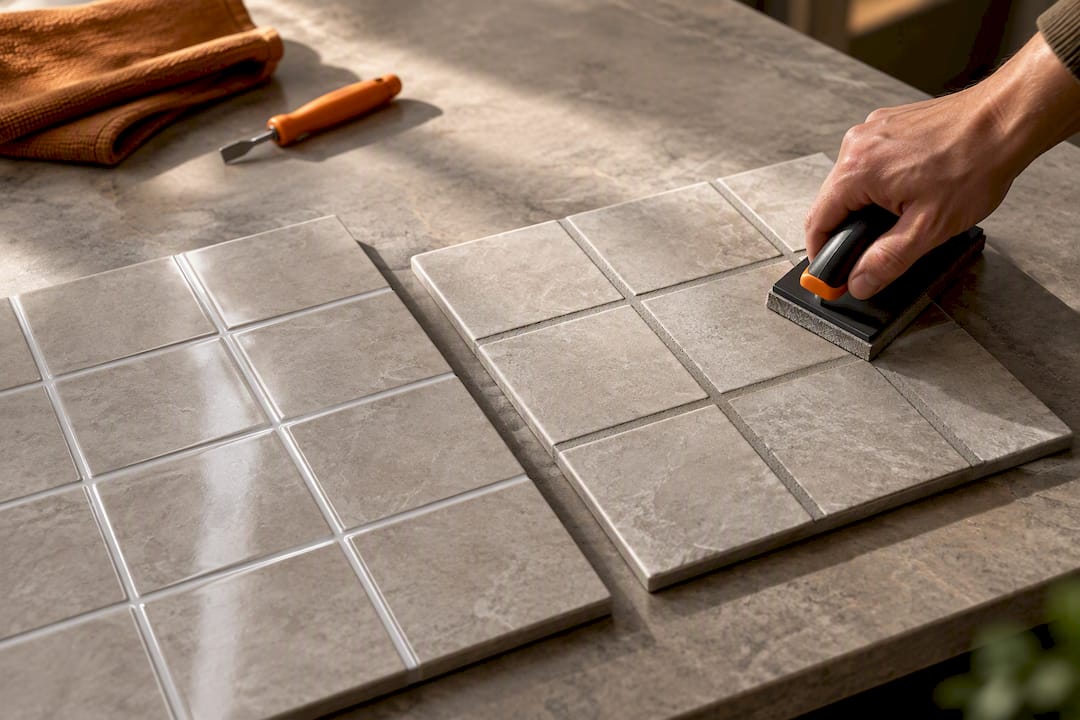
- Bullnose or pencil trim to finish raw tile edges cleanly around the niche mouth.
- Integrated stone ledge for a heavier, permanent shelf look; thin stainless or glass shelves for a lighter, more modern feel that’s easier to swap later.
Lighting has become one of the bigger differentiators in niche design. Low-voltage LED strips tucked along the top edge, hidden behind a lip of trim, turn a storage cubby into ambient lighting for the whole shower. Spotlighting from above works too, but it tends to cast shadows across the niche floor rather than glowing evenly across the back wall.
Pro Tip: If you’re going with a backlit niche, order the LED strip before finalizing your tile order. The trim depth needed to hide the fixture changes your niche’s usable interior width by a surprising amount.
Waterproofing and Installation Choices That Determine Whether the Niche Lasts
A prefab tile-ready insert is faster to install and comes pre-waterproofed at the factory, but it locks you into a handful of stock sizes. Custom-framed niches can span whatever width you want, though they demand more careful membrane work on-site to match that flexibility.
Either way, the waterproofing basics don’t change: a continuous membrane needs to run over mold-resistant backer board, seams get taped rather than just butted together, the niche floor should slope slightly toward the shower to drain instead of pool, and every change-of-plane joint gets sealed with silicone caulk.
- Skip exterior walls when possible. Insulation and vapor barriers behind the tile complicate waterproofing and can invite condensation.
- If an exterior wall is the only option, insist on specialist insulation and vapor-barrier detailing rather than a standard interior-wall approach.
- The most common leak causes are skipped membrane laps, standard caulk used where silicone was needed, and tile cuts that interrupt the waterproof layer instead of running past it.
Your Pre-Contractor Planning Checklist
- Measure your tallest bottles and mark the proposed niche location directly on the wall.
- Confirm which stud bay is open and where the plumbing runs before committing to a spot.
- Pick horizontal, vertical, or stacked, and decide prefab versus custom before framing starts.
- Choose tile, edge trim, and whether you want integrated lighting.
- Set the final height so it lines up with a full tile course, not a mid-tile cut.
- Budget extra if the niche requires moving plumbing or cutting into an exterior wall.
How a Design-Build Team Avoids the Usual Niche Problems
Placement decisions made during the design phase, not after framing, keep niche edges landing on grout lines instead of forcing an awkward tile sliver later. That’s the difference between a niche that looks planned and one that looks patched in. Firms offering up-front pricing, a dedicated Lead Carpenter, and a formal dust-control process during construction tend to catch these details before they become change orders. Complex cases, like exterior-wall niches, relocated plumbing, integrated lighting, or large-format slab matching, are worth handing to a professional rather than a weekend project.
Blend It In or Make It the Feature?
Design-first niches look effortless, but only when tile layout and waterproofing get planned together from day one. Functional-first niches skip the fuss and just work, which is the right call when budget or a retrofit limits your options.
— MediaBeast
Get Your Shower Niche Designed and Built Right the First Time
Picking the right niche style is one decision. Getting it framed at the correct depth, waterproofed without shortcuts, and tiled so the edges land clean on a grout line is another. A design-build team that handles design and construction under one roof, gives up-front pricing before work starts, and assigns a dedicated Lead Carpenter to each project ensures niche placement, tile layout, and plumbing get coordinated instead of guessed at mid-build. A formal dust-control process helps ensure homeowners are not living in dust for weeks during a shower remodel.
If you’re ready to see what a custom or prefab niche could look like in your own bathroom, browse the Tampa shower remodeling services page and request a consultation to get your project scoped and priced.
Where to Look Next for Sizing and Inspiration
For dimension charts, revisit the Apollo Tile sizing breakdown and House Made Clear’s height guide. For style direction, see Homedit’s 2026 niche roundup, and for small-bathroom layouts pair a compact niche with smart storage strategies or a broader home organization system.
Sources
- Shower Niche Sizes Explained | Apollo Tile
- 18 Shower Niche Ideas for 2026 That Replace Shower Caddies | Homedit
- Shower Niche Height & Size: Standard Dimensions Guide – House Made Clear
FAQ
What Are the Most Common Shower Niche Mistakes?
The biggest mistakes are sizing the niche without measuring actual bottles, placing it directly in the spray path, and skipping the membrane lap at the niche floor. Cutting tile mid-course instead of aligning the opening to a full tile also creates a visibly unbalanced result.
Are Shower Niches Still in Style for 2026?
Yes. If anything, niches have become more prominent, with backlit and marble wraparound designs leading current trends toward built-in features that replace shower caddies entirely.
What Should I Do Instead of a Shower Niche?
If framing constraints rule out a niche, a corner caddy, a teak shower bench with storage underneath, or a slim freestanding shelf unit are the main alternatives. None offer the seamless, built-in look a recessed niche provides, but they avoid any wall cutting.
Where Should You Avoid Placing a Shower Niche?
Avoid exterior walls when possible, since insulation and vapor barriers complicate waterproofing and can cause condensation behind the tile. Also avoid placing it directly in the water stream, since that accelerates soap scum buildup and makes the interior harder to keep dry.
Does Tampakitchenandbath Design Custom Shower Niches?
Yes, custom and prefab niche design is part of Tampakitchenandbath’s shower remodeling process, handled alongside tile, lighting, and waterproofing under one design-build team. Full project pricing depends on scope and is available through a consultation request.