
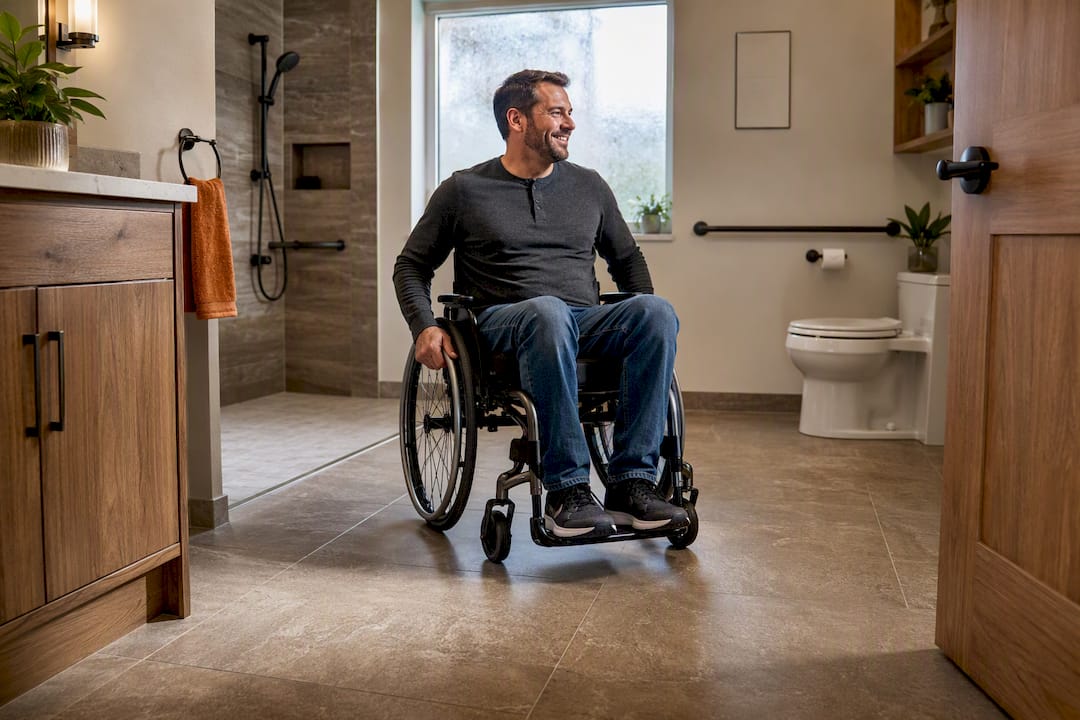
An accessible bathroom design gives every person, regardless of mobility, the ability to bathe and use the toilet safely and independently. The three moves that matter most: a curbless or transfer shower, a clear turning space sized to allow comfortable wheelchair maneuvering, and grab bars backed by solid wall blocking at the right heights. Check the ADA/Access Board bathing rooms guidance before finalizing dimensions, then build outward from there.
TL;DR:
- A fully accessible bathroom should include a curbless shower, a 60-inch turning radius, and grab bars with proper wall reinforcement, based on ADA guidelines.
- Clear floor space of at least 60 inches for turning and 30 by 48 inches in front of fixtures is essential for wheelchair maneuverability and user reach.
- Enlarged door openings, outward-swing or pocket doors, and fixtures with minimal reach and operating force improve usability for all mobility levels.
- Slip-resistant flooring, contrasting colors, adjustable mirrors, and properly placed controls optimize safety and visibility for users with low vision or limited mobility.
- Integrating plumbing, waterproofing, and structural reinforcement from the start prevents costly upgrades or retrofits, saving time and expense.
Table of Contents
- What Features Belong in an Accessible Bathroom?
- How Much Clear Floor Space Does an Accessible Bathroom Need?
- Which Shower or Tub Type Fits Your Needs?
- What Fixtures and Controls Improve Usability?
- Which Materials Reduce Slip Risk and Aid Visibility?
- How Should Storage Be Placed for Reachability?
- What Should You Budget and Plan For?
- How Do You Design for Multiple Generations at Once?
- How Does Bath & Kitchen Gallery Build Accessible Bathrooms?
- What Ventilation Does an Accessible Bathroom Need?
- What Emergency Response Features Should Be Included?
- What Mirror Options Work Best for Accessible Bathrooms?
- How Do Contrasting Colors Help Users With Low Vision?
- Accessibility Is Just Good Design With Better Math
- Ready to Start Your Accessible Bathroom Remodel?
- Where to Verify Technical Specs and Design Ideas
- Sources
- FAQ
What Features Belong in an Accessible Bathroom?
A good accessible bathroom isn’t a checklist of medical equipment bolted onto a normal room. It’s a room built around clearances, reach, and reinforcement from the start. If you’re auditing a set of plans or a contractor’s proposal, here’s what should be on the page.
Curbless or roll-in showers remove the single biggest fall hazard in most bathrooms: the step-over threshold. A flush entry means someone using a wheelchair, walker, or shower chair can move in and out without lifting a leg over a lip, and it works just as well for a parent managing a toddler or an athlete nursing a bad knee. The tradeoff is that it demands more careful waterproofing and drain planning, which we cover below.
Grab bars need to go where a person’s body actually reaches for support, not where it looks tidy. The Access Board’s chapter on bathing rooms specifies exact placement near the toilet and inside shower and tub compartments, including horizontal and vertical bar combinations. The bars themselves are cheap. What’s expensive is retrofitting a wall that has no blocking behind the drywall, so plan reinforcement at rough-in even if you’re not installing bars on day one.
Turning radius and door choice determine whether the room actually functions for a wheelchair or walker user. A 60-inch turning circle is the benchmark cited across universal design specifications, and door swing direction can make or break a tight layout. Outward-swinging or pocket doors free up floor space that an inward-swinging door eats into, a detail door manufacturers and remodelers increasingly flag as one of the cheapest fixes in a renovation.
Toilet and sink clearances follow specific numbers, not guesswork. Comfort-height toilets designed to match typical wheelchair seat height for easier transfers, and sinks need open knee space underneath so a seated user can roll up close instead of reaching across a cabinet.
Handheld showers and one-hand controls matter for anyone with limited grip strength or one functional hand. Controls should require minimal force to operate and shouldn’t demand twisting or pinching motions.
Lighting and flooring round out the list. Bright, even lighting without harsh shadows reduces missteps, and slip-resistant flooring is non-negotiable in a wet room.
- Curbless or roll-in shower entry
- Grab bars at ADA-specified heights with wall blocking installed
- 60-inch turning space or equivalent clear floor space
- Comfort-height toilet (17–19 inches) with adjacent grab bar clearance
- Sink with open knee clearance for seated access
- Handheld shower head on a slide bar, one-hand operable controls
- Slip-resistant flooring rated for wet areas
- Even, glare-free lighting
Pro Tip: Install blocking behind the walls in the shower, near the toilet, and along at least one vanity wall even if you don’t need to grab bars yet. It costs almost nothing during a remodel and saves you from cutting open finished tile later.
How Much Clear Floor Space Does an Accessible Bathroom Need?
The number you’ll see repeated everywhere is 60 inches, or 5 feet by 5 feet. That’s the turning space universal design guidance recommends so a wheelchair user can rotate a full 360 degrees without backing into a fixture. It doesn’t have to be one perfectly clear square. T-shaped and other configurations can satisfy the same functional need if the room’s proportions demand it.
A second number matters just as much: 30 by 48 inches of clear floor space in front of each fixture, whether that’s the sink, toilet, or shower entry. This is the minimum footprint for someone to park a wheelchair and reach the fixture directly, and it’s often the number that actually decides whether a small bathroom works or doesn’t.
Roll-in showers versus transfer showers call for different clearances. A roll-in shower needs enough depth for a wheelchair to enter fully, typically at least 60 inches wide when a straight-in approach is used, with no curb and a fixed or folding seat mounted to one side, not centered. A transfer shower has a smaller footprint, often about 36 by 36 inches, and assumes the user moves from a wheelchair onto a seat positioned at the shower’s edge rather than rolling all the way in. Seat placement rules differ between the two: a roll-in shower places the seat along a side wall so it doesn’t block the entry path, while a transfer shower positions it directly across from the control wall for a short, controlled sideways move.
Door swing decides whether that clearance is real or theoretical. An inward-swinging bathroom door can eat 24 to 30 inches of floor space the moment someone opens it, which quietly kills a turning radius that looked fine on paper. That’s why design guidance from remodeling and universal design sources consistently pushes toward 36 inch openings paired with outward-swing or pocket doors wherever the wall structure allows it.
Three layout patterns cover most remodel scenarios:
- Small bathroom (5×7 ft or smaller): Convert the entire wet zone into a single wet room with a linear drain, eliminating the separate shower pan and curb entirely. This borrows floor space from the shower footprint for turning radius elsewhere, and it’s the most common fix in older homes with narrow floor plans.
- Medium bathroom (5×8 to 8×10 ft): A roll-in shower on one wall, comfort-height toilet with grab bars on the opposite wall, and a floating vanity with knee clearance gives you the 60 inch turning space in the room’s center without any fixture crowding another.
- Full remodel or new addition (10×10 ft or larger): This size supports a roll-in shower with a built-in bench, separate toilet area with full clearance on both sides, and dual-height counter zones, effectively future-proofing the room for multiple users with different needs.
For genuinely tight spaces, a wet-room conversion (waterproofing the entire floor and lower walls rather than isolating a shower pan) is usually the most cost-effective way to gain clearance without pushing out walls.
Which Shower or Tub Type Fits Your Needs?
The right choice depends on the user’s mobility level more than personal taste, though style rarely has to suffer for function.
A curbless roll-in shower is the best fit for full-time wheelchair users or anyone who can’t safely step over a threshold. It requires the most plumbing and waterproofing work up front but delivers the most independence day to day. A transfer shower suits someone who can stand briefly or pivot from a wheelchair to a fixed seat, and it takes up less floor space, which makes it the practical choice in smaller bathrooms. A walk-in tub works best for someone who wants to soak and can tolerate the wait for the tub to fill and drain, but it’s a poor fit for anyone who needs quick, independent access, since the door has to seal and the water has to clear before entry or exit.
Seat choice matters as much as shower type. A folding wall-mounted seat saves floor space when not in use and works well in transfer showers. A fixed bench seat, usually built into the shower’s construction, offers more stability and a higher weight rating, which matters for users who need to fully rely on it rather than treat it as a backup.
Curbless showers succeed or fail on drainage. HGTV’s universal design coverage and installers alike point to linear drains set along one edge as the standard solution, since they allow a gentle, consistent slope across the whole floor instead of the four-way slope a center drain demands.
- Roll-in shower: best for full-time wheelchair users, needs the most floor space and waterproofing
- Transfer shower: best for partial mobility, smaller footprint, seat positioned at the entry edge
- Walk-in tub: best for soaking preference, slower entry/exit, not ideal for urgent access needs
- Controls should sit within reach of both the seat and the entry point, never centered out of reach from either
- Set water heaters or mixing valves to cap temperature around 120°F to prevent scald injury for users with reduced sensation
What Fixtures and Controls Improve Usability?
Fixture height and operating force decide whether a bathroom actually gets easier to use or just looks accessible.
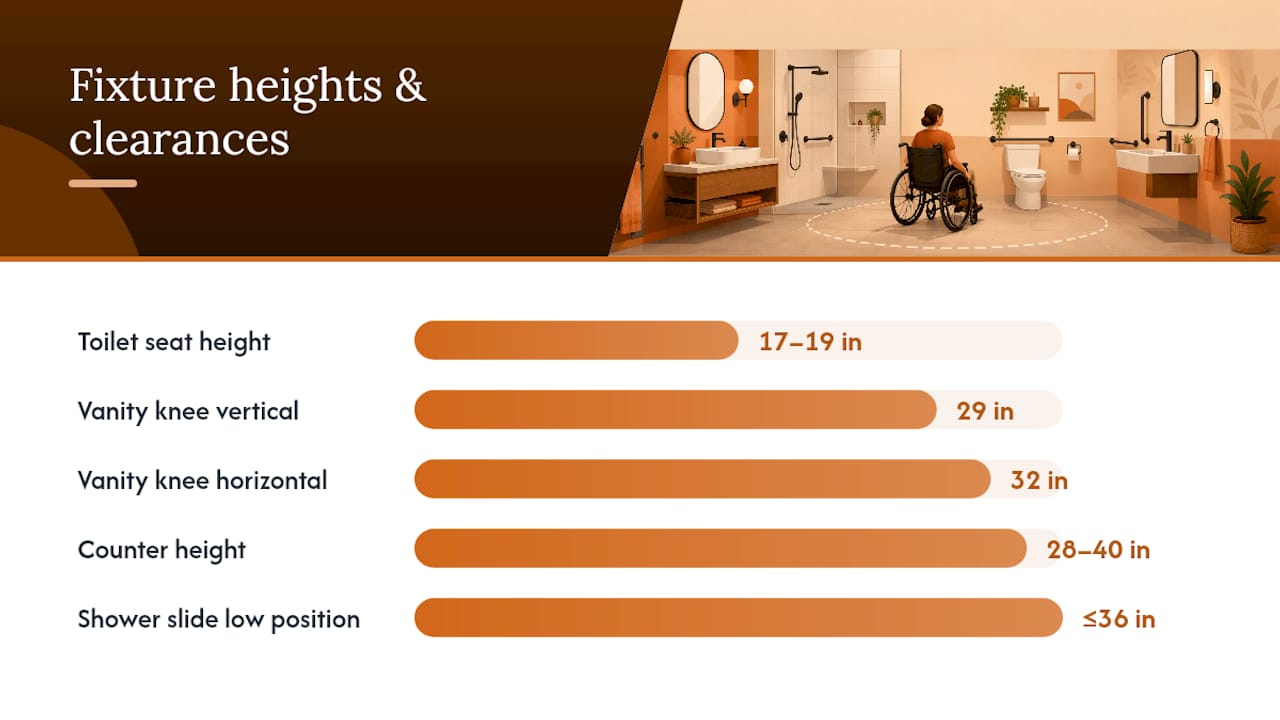
Toilets at comfort height, 17 to 19 inches from floor to seat, line up with most wheelchair seat heights for a safer, more level transfer. Flush levers should sit on the side nearest the approach path, and grab bar placement needs to be planned around the toilet before tile goes down, not after.
Vanities need real knee clearance: roughly 29 inches of vertical space and 32 inches of horizontal room underneath for a wheelchair to roll in close. Floating vanities solve this cleanly and also let you set counter height anywhere from 28 to 40 inches depending on who uses the room most.
Faucets should require minimal grip strength. Lever handles, single-handle mixers, and touchless sensor faucets all outperform traditional twist knobs for users with arthritis or limited dexterity, and sensor faucets carry a hygiene benefit on top of the accessibility one.
Handheld shower heads work best mounted on a vertical slide bar with the lowest position no higher than 36 inches, paired with a hose long enough to reach a seated user without stretching.
- Comfort-height toilets designed to align with typical wheelchair seat heights, with flush levers positioned for ease of approach
- Vanity knee clearance sufficient to allow close wheelchair access, with appropriate vertical and horizontal clearances
- Lever, single-handle, or touchless faucets requiring minimal grip force
- Handheld shower heads mounted on adjustable slide bars with a low position accessible to seated users
- Dedicated outlet near the toilet if a bidet seat or powered lift is planned
Pro Tip: If you’re installing a bidet seat or any powered accessible fixture, run the electrical rough-in during the same phase as your plumbing rough-in. Adding an outlet after tile is set is one of the most expensive change orders in a bathroom remodel.
Which Materials Reduce Slip Risk and Aid Visibility?
Flooring is where accessible design and safety overlap most directly. Micro-textured porcelain tile and non-slip vinyl sheet flooring both hold up well in wet areas without the institutional look of old-style rubber matting, and both come in enough finishes now that “slip-resistant” no longer means “looks like a hospital.”
Contrast helps people with low vision navigate the room without relying on memory alone. A floor that’s visibly darker or lighter than the walls marks the room’s boundaries clearly, and control levers or grab bars finished in a contrasting color stand out against the wall behind them instead of disappearing into it.
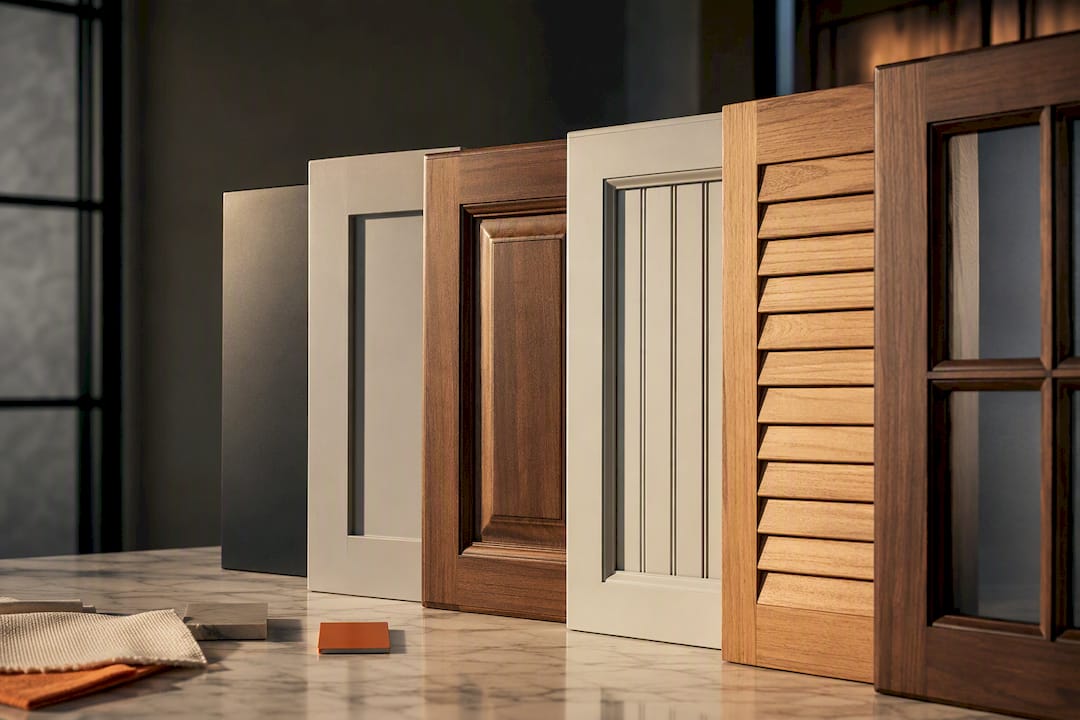
Wall finishes matter for long-term maintenance as much as looks. Large-format tile with fewer grout lines means less scrubbing and less chance of a slick, mildew-prone seam underfoot. Epoxy grout resists staining better than standard cement grout in a room that’s wet more often than dry.
Thresholds deserve their own attention even outside the shower. Any transition between flooring types, tile to hallway carpet, for instance, should be beveled or flush rather than raised, since a quarter-inch lip is enough to catch a walker wheel or a foot dragging from fatigue.
- Micro-textured porcelain or textured non-slip vinyl for shower and floor surfaces
- High color contrast between floor and walls, and between hardware and wall backing
- Large-format tile with epoxy grout to reduce seams and staining
- Beveled or flush thresholds at every flooring transition
How Should Storage Be Placed for Reachability?
Storage only works if it’s actually within reach. Keep everyday items like towels, soap, and toiletries between 18 and 48 inches off the floor, the reach range universal design specifications recommend for both standing and seated users. Save the top shelf for things you grab once a season.
Pull-out shelves and drawers beat fixed shelving for anyone using a wheelchair, since they bring the contents forward instead of requiring a reach into a deep cabinet. Pull-down shelving inside upper cabinets extends that same logic to storage that would otherwise sit out of reach entirely.
- Store daily-use items 18–48 inches from the floor
- Use pull-out drawers or pull-down shelves instead of fixed cabinet shelving
- Choose D- or C-shaped pull hardware over round knobs for easier grip
- Design storage that can be adjusted later without tearing out cabinetry
What Should You Budget and Plan For?
Plumbing relocation is usually the single biggest cost driver in an accessible remodel, followed by waterproofing work for a curbless shower and any structural changes needed to widen a doorway or remove a load-bearing obstruction. Custom tile work and linear drain installation add labor hours that a standard shower pan doesn’t require.
A typical remodel moves through five phases: design and planning, demolition, plumbing and electrical rough-in, waterproofing, and finish work. Each phase depends on the one before it, so a delay in rough-in inspection pushes every later phase back.
Permits and inspections get triggered by structural changes, plumbing relocation, and electrical work, and some jurisdictions apply additional review when a project is explicitly marketed as an ADA-compliant renovation. Confirm this with your local building department before finalizing a scope, since requirements vary by municipality.
Blocking grab bars in during rough-in, even for bars you’re not installing yet, avoids a far more expensive tear-out later. It’s one of the cheapest insurance policies in the entire project.
- Ask any contractor for a written scope that names every plumbing move and its cost impact.
- Confirm who pulls permits and who’s responsible if an inspection fails.
- Get a fixed timeline with named phases, not just a start and end date.
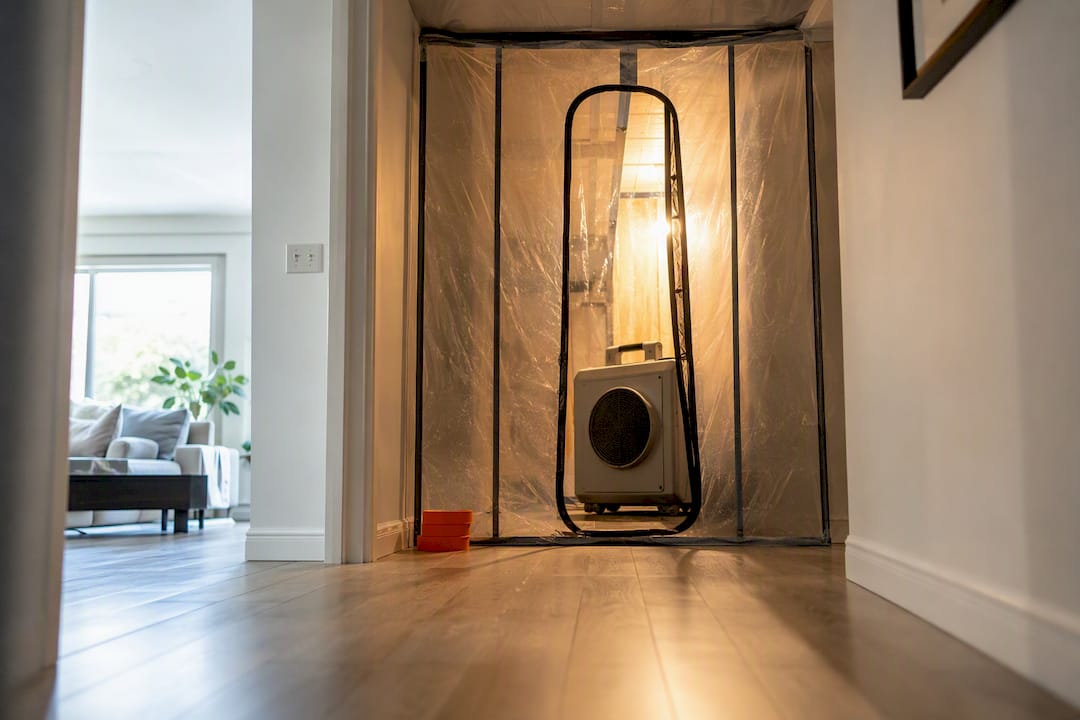
- Ask about dust containment and daily cleanup practices, especially if anyone in the household has respiratory sensitivity.
- Review the typical cost ranges for a Tampa bathroom remodel before committing to a scope, so surprises don’t show up mid-project.
How Do You Design for Multiple Generations at Once?
A bathroom that works for a grandparent, a teenager, and a toddler doesn’t need three remodels. It needs a few smart calls made once.
Plan variable-height work zones. Counters between 28 and 40 inches, achieved with a stepped vanity or a single floating counter set at a compromise height, let designers accommodate a wider range of users than a single fixed height ever could. Keep at least one full bathroom on the main floor of the house, since stairs become the real barrier long before any bathroom feature does.
Choose fixtures that support both independent use and assisted care: a wider door for a walker today and a wheelchair later, a shower bench that works as a seat now and a stability point during recovery from surgery down the road. None of this has to look clinical. Curbless entries, floating vanities, and lever faucets read as modern design choices first, and accessible features second.
Pro Tip: If you’re renovating with aging-in-place in mind, our aging-in-place bathroom guide walks through specific upgrade sequences that work for Tampa-area homes.
How Does Bath & Kitchen Gallery Build Accessible Bathrooms?
Accessible remodels fail most often when design and construction get handled by two disconnected teams, leaving gaps in blocking, clearances, or drain slope that nobody catches until tile is already down. Tampakitchenandbath handles design and construction under one roof specifically to close that gap, with a dedicated Lead Carpenter assigned to oversee each project from demolition through finish work.
Up-front pricing means the cost drivers discussed above, plumbing moves, waterproofing, custom tile, get scoped and priced before work starts, not discovered mid-project. The company’s Work Clean System also keeps dust and disruption contained during construction, which matters more in an accessible remodel than most, since the household often can’t relocate to a second bathroom during the work. Detailed guidance on smart walk-in tub layouts is also available for homeowners weighing that option against a curbless shower.
What Ventilation Does an Accessible Bathroom Need?
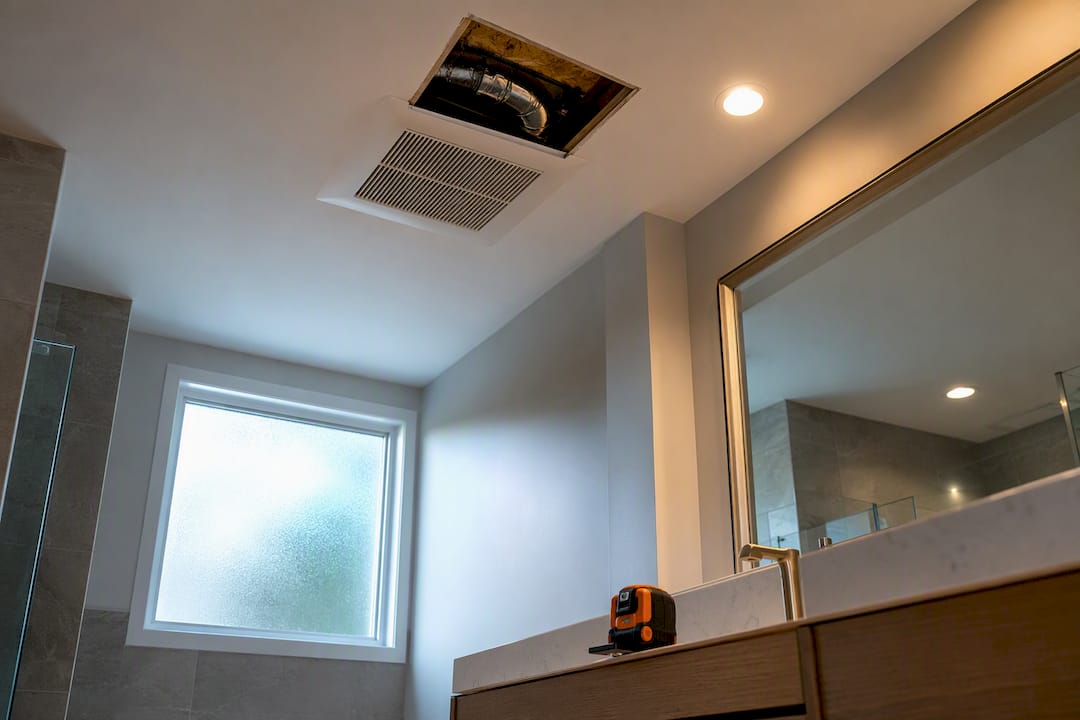
Ventilation in an accessible bathroom carries a slightly higher stakes than a standard one, mainly because slower entry and exit times mean more humidity buildup before anyone leaves the room. A wheelchair or walker user, or someone assisted by a caregiver, typically spends longer completing a shower than someone stepping in and out quickly, and that extra time adds moisture load to the air.
Exhaust fans should be sized to the room’s full square footage rather than the industry minimum, and controls need to be reachable without requiring a stretch to a high wall switch. A humidity-sensing fan that runs automatically removes the need to remember to turn it on or off, which matters for anyone managing memory issues or simply juggling a caregiving routine.
Placement matters too. Locate the fan intake away from the direct shower spray path so it isn’t constantly pulling in water droplets, and keep any switch or pull-cord control within the same reach range you’re using for light switches, generally between 15 and 48 inches from the floor. Good ventilation also protects the grout and wall finishes discussed earlier from the mildew growth that chronic dampness invites, extending the life of the exact slip-resistant surfaces you installed to reduce fall risk.
What Emergency Response Features Should Be Included?
An accessible bathroom needs a way to call for help that doesn’t depend on someone being able to stand, walk, or shout loudly enough to be heard through a closed door. A pull-cord emergency alarm, mounted low enough to reach from the floor in case of a fall, is the most common and reliable solution, and it should run to a chime or light visible elsewhere in the house, not just an alarm inside the bathroom itself.
Wireless call buttons offer more flexibility than a hardwired cord system, since they can be mounted at a height that suits the specific user and moved if needs change later. Some households pair this with a wearable pendant alarm for a caregiver who spends time outside the bathroom but needs to respond fast.
Placement should cover both standing and floor-level positions: one pull cord within reach of someone in the shower seat, and a second lower cord or button reachable by someone who has fallen to the floor. Test any system regularly, since a system nobody checks is functionally the same as having none installed at all.
What Mirror Options Work Best for Accessible Bathrooms?
A fixed mirror mounted at standard height often fails half the household in an accessible bathroom, since a seated user or a child sees only ceiling or countertop reflected back. The fix is either a full-length mirror that runs low enough to cover a seated line of sight, typically starting around 40 inches from the floor and extending upward, or a tilting mirror mounted on an adjustable bracket that can angle down for a seated user and back up for someone standing.
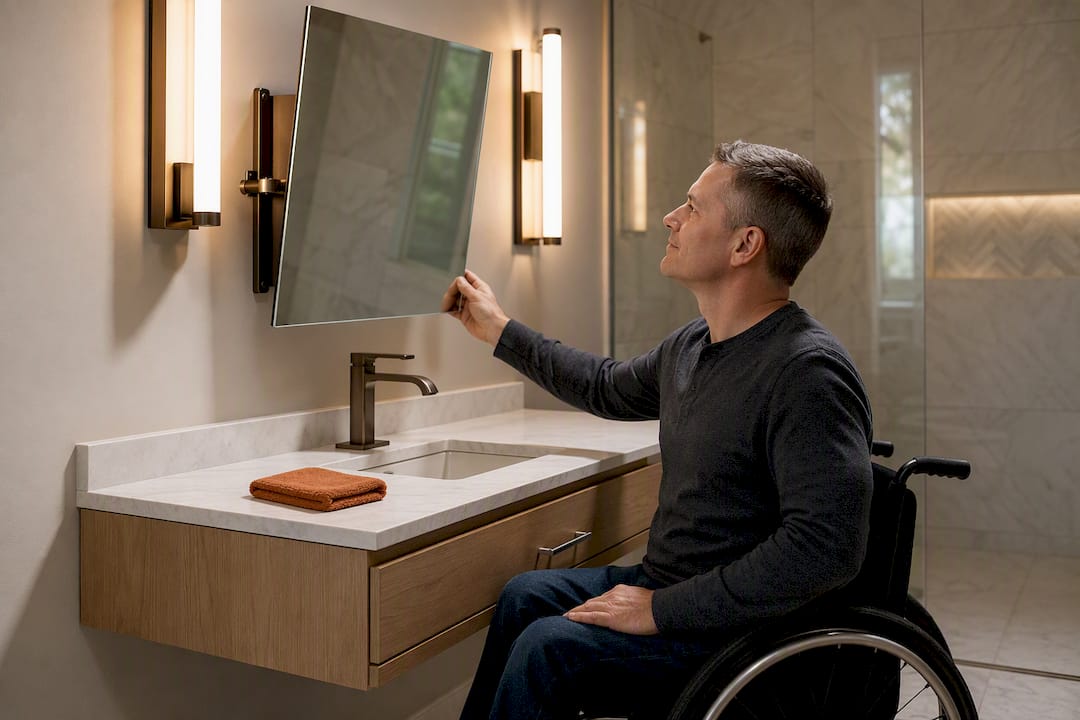
Adjustable-height mirrors on a sliding track offer the most flexibility for a bathroom shared across generations, letting each person set the mirror to their own eye level in seconds. For a fixed installation, mounting the bottom edge lower than convention dictates, rather than centering the mirror at standing eye level, is the simpler and cheaper solution.
Lighting around the mirror deserves the same attention as the mirror itself. Even, shadow-free light on both sides of the face, rather than a single overhead fixture, helps anyone with low vision see clearly enough to shave, apply makeup, or check a medication label without squinting or leaning in dangerously close to a hard surface.
How Do Contrasting Colors Help Users With Low Vision?
Color contrast turns a bathroom from a guessing game into a room that reads clearly at a glance, which matters enormously for anyone with reduced vision navigating a wet, hard-surfaced space. The floor should read as visibly different from the walls, and the walls should read as visibly different from fixtures like the toilet and vanity, so edges and obstacles are obvious without requiring sharp eyesight to detect them.
Grab bars and shower controls benefit the most from deliberate color choice. A bar or lever finished in a contrasting tone against its background wall stands out immediately, while the same hardware finished to blend in disappears exactly when it’s needed most, during a moment of instability. This is one of the cheapest accessibility upgrades available, since it usually costs nothing beyond choosing a different finish than the wall color during selection.
Threshold and step transitions, however subtle, should also carry a contrasting strip or edge marking, since a monochrome transition is one of the most common places for a fall to happen. Combined with the slip-resistant flooring and beveled thresholds covered earlier, strong color contrast closes a gap that dimension and material specs alone can’t fully solve.
Accessibility Is Just Good Design With Better Math
The conventional wisdom treats accessible features as compromises, something you tolerate for a family member’s sake rather than something you’d choose on aesthetic merit. That framing gets the math backwards. A curbless shower, a floating vanity, and lever hardware read as clean, modern choices to any buyer, accessible needs or not, and they tend to hold resale value better than a dated tub-shower combo ever will.
The real cost of accessible design isn’t the fixtures. It’s what happens when nobody plans blocking or clearances up front and a family has to gut a bathroom twice, once for the original remodel and again five years later when a parent’s mobility changes. Planning both dimensions from day one, even if you only install half the features now, is the difference between one project and two. For anything beyond a simple fixture swap, loop in a design and build firm early so the plumbing, structure, and finish decisions get made together instead of in conflicting phases.
— MediaBeast
Ready to Start Your Accessible Bathroom Remodel?
If you’ve been comparing DIY grab bar kits against a full gut renovation, there’s a real gap between the two: DIY hardware fixes small problems but can’t touch clearances, drain slope, or wall blocking, while a full renovation without design and construction under one team often means costly miscommunication between your designer and your plumber. Design and construction handled together, with a Lead Carpenter assigned to each project and up-front pricing to clarify plumbing and waterproofing costs before demolition starts.
A Work Clean System keeps dust and disruption contained throughout the remodel, which matters most in a bathroom your household can’t afford to lose access to for weeks. You can browse completed accessible remodel projects in the project gallery, read client testimonials from past remodels, or review the dedicated accessible bathroom design service page for a closer look at the process. Ready to talk specifics? Schedule a design consultation or visit the showroom to see materials in person and get a scoped estimate for your space.
Where to Verify Technical Specs and Design Ideas
For exact dimensions, cross-check the Access Board’s bathing rooms chapter and UniversalDesign.org’s bathroom specifications. For layout inspiration and single-user restroom best practices, see Ta11y’s accessible restroom guidance and HGTV’s universal design ideas.
Sources
- Chapter 6: Bathing Rooms — ADA Accessibility Guidelines (Access Board)
- Universaldesign
- Universal design bathroom ideas — HGTV
FAQ
How Do You Design an ADA-Compliant Bathroom?
Start with the ADA/Access Board’s bathing rooms chapter for exact shower, grab bar, and clearance dimensions, then confirm a 60 inch turning space, comfort-height toilet, and reinforced walls for grab bars before finishing any surfaces.
How Much Does It Cost to Make a Bathroom Handicap Accessible?
Cost depends heavily on how much plumbing needs to move and whether you’re converting to a curbless shower, since waterproofing and drain work drive most of the budget; check a detailed cost breakdown before setting a scope.
How Do You Design a Bathroom for a Person With a Disability?
Prioritize a curbless or transfer shower matched to the person’s mobility level, a 60 inch clear turning space, grab bars backed by wall blocking, and fixtures set at reachable heights, including a comfort-height toilet and a vanity with open knee clearance.
What Is the Golden Rule for Bathroom Layouts?
The golden rule is maintaining unobstructed clear floor space, generally a 60 inch turning circle or 30 by 48 inch clearance in front of each fixture, since a beautiful bathroom that can’t be maneuvered through safely fails its basic job.